
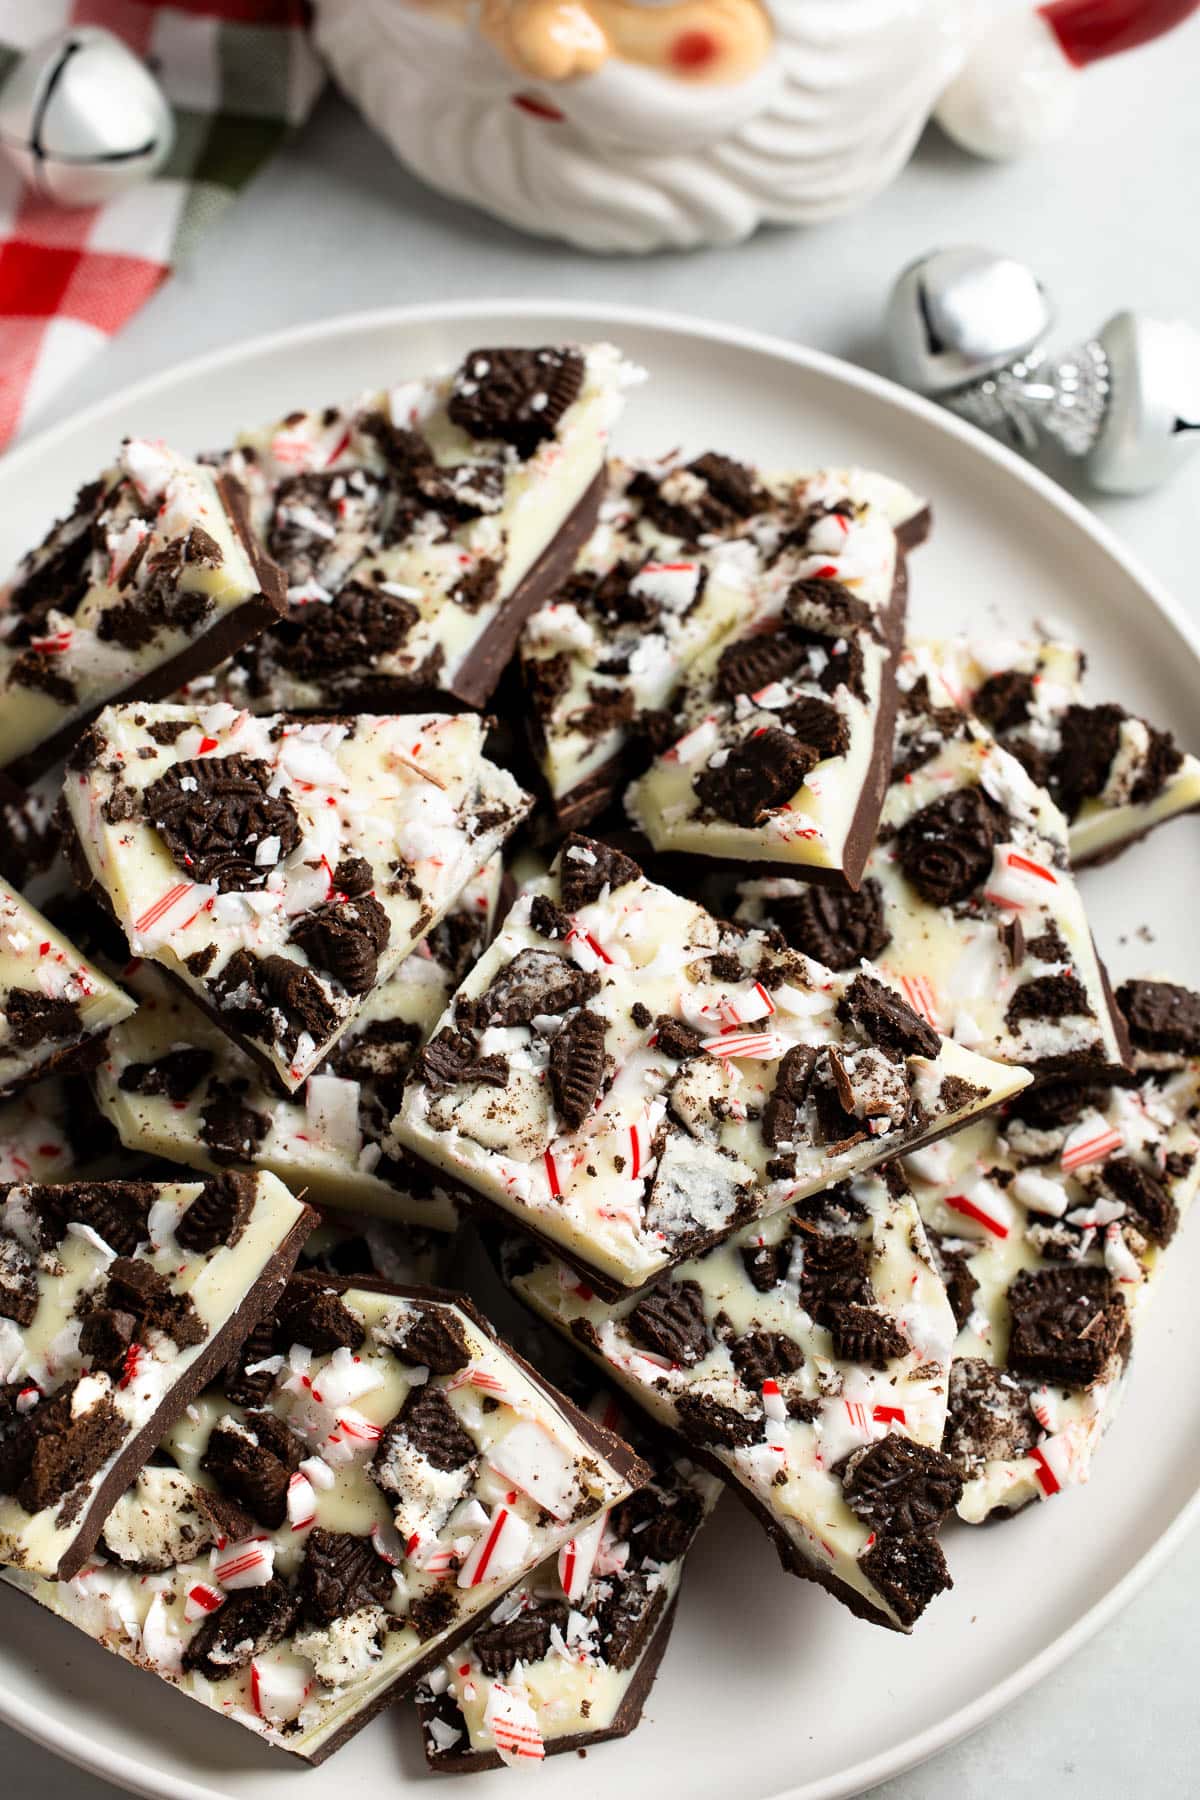
With just the right amount of peppermint flavor in the dark and white chocolate layers, this Oreo peppermint bark is a Christmas dessert recipe you'll crave each year! It stays for weeks and makes a great last-minute holiday dessert or food gift.
'Tis the season (almost) and per usual I'm ridiculously excited to break out all of the extra festive holiday recipes and get to work filling cookie tins, the fridge, and the freezer.
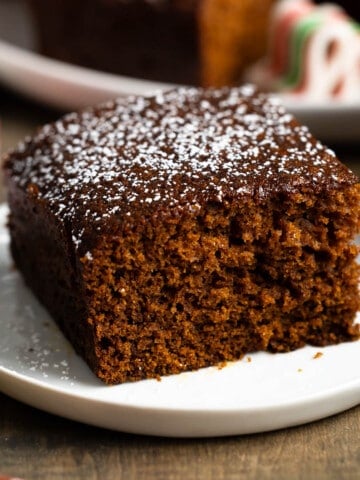
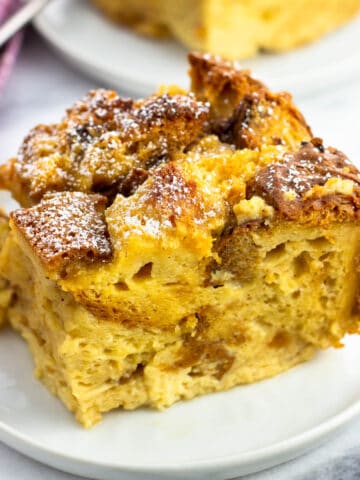
Over the years I've amassed a fairly wide variation of homemade Christmas treats that aren't cookies, from piles of fried dough dripping with honey (Italian struffoli), tender old-fashioned gingerbread, fudgy peppermint brownies, no-sauce-needed panettone bread pudding, and more, but what's a dessert tray without a candy accompaniment? Like chocolate peppermint pretzels, this Oreo peppermint bark recipe fits the bill perfectly.
This isn't a difficult recipe to pull off in terms of steps and effort, but there are some important tips and tricks to keep in mind for peppermint bark perfection, Oreo or otherwise. I share all those below.
P.S. Looking for more peppermint flavor that won't overpower your taste buds? Try out a peppermint tea latte!
Note: This recipe and photos were updated in November 2024 from the initial publish date in 2016. I wanted to make it look more like traditional peppermint bark with separate chocolate layers (not swirled) and added peppermint extract to the chocolate itself. I also left off the salted pretzel pieces, though do add those if you'd like!
Most Important Takeaways
Oreo peppermint bark isn't exactly a difficult recipe, but keeping a few things in mind ensures it's a low-fuss process that comes out just right every time.
- Use bar chocolate, not chips or chunks - Shaped chocolate chips/chunks have stabilizers that help them hold their shape when heated. We want smooth melting, so it's best to chop up bars for this recipe.
- Use white chocolate without palm oil - Check the ingredient list to see that palm oil is not included, as it can cause the chocolate layers to separate.
- Use pure peppermint extract, not just "mint" - We want a candy cane vibe, not toothpaste!
- Stir the extract into the oil - Adding extract (which includes water) directly to melted chocolate can cause it to seize and become grainy. Mixing it into the oil prevents that.
- Set a timer for setting the dark chocolate - The white chocolate top layer can separate when slicing if the dark chocolate layer sets for too long. Chill it only for around 10 minutes, until nearly set.
Recipe Ingredients

- Chocolate: Rich dark chocolate contrasts really nicely with the other sweet ingredients here, but you can also use milk, bittersweet, or semi-sweet chocolate if you like.
- White Chocolate: Chop up a bar of white chocolate to use in Oreo peppermint bark, not white chocolate morsels, for the most efficient melting and preventing separation.
- Peppermint Extract: Make sure it's pure peppermint extract and not simply "mint", which includes spearmint.
- Coconut Oil: Creates extra silky smooth chocolate layers, adds the tiniest bit of softest so this bark is easy to bite through, and acts as a vehicle to add the extract without worrying about the chocolate seizing. Using refined coconut oil is flavorless so no need to worry about a coconut flavor coming through.
- Oreo Cookies: Standard Oreo cookies bring a perfectly complementary cookies-and-cream element, but have fun with special holiday flavors if you like - red and green cream filling, mint flavoring, etc. Six cookies will provide good coverage for a 9-inch square pan.
- Crushed Candy Canes: Crush three peppermint candy canes for this bark's signature appearance. Leave some larger pieces for crunch, not all dust.
Step-by-Step Instructions
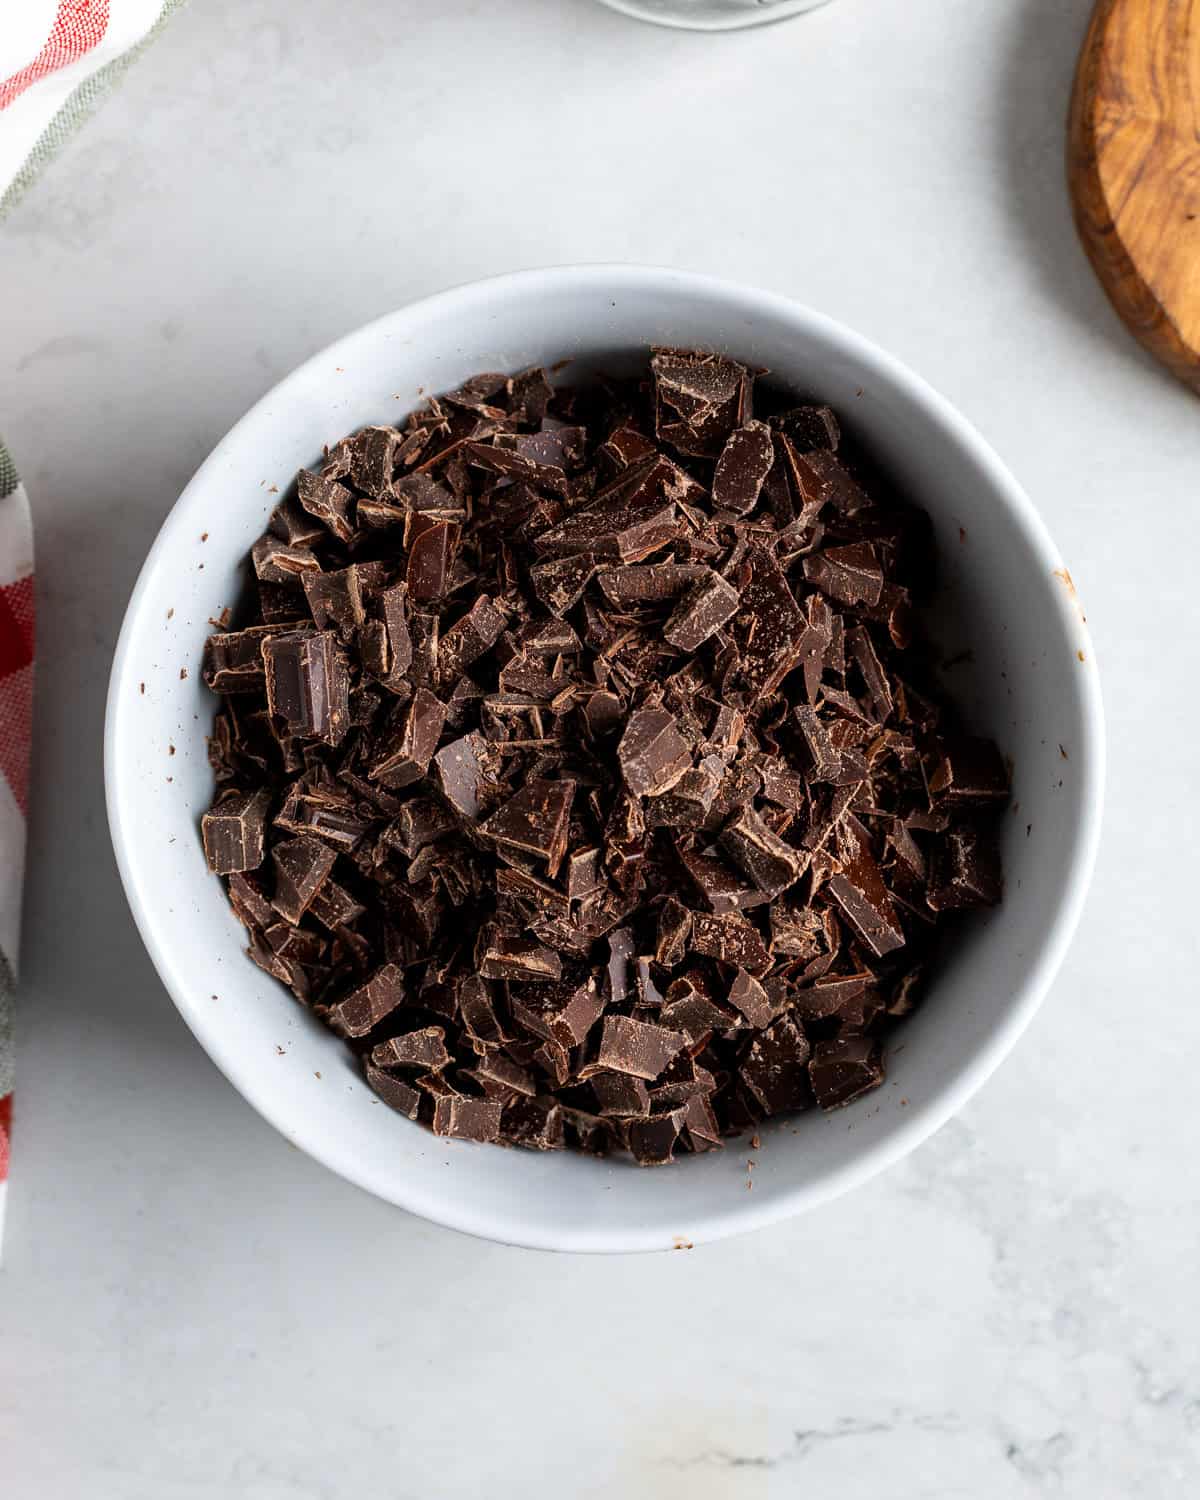
- Step 1: Chop up the dark (or semisweet) chocolate and add it to a microwave-safe bowl. The melting stages can also be done with a double boiler, if you prefer.
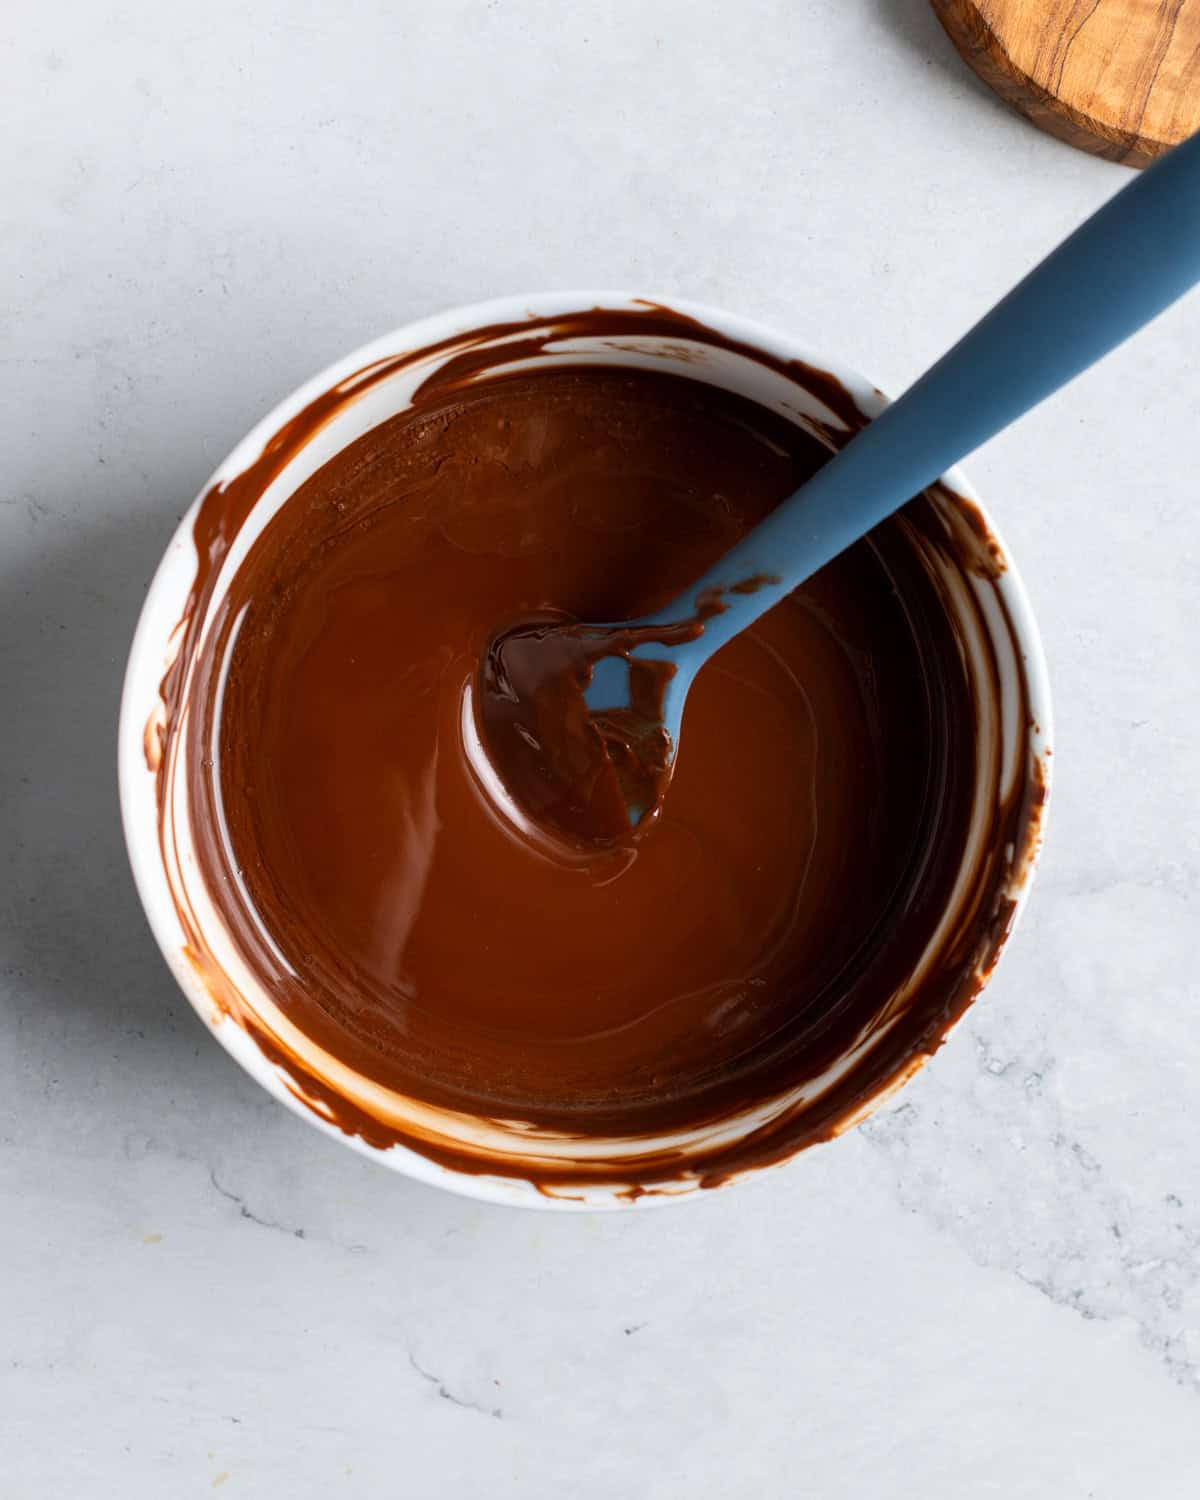
- Step 2: Melt it in intervals in the microwave until smooth, then stir in the melted coconut oil and peppermint extract.
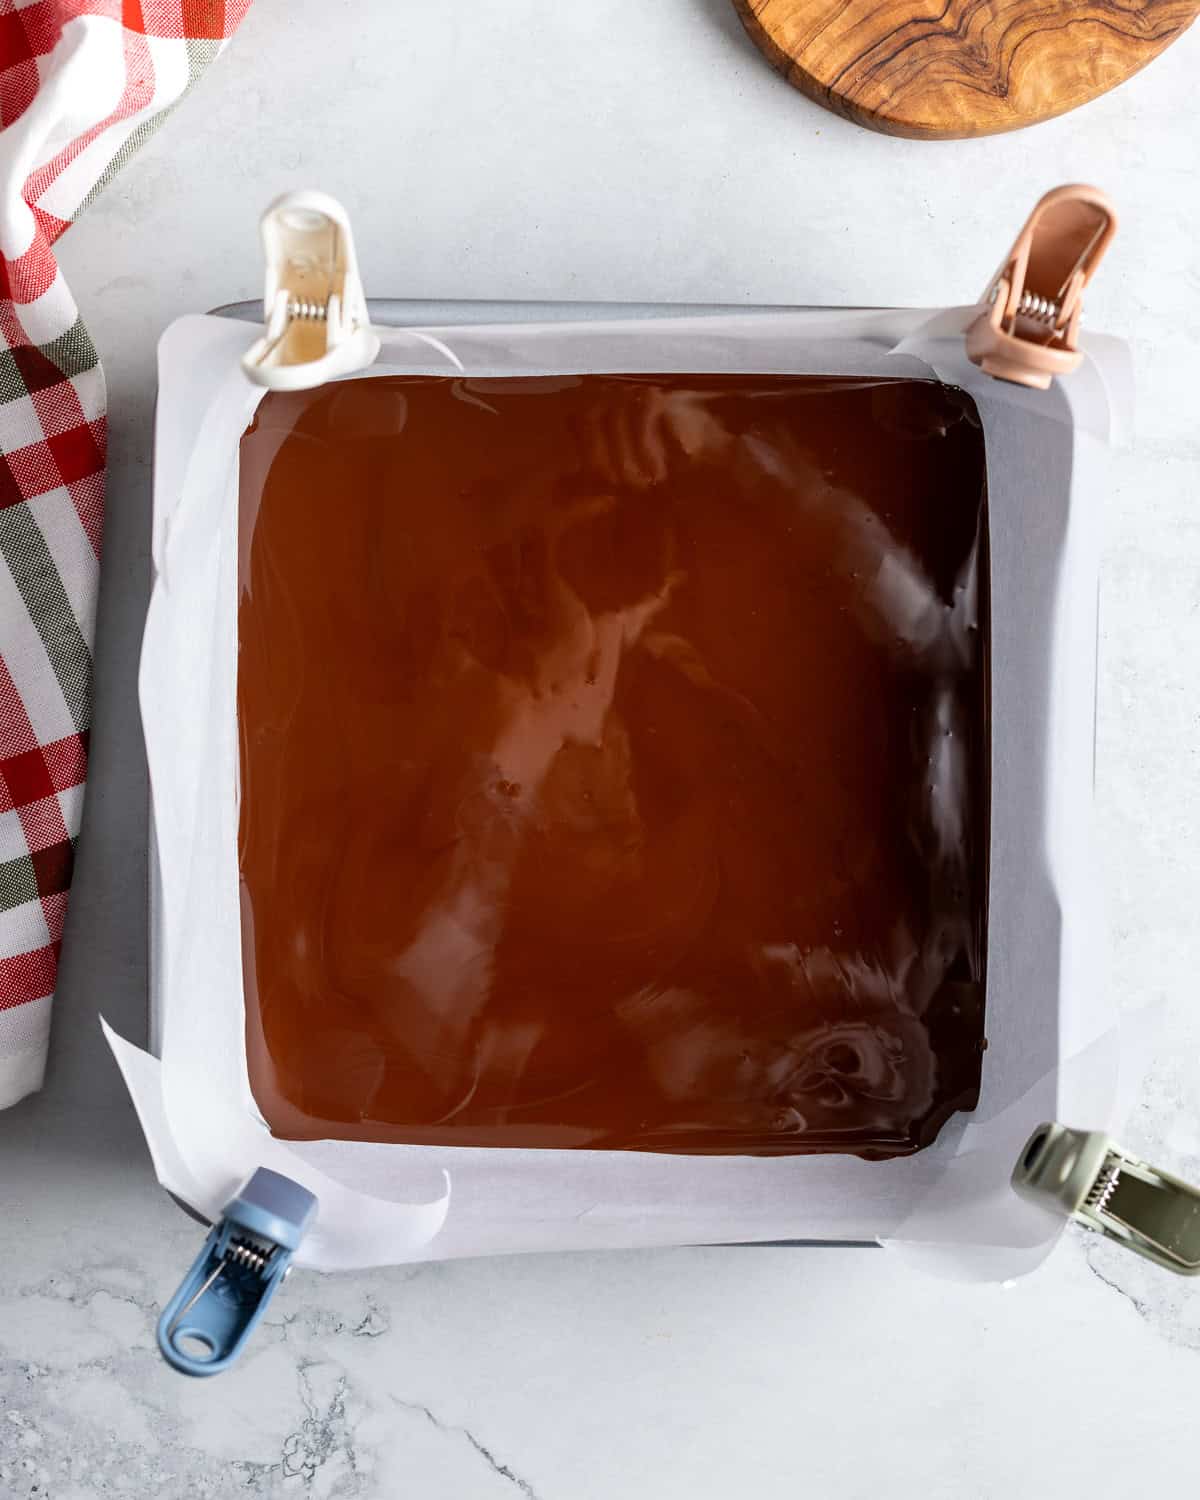
- Step 3: Pour out the melted chocolate into parchment-lined 9-inch square pan and smooth it into an even layer. Chill for 10-15 minutes.

- Step 4: Repeat the process with the white chocolate while the dark chocolate is chilling.
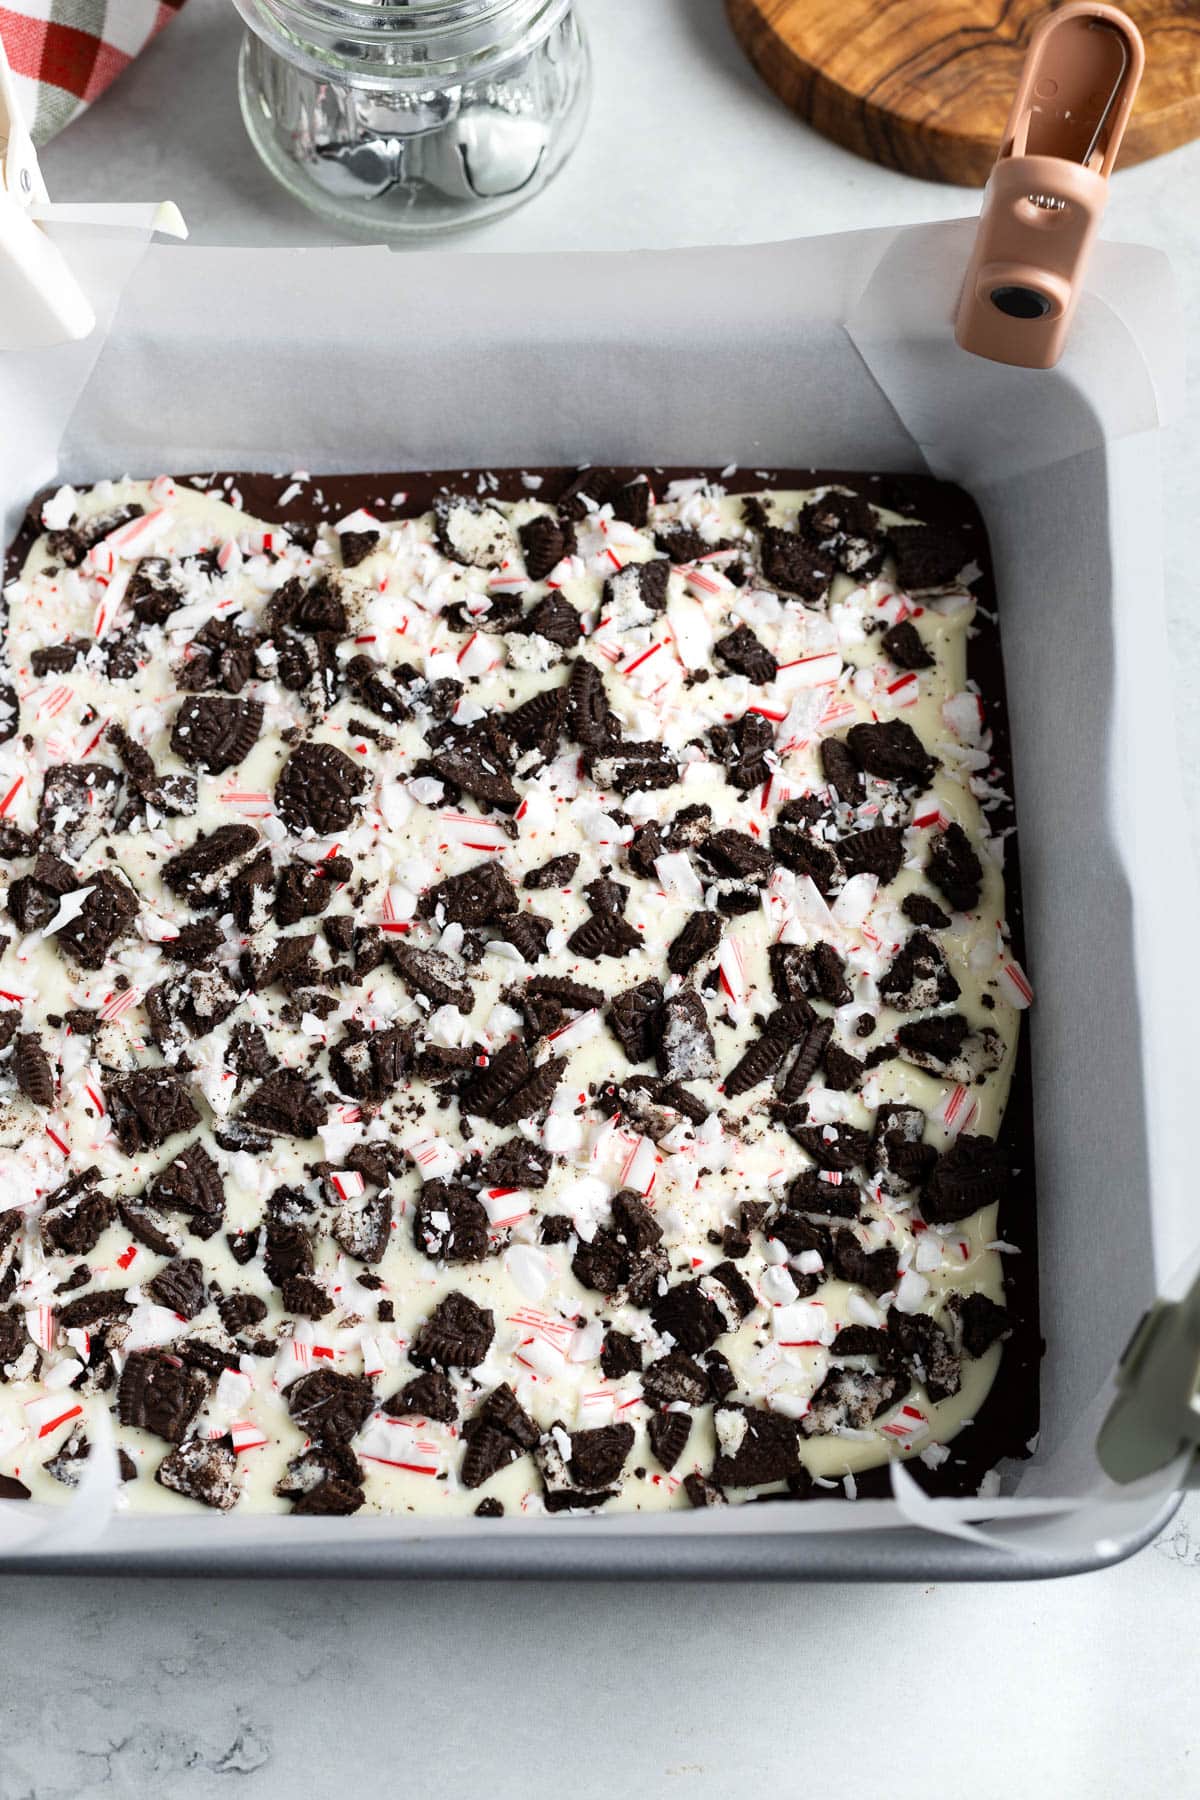
- Step 5: Pour the melted white chocolate/coconut oil/peppermint extract in the pan and carefully move it around to cover the dark chocolate layer without disturbing it. Gently press the chopped Oreo cookies and candy cane pieces into the white chocolate layer until the surface is covered. Chill for several hours until fully set before slicing.
Recipe Tips and Tricks
- Pan Size - Using a 9-inch square pan is an easy way to ensure relatively even chocolate layers, though you can spread the chocolate mixture out onto a parchment-lined sheet pan if you prefer (and have room for in your fridge).
- Smooth Appearance - Ensure the parchment or wax paper you use to line the pan is flat and not crinkled.
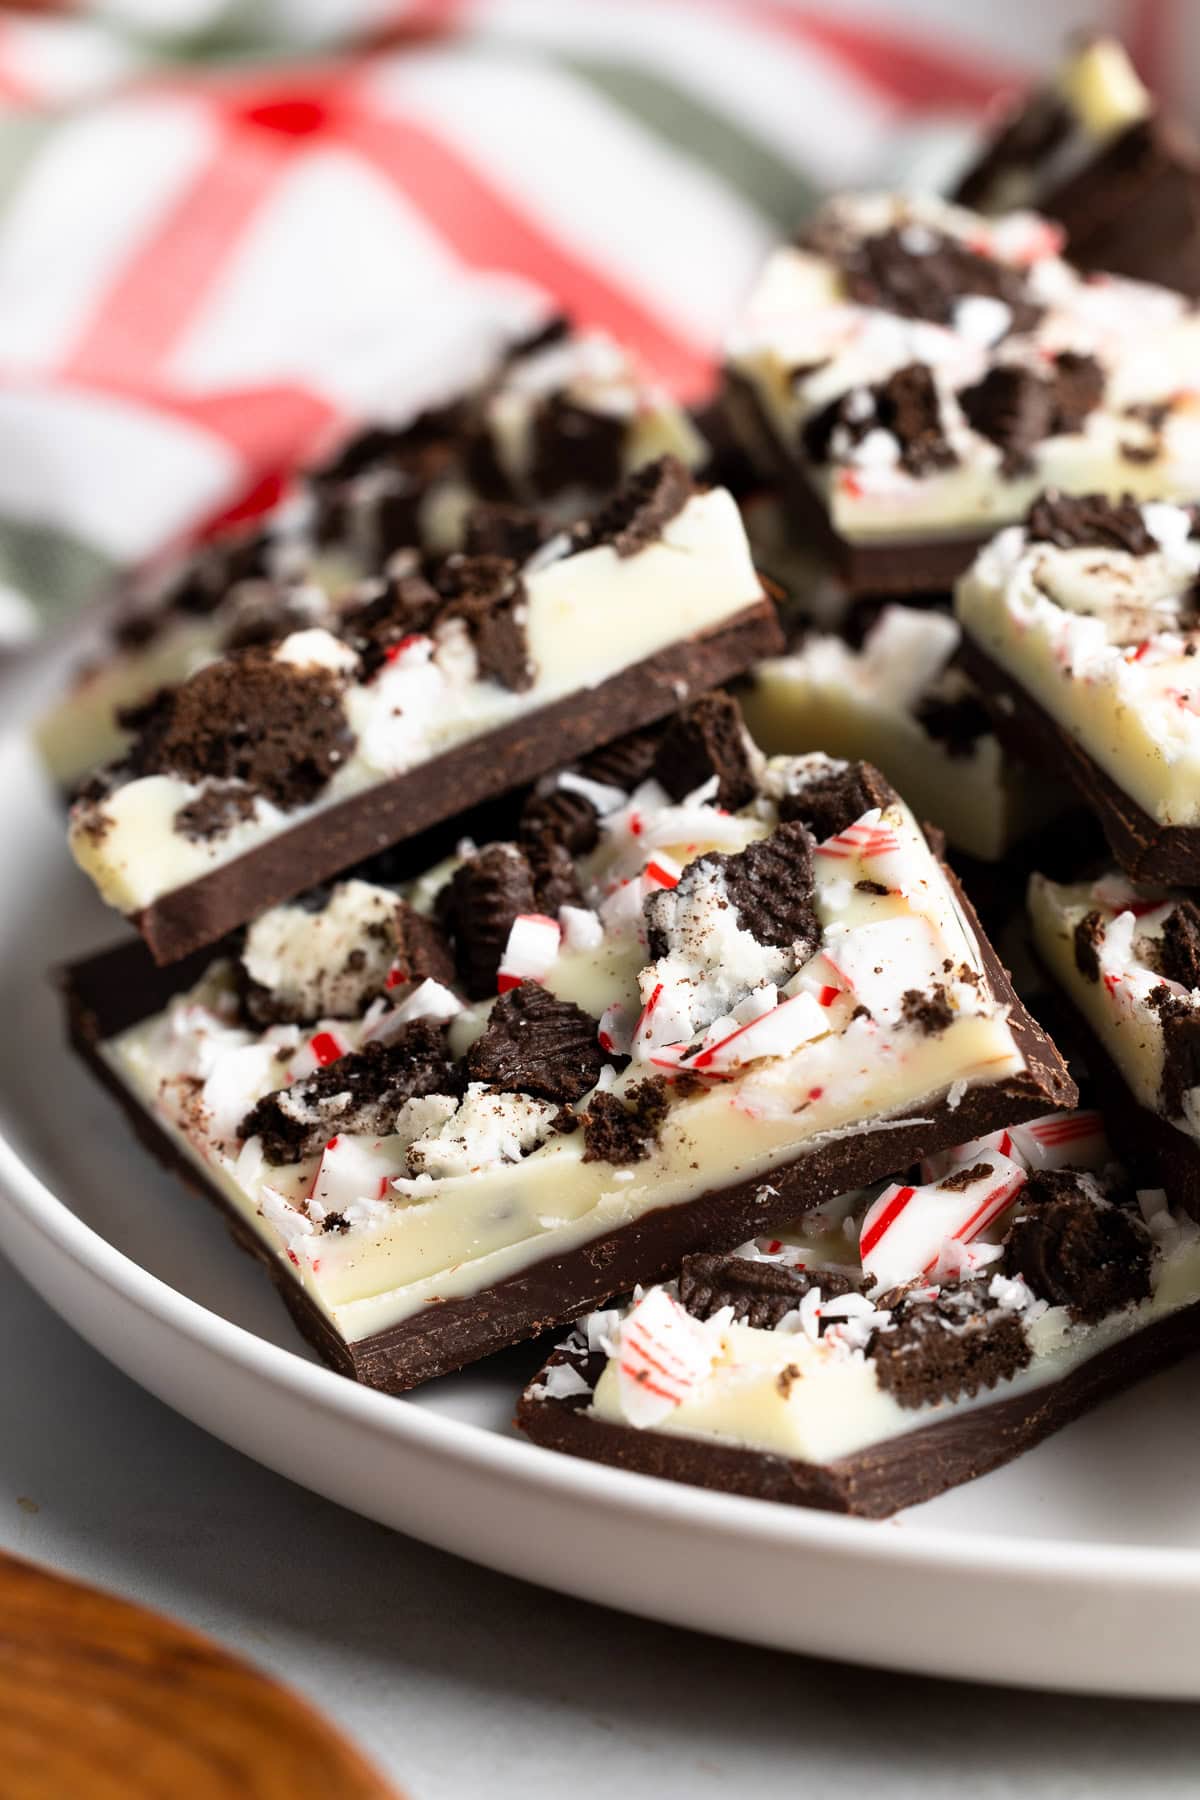
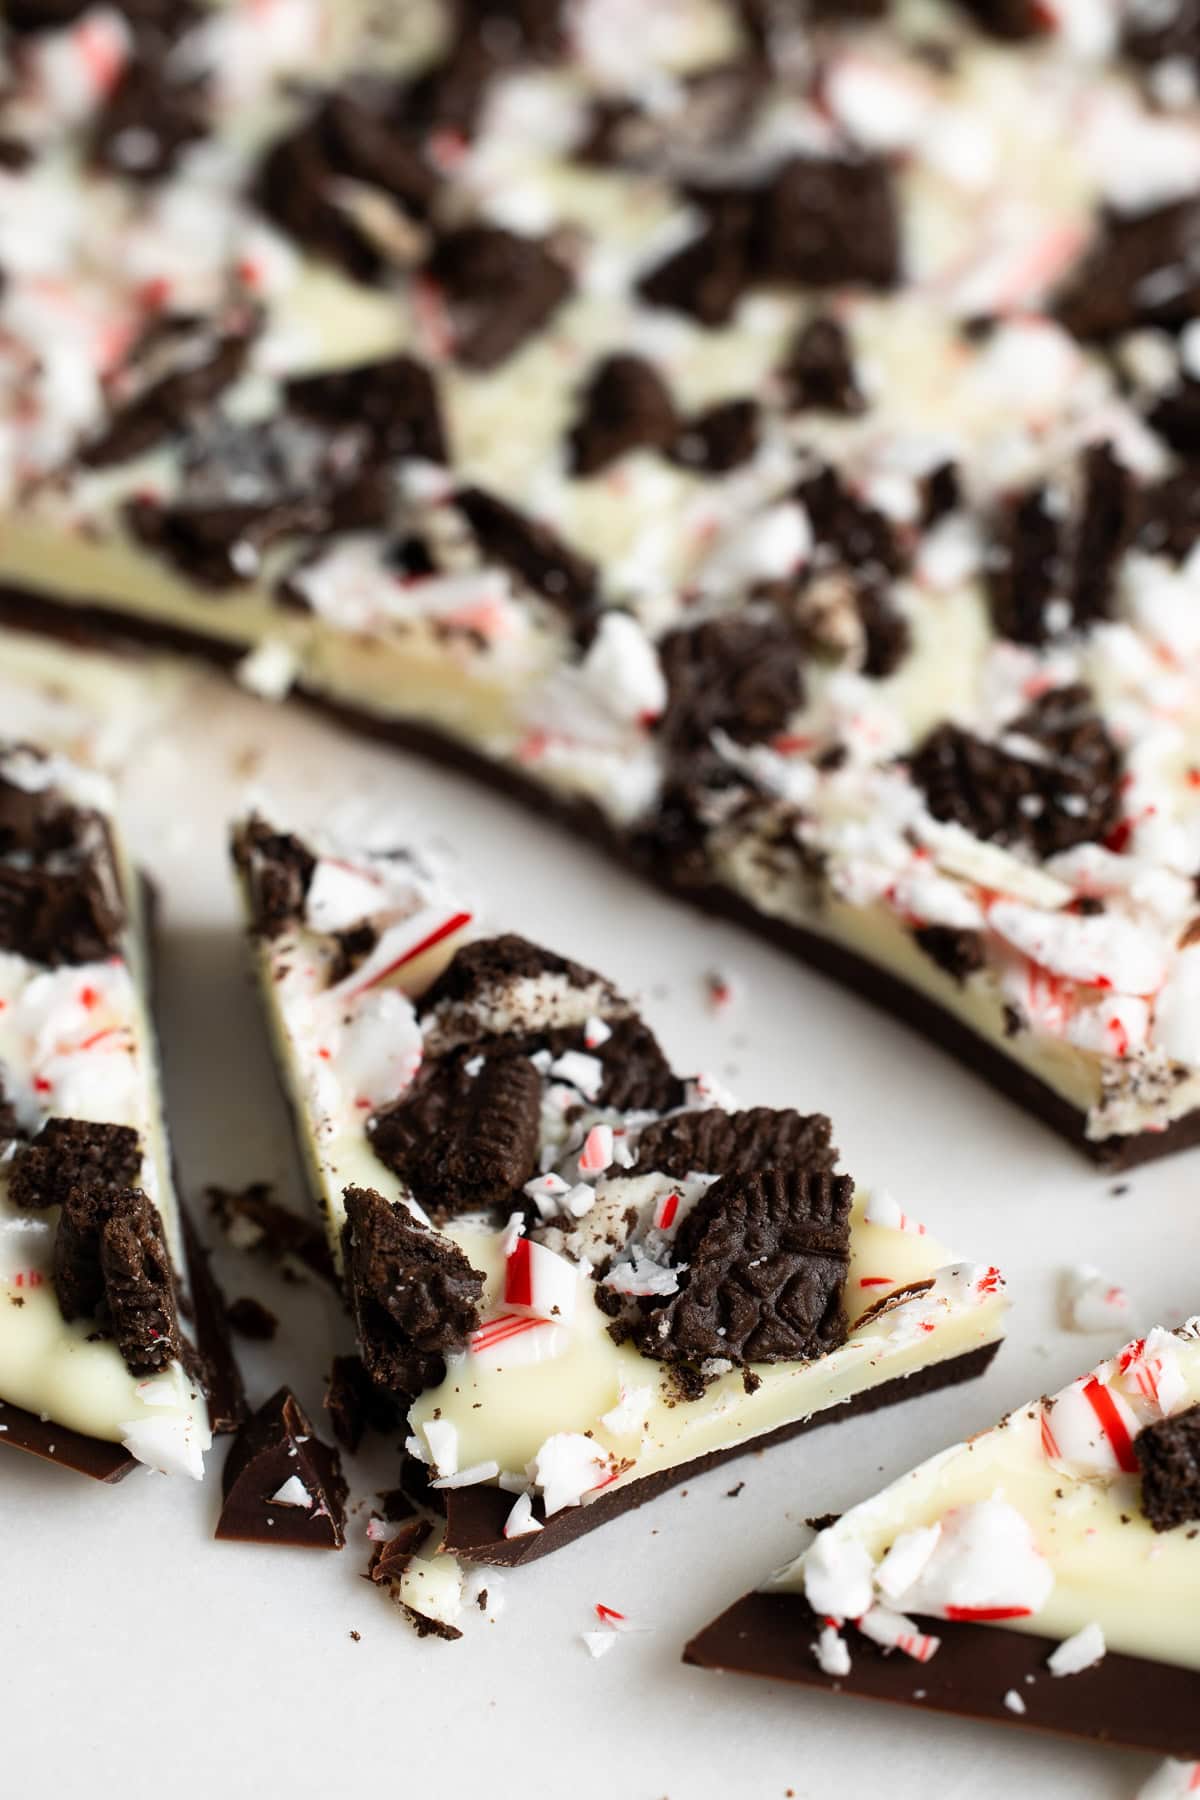
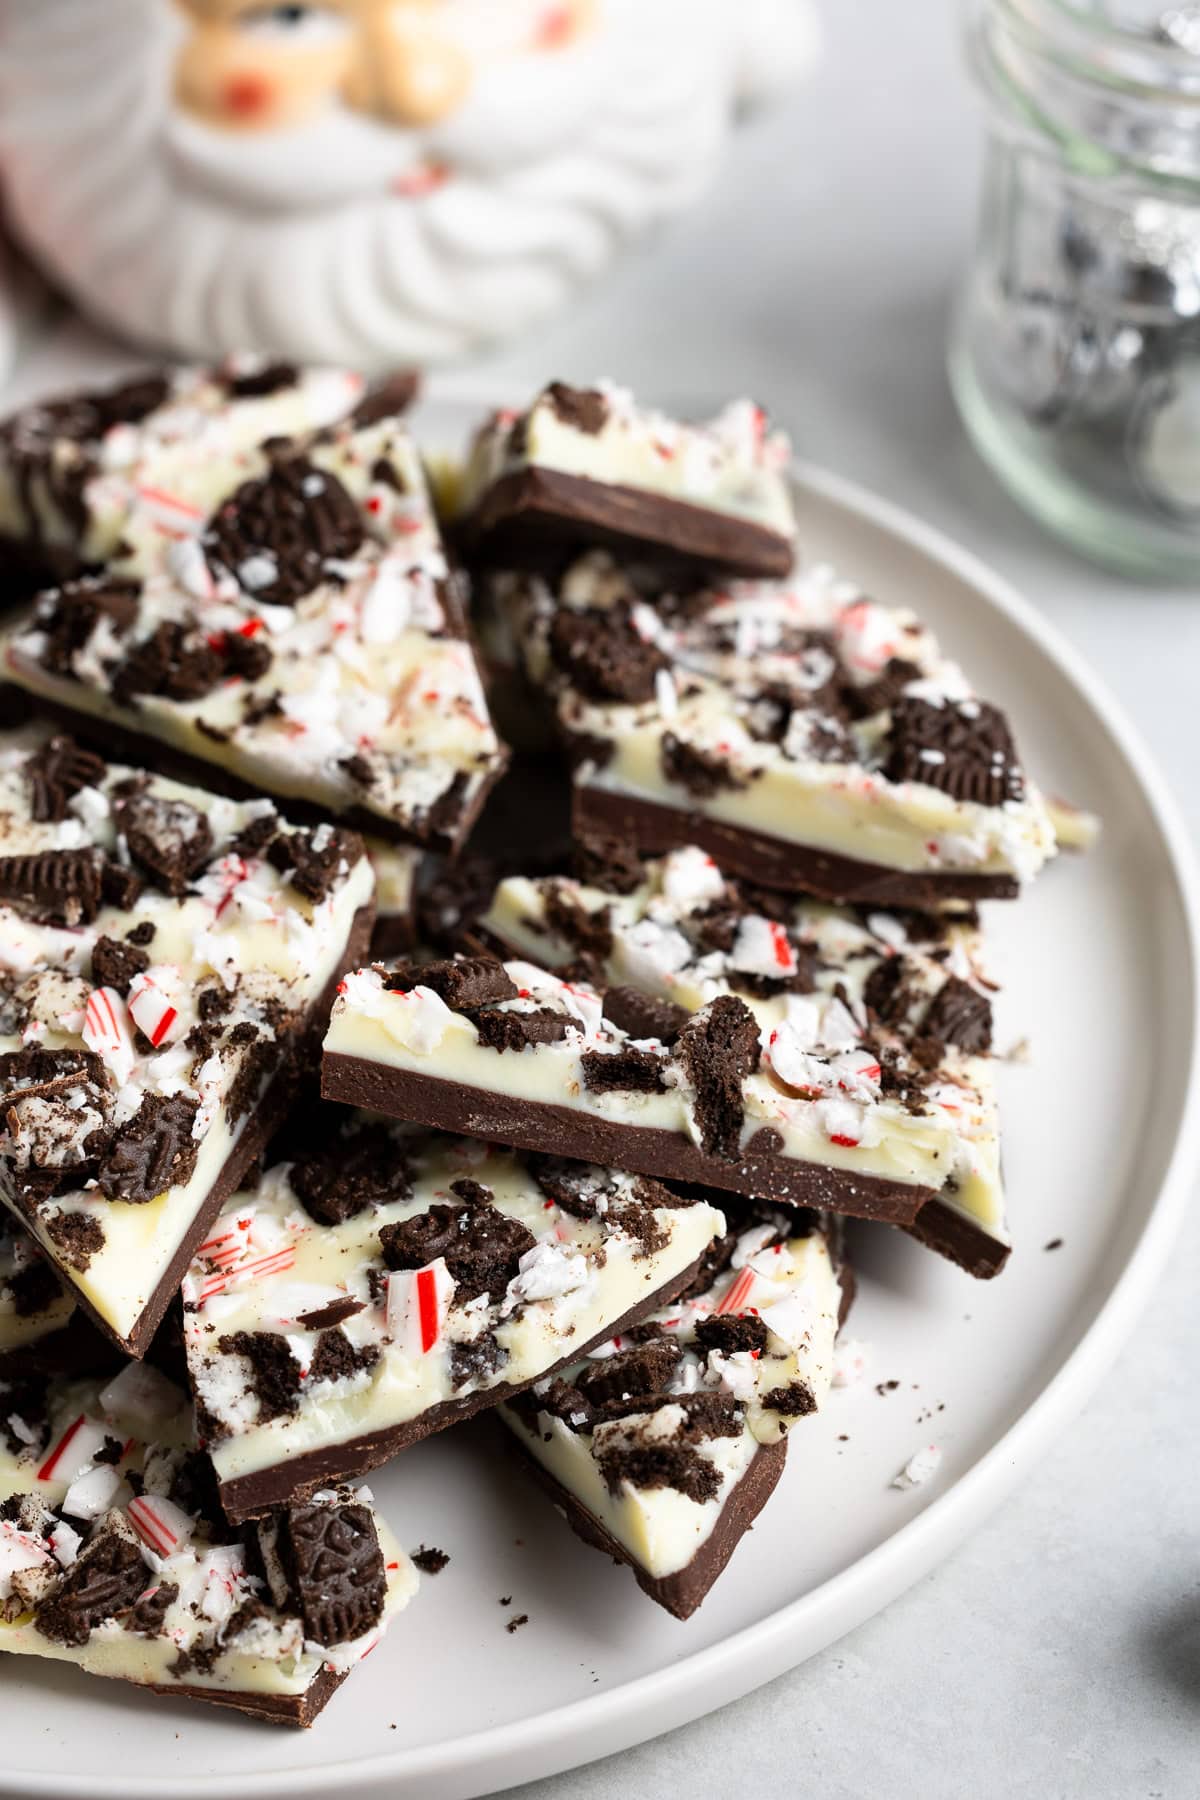
- Slicing vs. Breaking - Using a 9-inch square pan will result in Oreo peppermint bark that (in my opinion) is a liiiiittle too thick to break into pieces with your hands and requires a knife for careful cutting.
- Storage - This bark is best stored in the refrigerator for the snappiest texture and extra cooling flavor, though it'll be fine served at room temperature on a Christmas dessert tray or stored that way for shorter times.
- Easy Slicing - If the bark seems too difficult to slice after it's been chilled, leave it out at room temperature for a brief time until it becomes easier to cut through.
More Holiday Treats


Did you enjoy this recipe? I’d love for you to leave a star rating and a comment review in the recipe card below!

Oreo Peppermint Bark
Ingredients
- 8 ounces dark or semi-sweet chocolate chopped
- 1 ½ teaspoons refined coconut oil divided
- 1 teaspoon pure peppermint extract divided
- 8 ounces white chocolate chopped
- 6 Oreo cookies roughly chopped
- 3 peppermint candy canes crushed
Instructions
- Line a 9-inch square baking pan flat with parchment paper and set aside. You can also use a sheet pan and spread chocolate out to your preferred shape.
- Add chopped dark chocolate to a microwave-safe bowl and microwave in 30 second increments on half-power, stirring well after each increment, until just melted and smooth. Be careful not to overheat the chocolate.
- Separately melt ¾ teaspoon of the coconut oil in the microwave (it shouldn't take longer than 10-15 seconds) then stir ½ teaspoon of the peppermint extract into the oil. Stir into the melted dark chocolate until evenly combined.
- Pour the melted chocolate into the parchment-lined pan and spread into an even layer with a spatula. Chill for 10-15 minutes or until just set - set a timer as too long can cause the chocolate layers to separate.
- Chop the white chocolate, add it to a microwave-safe bowl, then melt it in the same way as the dark chocolate. Separately melt the remaining ¾ teaspoon of coconut oil, stir in the remaining ½ teaspoon of peppermint extract, and stir into the white chocolate. Once the dark chocolate layer has just set, pour over the white chocolate and gently spread it around to cover in an even layer.
- Scatter chopped Oreo cookie pieces and crushed candy canes over the white chocolate and lightly press so they adhere to the bark. Return the pan back to the fridge to harden fully before slicing, around 2-3 hours. If the bars seem difficult to slice, let them sit out at room temperature for a little bit to make things easier.
- Store Oreo peppermint bark in an air-tight container for several weeks in the fridge, or for shorter bursts at room temperature.
Notes
- Chocolate - Chop up bars of chocolate instead of using chips or chunks, as they will have additives that can impede a smooth melt.
- White Chocolate - Look for a variety without palm oil, which can cause the layers to separate when slicing.
- Coconut Oil - Use refined coconut oil (not unrefined/virgin) as refined is flavorless. I prefer to use coconut oil vs. a neutral flavored oil as it's solid at room/chilled temperatures.
Would you like to save this?
Plus receive periodic recipe newsletter emails.
Nutrition
Nutritional information is provided as an estimate. As it can vary due to many factors (brands used, quantities, etc.), we cannot guarantee its accuracy.
Food Safety and Nutrition DisclaimerIf you're coming back to this post via Pinterest or a bookmarked link, you may recognize the photo below. The recipe is tweaked slightly but even more delicious, if I must say! Add salted pretzel pieces for a sweet and salty element.

Comments
No Comments