

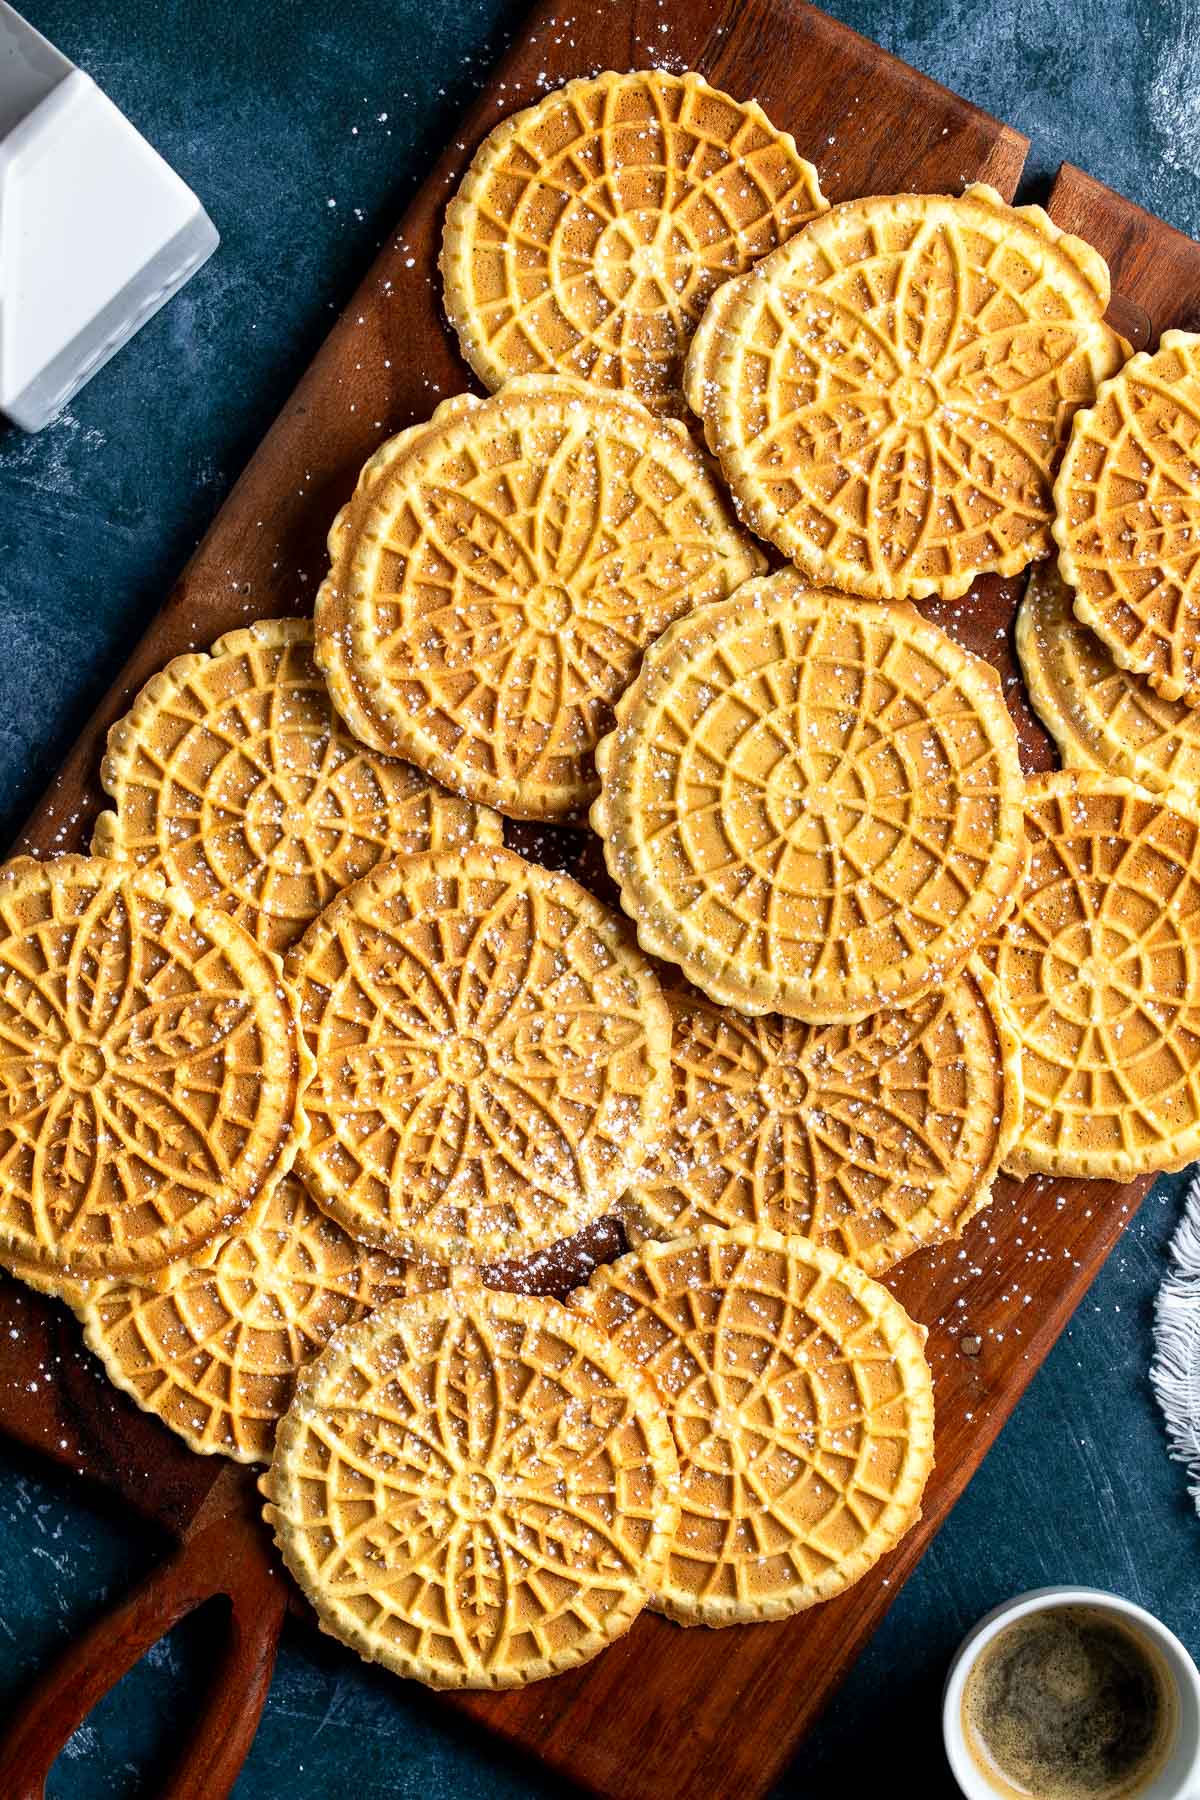
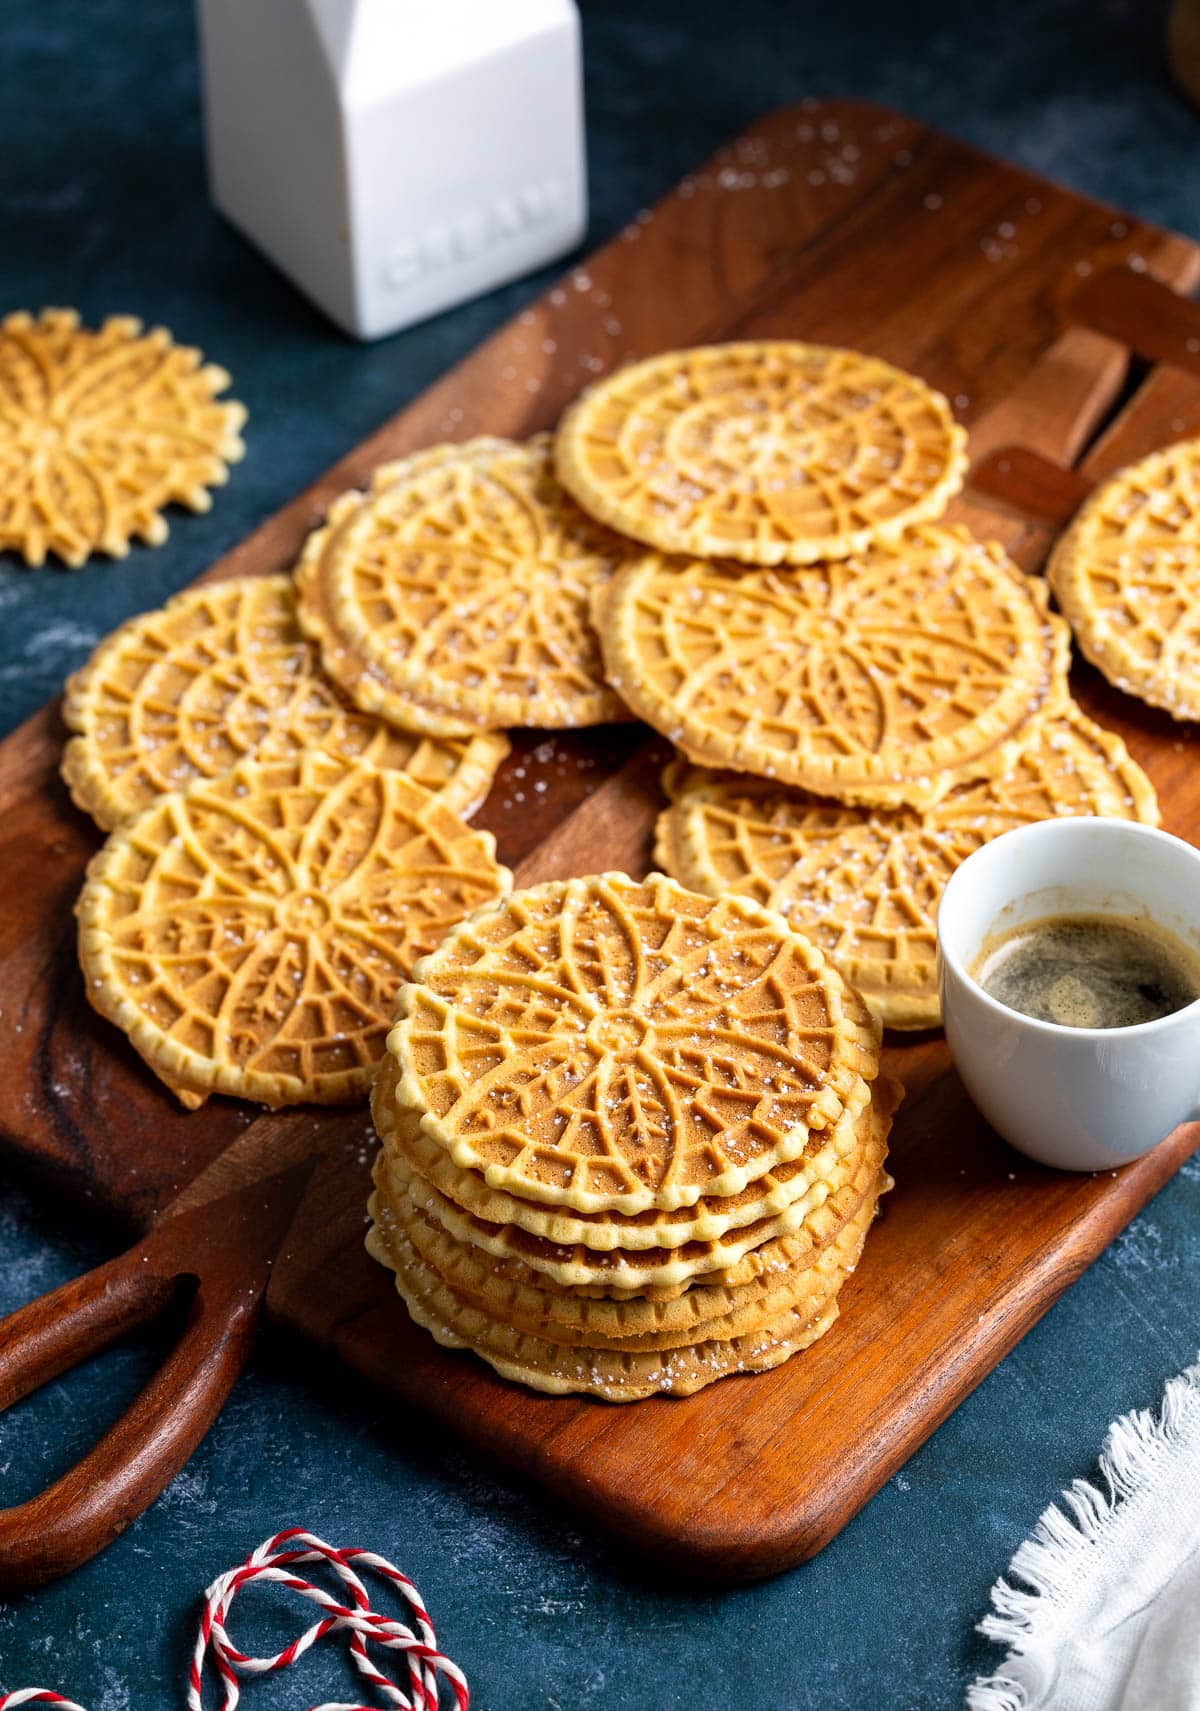
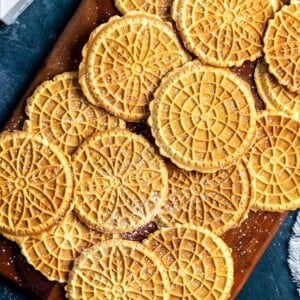
This is a classic recipe for buttery crisp anise pizzelle. With a balanced flavor, easy method, and long shelf life, these Italian waffle cookies are favorites for your Christmas cookie tray or Easter dessert table.
Forever a nonna at heart, I was gifted my very own pizzelle press in high school and have been cranking out Italian pizzelle two at a time ever since.
Over the years I've dabbled in variations (rich chocolate pizzelle and bright, bold lemon pizzelle) but always come home to these classic Italian pizzelle.
What to Expect
This traditional pizzelle recipe produces reliably thin-yet-substantial wafer cookies that stay crisp for weeks, making them a fantastic make-ahead cookie for the busy holiday season. And while there's no getting around the time it takes to press pizzelle, the batter is as quick as can be with no chill time required.
They have a present but balanced anise flavor that isn't overwhelming in the slightest. Even the licorice nay-sayers in my life can't stay away! But you can substitute in more vanilla extract or pair vanilla with almond extract if you'd prefer pizzelle without anise.
Besides serving them flat, you'll have a short window of time of being able to mold warm pizzelle right off the press. Roll them over a wooden dowel to form homemade cannoli shells or small cones, or shape them into an edible bowl by laying them over muffin tin cups or an overturned glass.
And even more outside the box, did you know that Italian pizzelle make a fabulous "cake" layer for no-bake icebox cakes? Just sub in all vanilla extract for the pizzelle in my cannoli icebox cake.
I have to say it’s even better than what I grew up on. I made a triple batch since they will be in cookie boxes everyone at my party gets and part of me wants to keep them all. Lol. This is now the only recipe I will ever use!
- reader Jody
Recipe Ingredients
One thing to love, among many, about pizzelle is that they use very basic ingredients that you probably already have on hand.
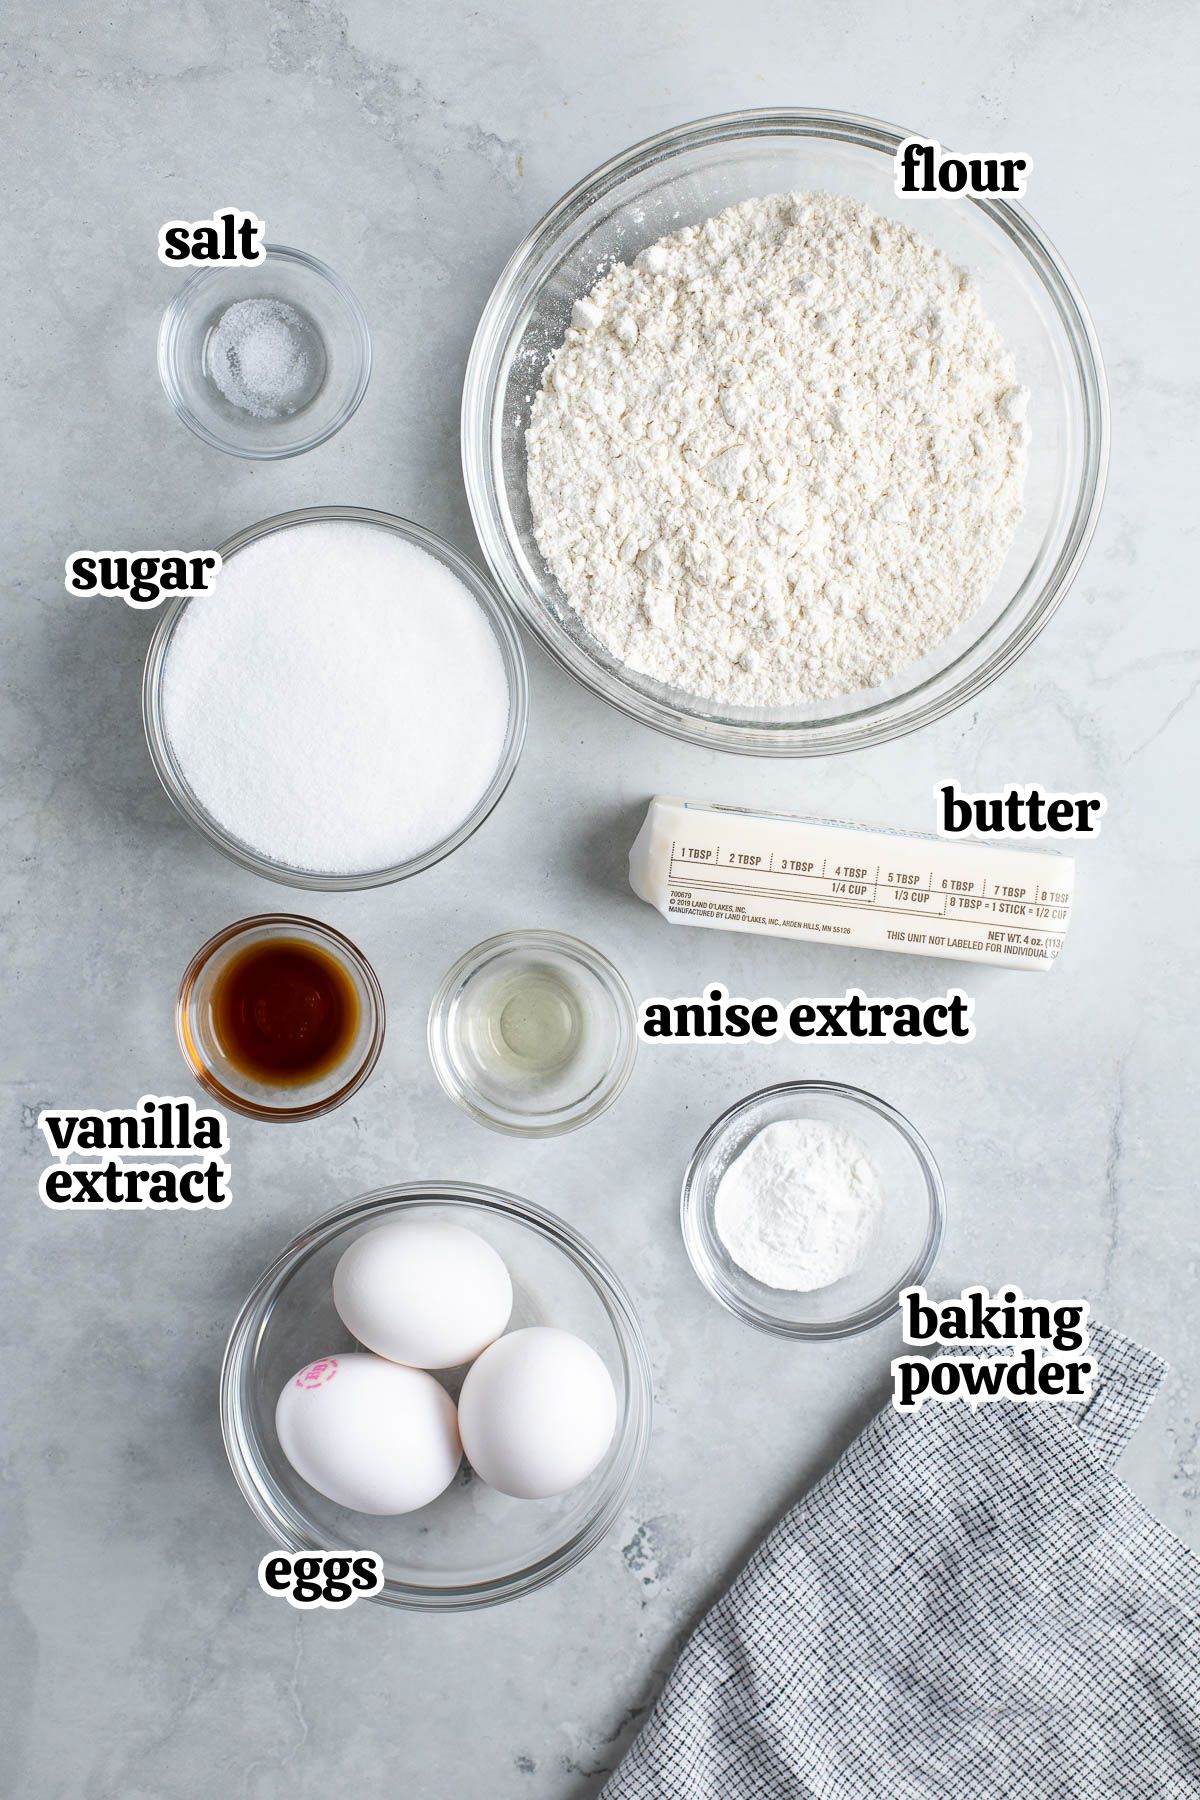
- Unsalted butter: I prefer using melted butter instead of oil for a better flavor. Don't worry - even with using melted butter, these traditional pizzelle cookies crisp up beautifully.
- Extracts: Two teaspoons of anise extract bring that classic pizzelle taste without too much licorice, with one teaspoon of vanilla extract tempering it nicely. I happen to love the anise flavor (as do many readers, as evidenced by the popularity of my Italian anise cookies!) but the amount used here shouldn't scare anyone away if it isn't your favorite. Prefer a citrus twist? Check out my lemon pizzelle instead.
- Baking powder: I recommend an aluminum-free variety as some palates can pick up on a bitter taste from recipes with a larger baking powder-to-flour ratio.
Step-by-Step Instructions
For reference: I have an electric press with 4-inch non-stick grids. I don't have firsthand knowledge of the intricacies of a stovetop iron or one that's cast iron. If so, please follow your particular iron's cooking instructions when the time comes.
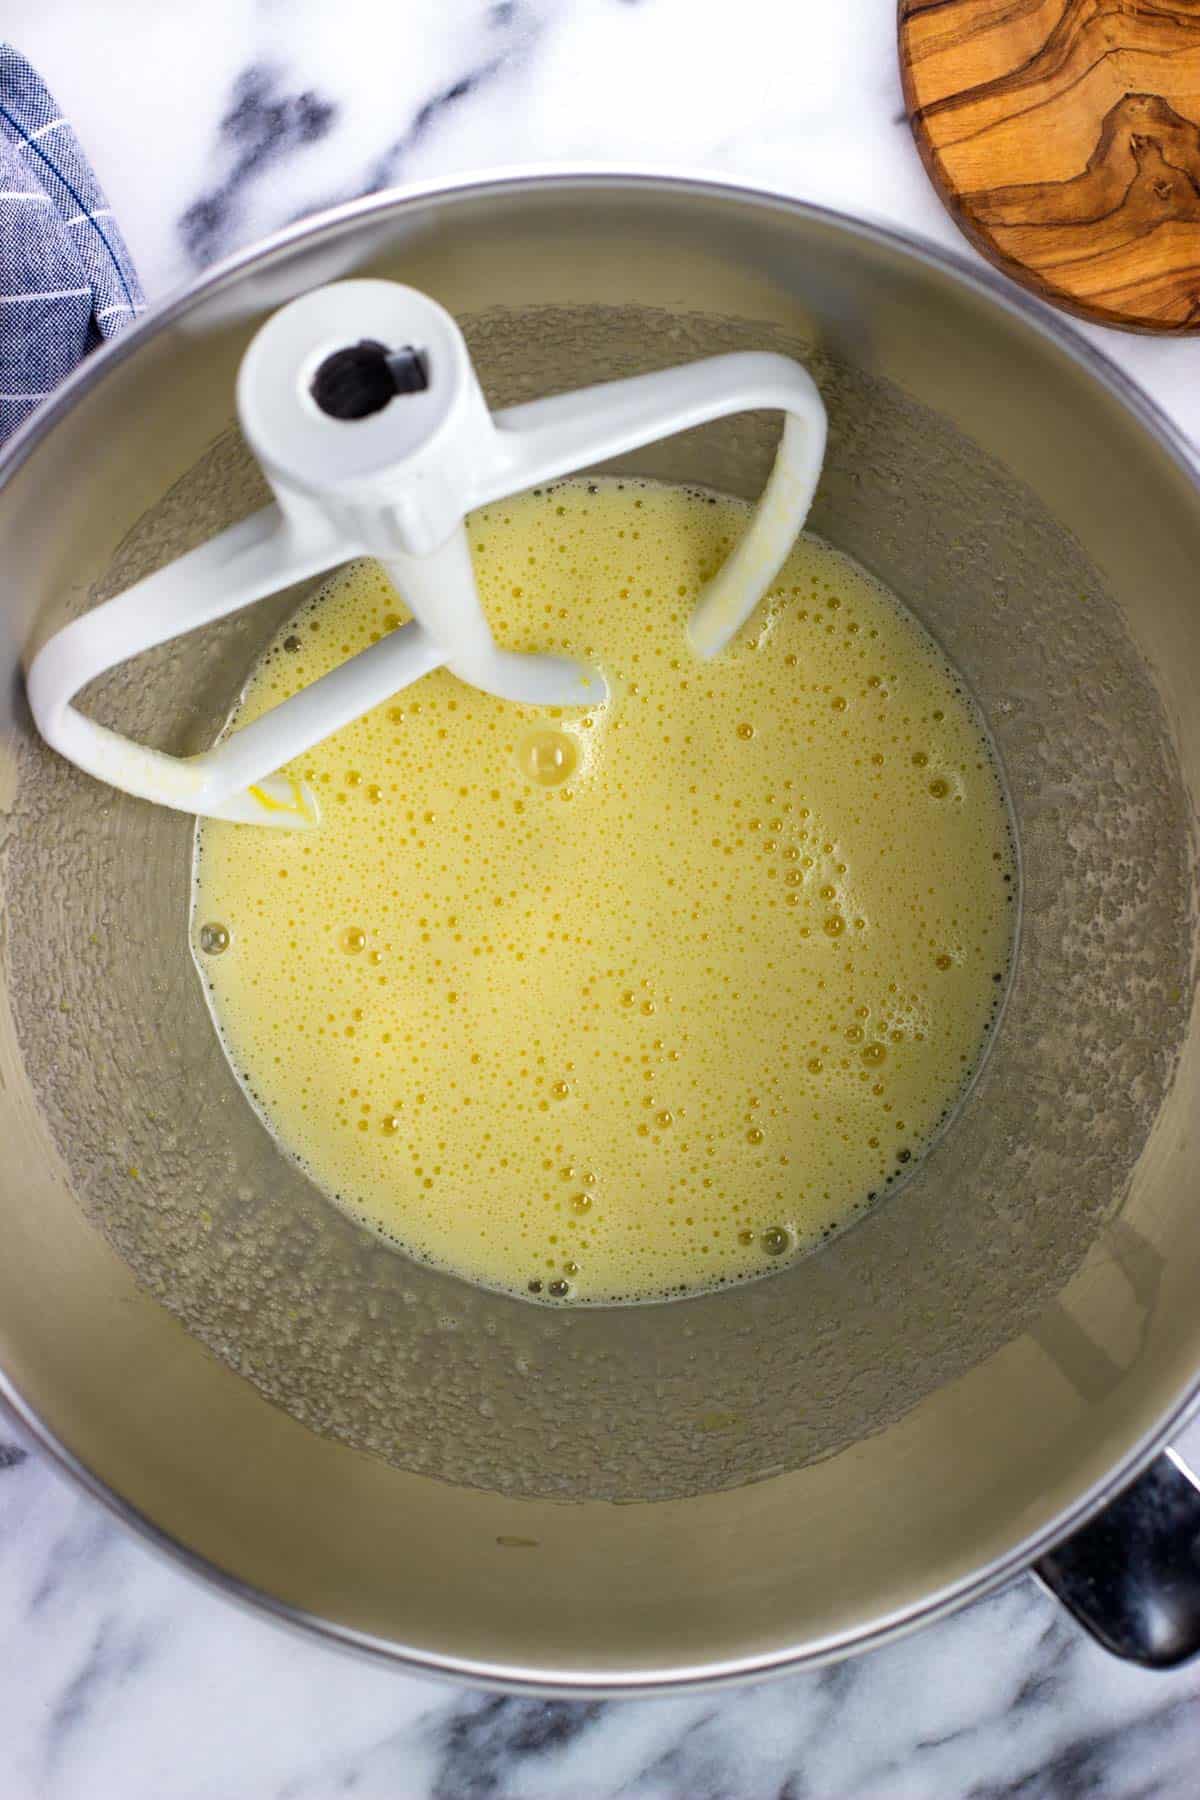
- Step 1: Beat eggs and sugar until smooth and thickened.
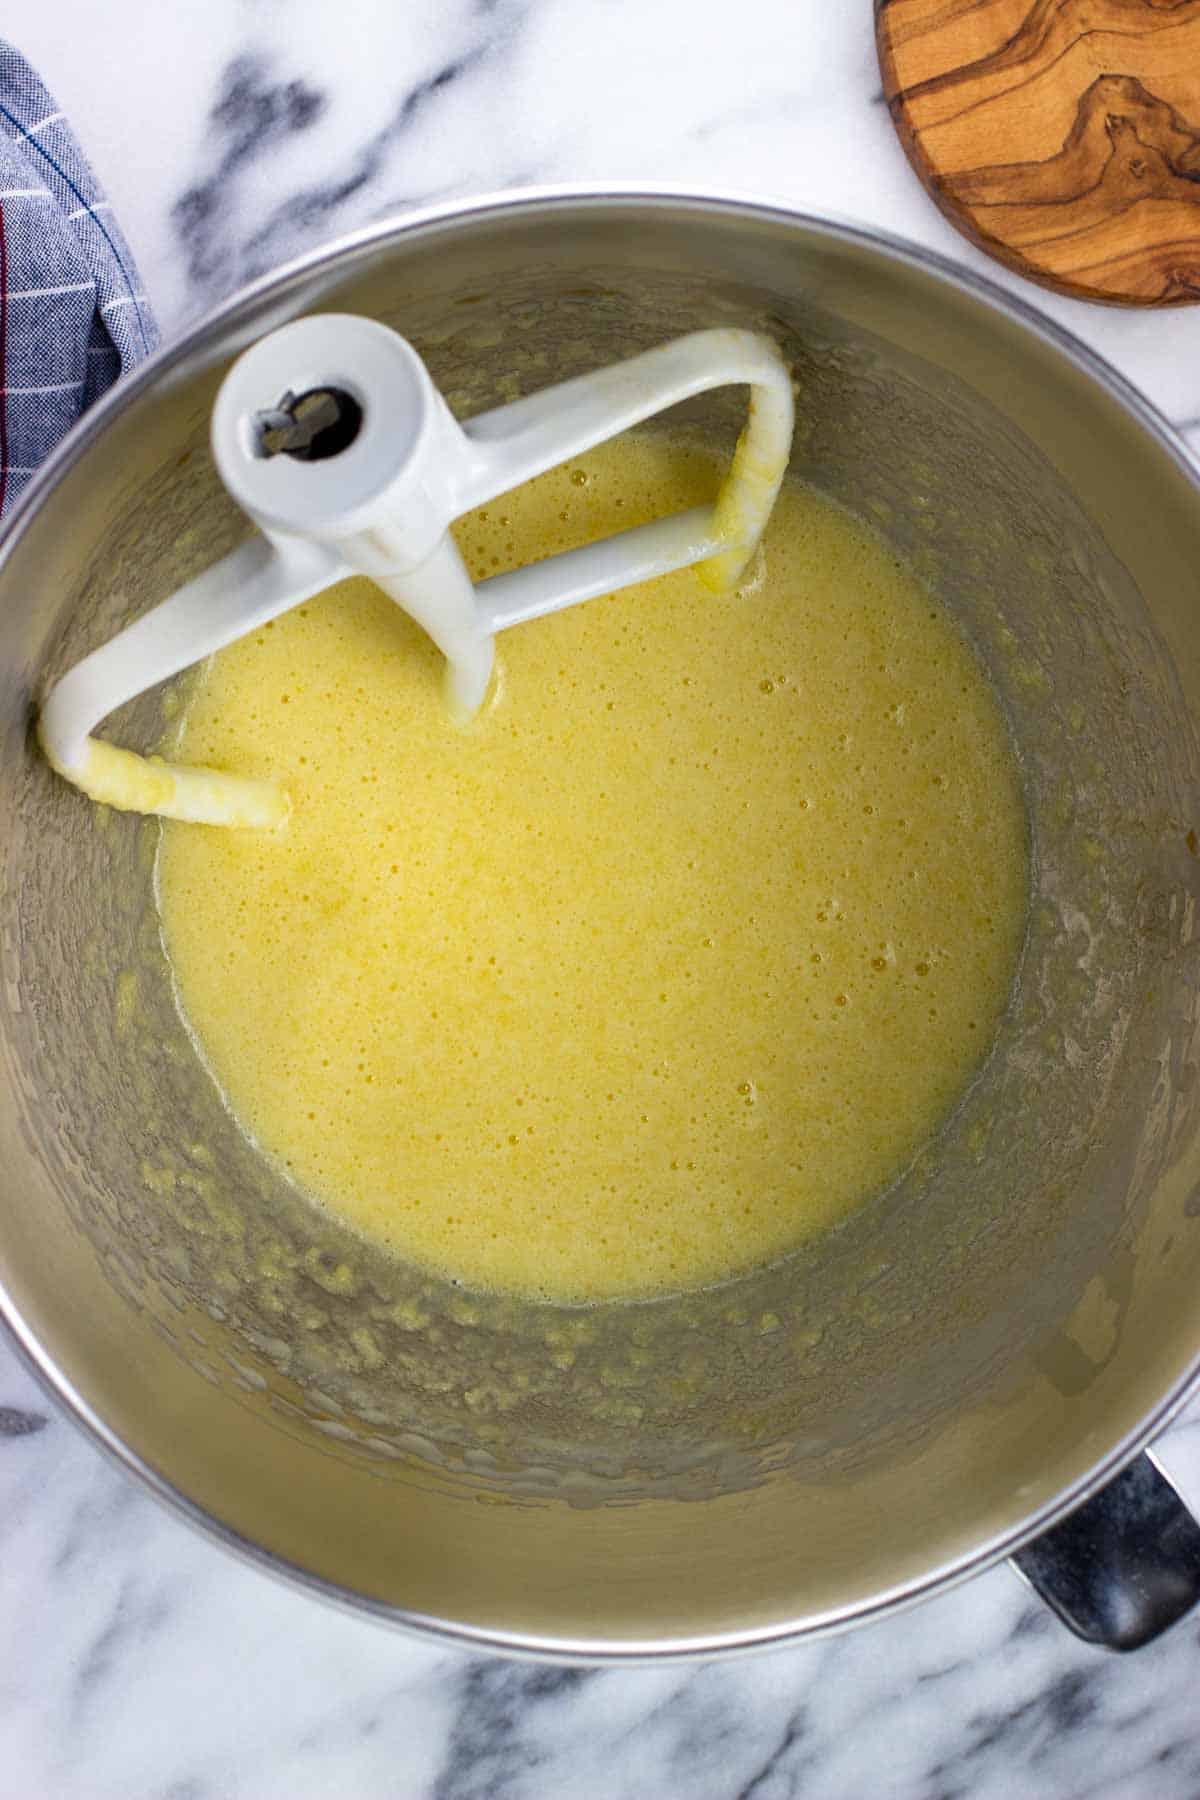
- Step 2: Pour in melted butter and extracts on low speed until combined.

- Step 3: Separately whisk the dry ingredients.
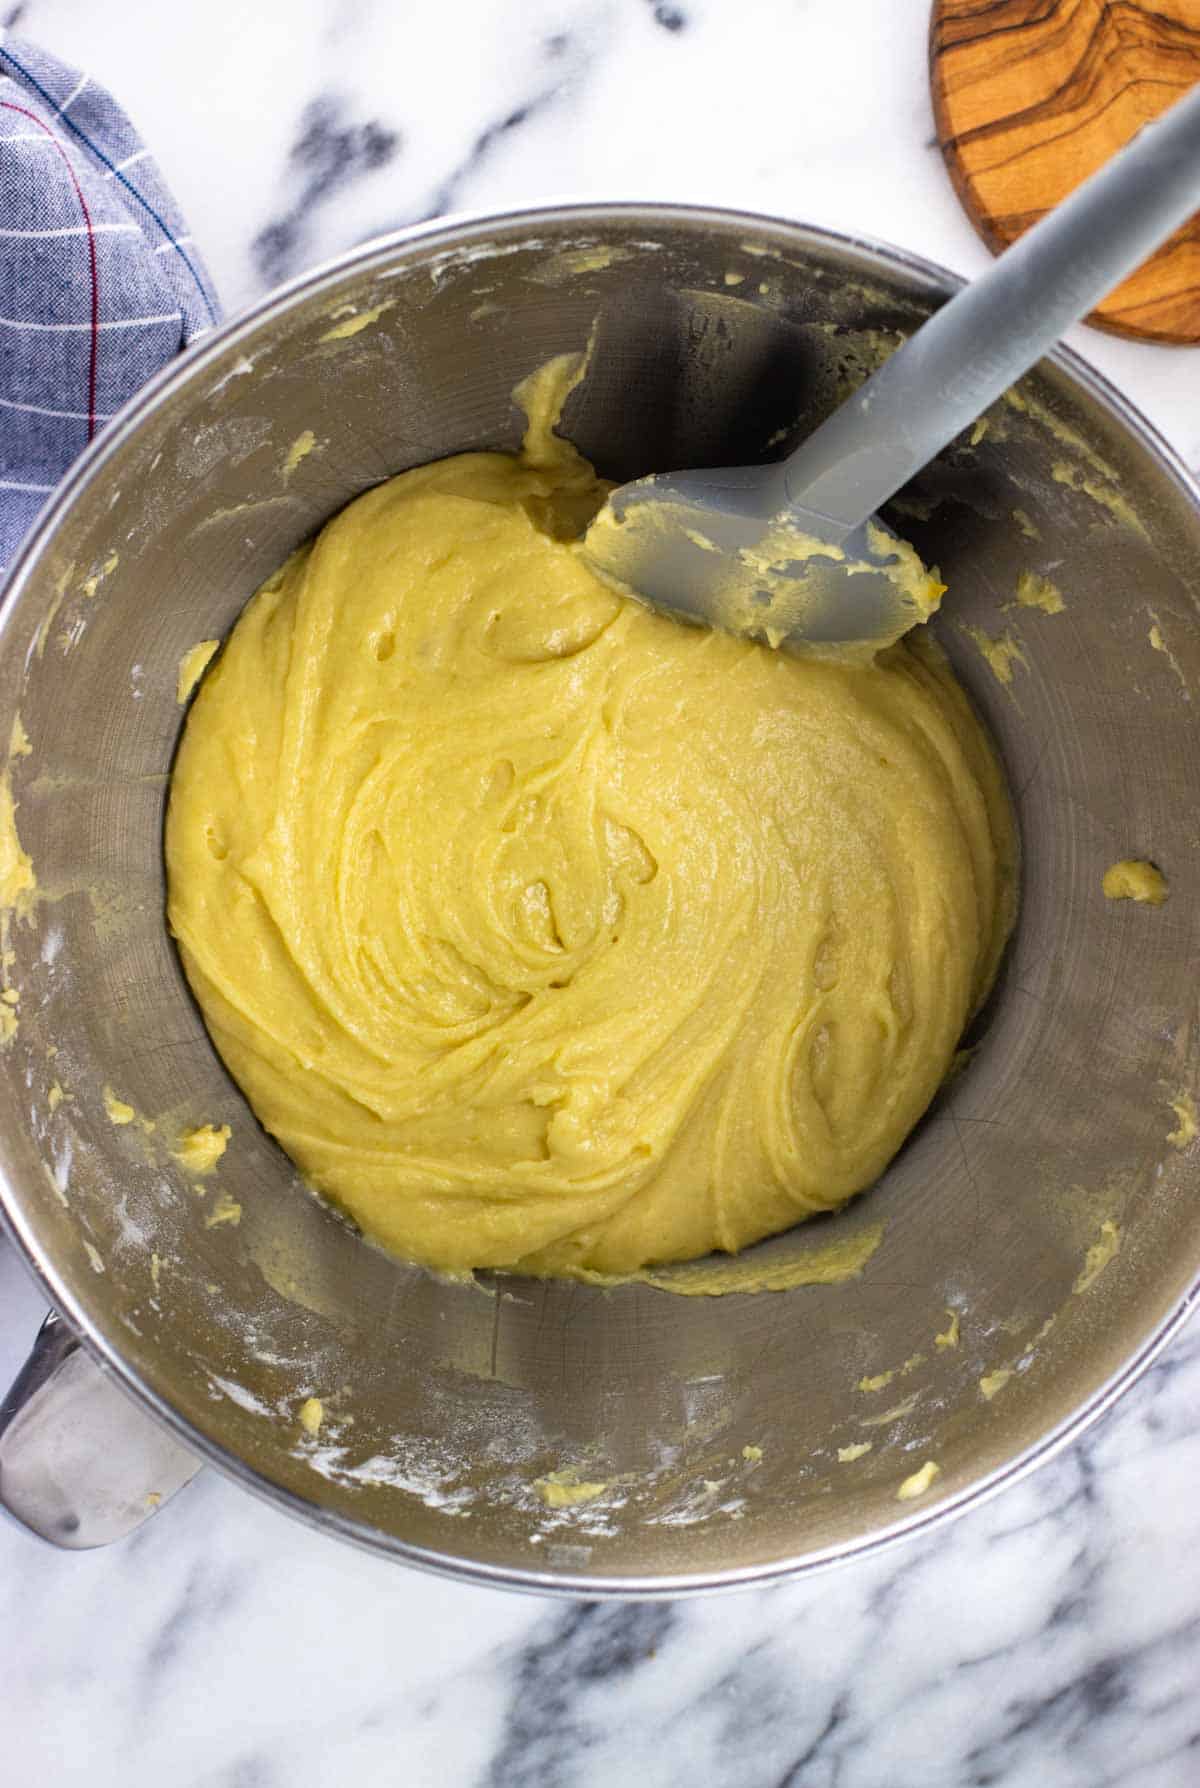
- Step 4: Mix the dry ingredients into the wet on low speed until just combined.
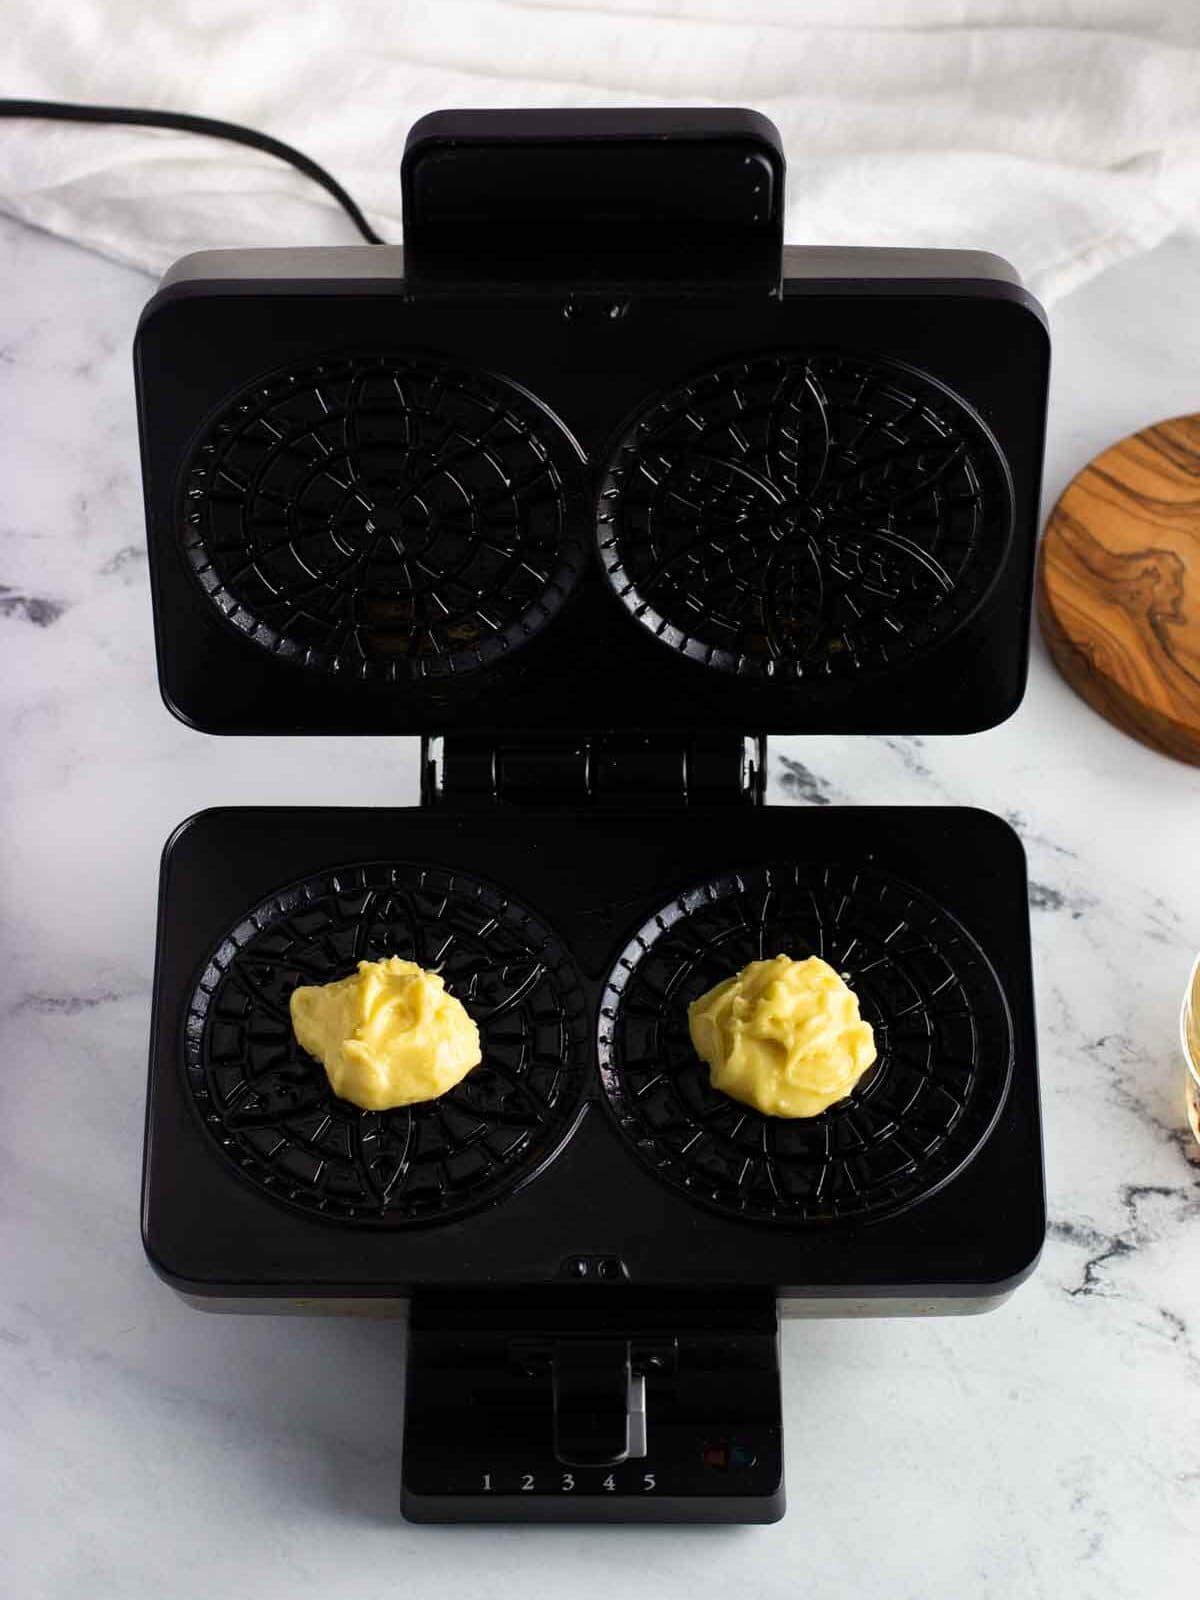
- Step 5: Once heated, scoop batter onto the grids and close and lock the lid.
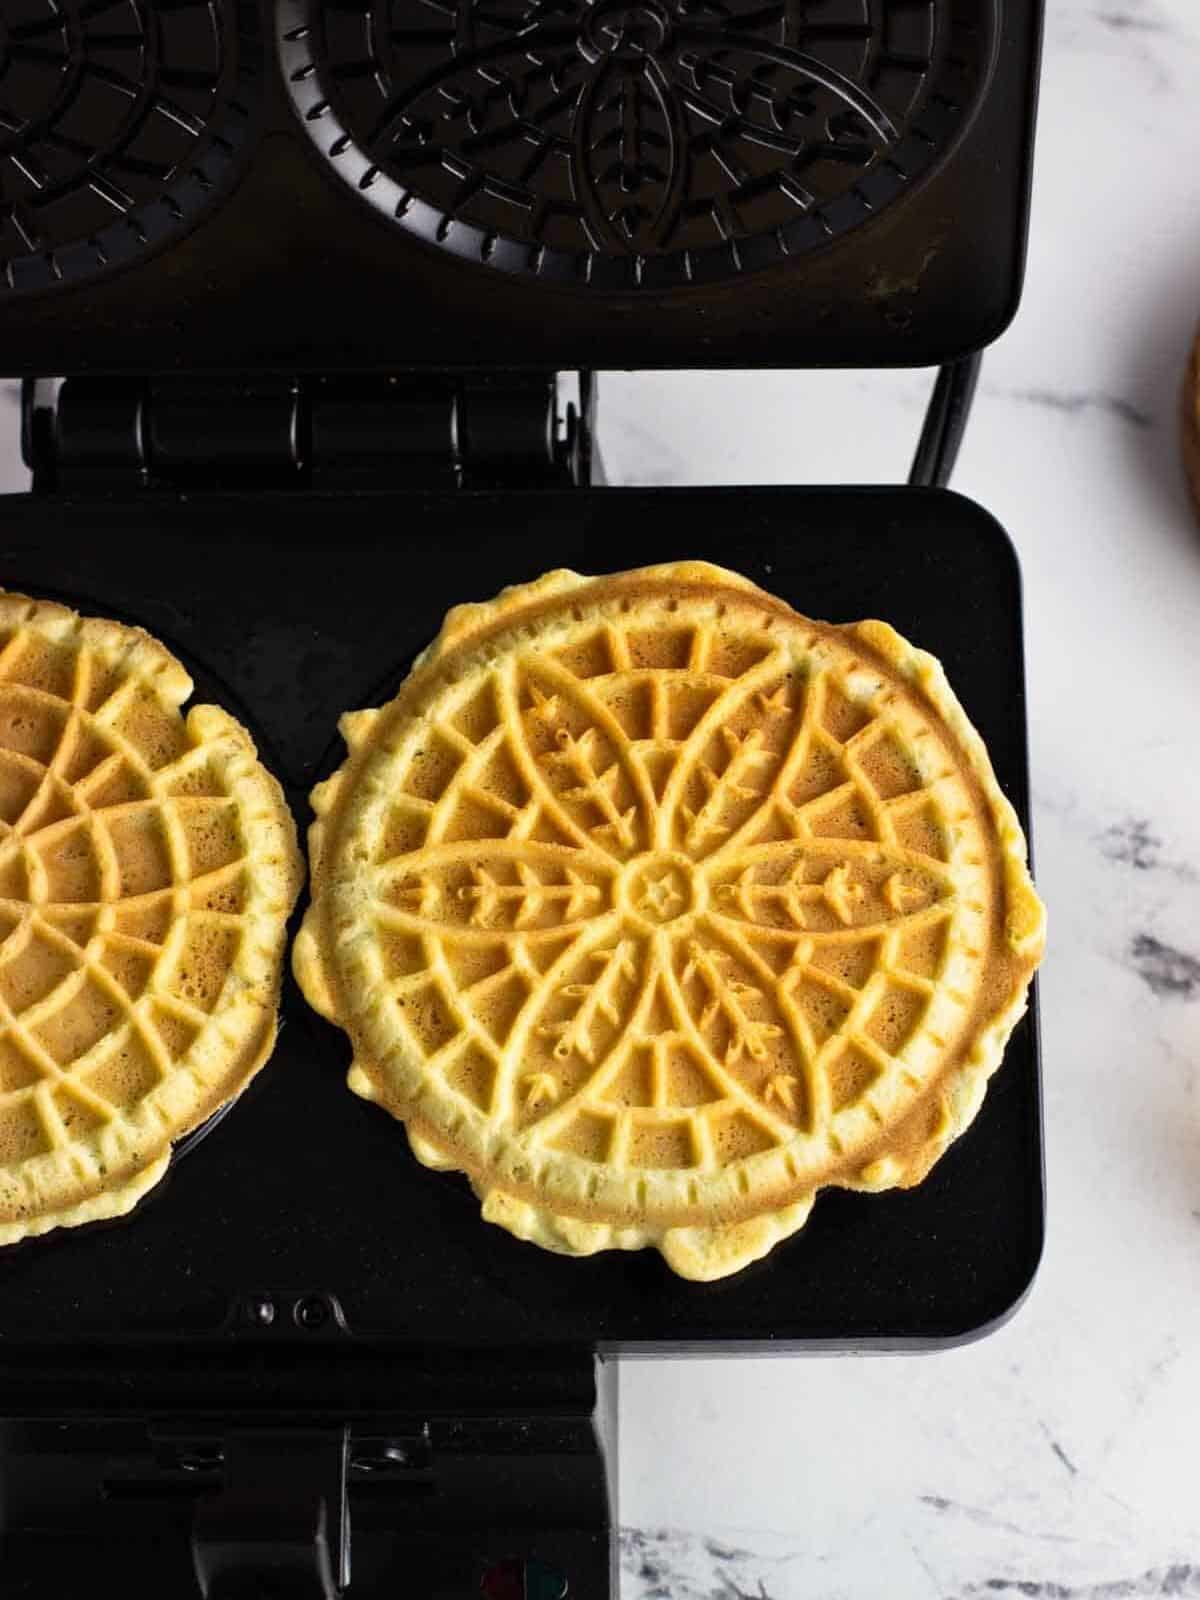
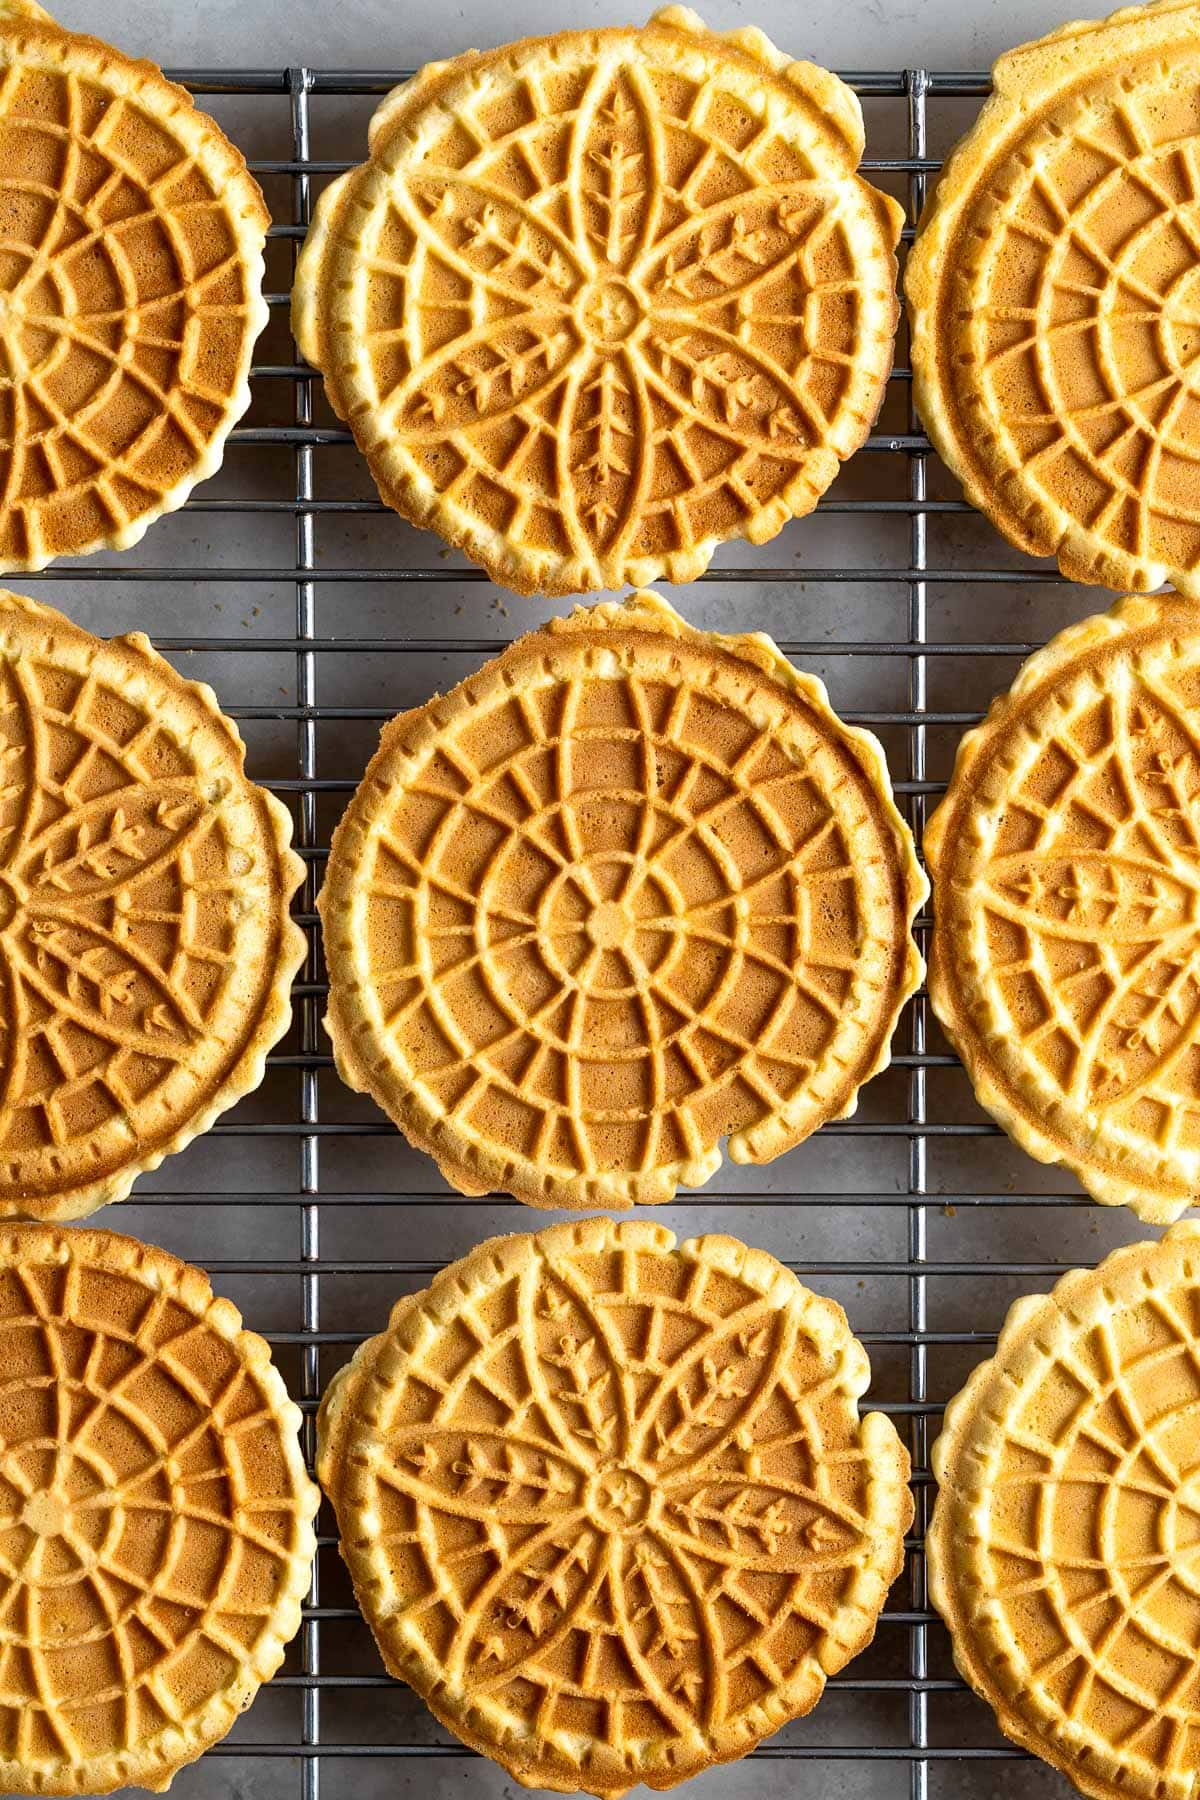
- Step 6: Cook until your preferred golden brown crispness and immediately place flat on rack to cool.
A Note on Cook Time
The amount of time your pizzelle need to cook will differ depending on your particular iron. For my electric, non-stick pizzelle press, I cook them for roughly 1 minute and 30 seconds for perfect middle of the road crispness. I'll do five seconds less for rollable pizzelle, and five seconds more for an extra golden-brown finish.
My press is 20 years old now and the doneness indicator lights are a little wonky, so I use a separate kitchen timer for precision.
Secrets to Perfect Pizzelle
When making pizzelle, there's an element of time sensitivity once the first scoops of batter hit the iron. Before beginning, it's helpful to keep the following in mind:
- Prep your pizzelle press, if needed. Even with non-stick grids I still brush them with vegetable oil before the first batch to prevent sticking. No one wants to have to clean burnt batter bits from those small crevices.
- Use restraint when portioning the batter. Try not to overload each grid with more than one tablespoon of batter. A heaping two-teaspoon capacity cookie scoop lands in the right vicinity for 4-inch pizzelle. Though you can trim any overhang beyond the design with kitchen shears if you'd prefer a neater appearance in the brief time the pizzelle are still soft and hot.
- Set up multiple wire cooling racks. You'll need more than one to fit a batch in a single layer. The airflow on all sides will prevent them from softening from any trapped steam or condensation.
- Cool them totally flat... Immediately place a cooked pizzelle on a rack and make sure no part of it is hanging over the edge. If so, they'll quickly harden that way and you'll have bent pizzelle.
- ...or be ready with a wooden dowel if you’re rolling them into cannoli-like shells or cones. You’ll only have the first few seconds they come off of the press (no exaggeration) to shape them before they harden.
- Store them separately. Otherwise pizzelle can absorb the moisture and flavor of softer cookies and soften themselves.
Frequently Asked Questions
I've made these pizzelle with anise seed to good results. Use five teaspoons of ground anise seed in place of the two teaspoons of anise extract. I haven't yet tried anise oil, but it's more concentrated than extract and will require a lot less.
I'd recommend against subbing in anise liqueur (Anisette, Sambuca) here. It's less concentrated in flavor in comparison to extract/oil and the amount you'd need for sufficient flavor would result in a batter that's too wet.
No, the waffle iron grooves will be way too deep to produce the thin crispness we know and love about pizzelle.
I wouldn't. Because they're thin and crisp, pizzelle are too dainty to hold up to the jostling they would get in the mail and would likely arrive broken.
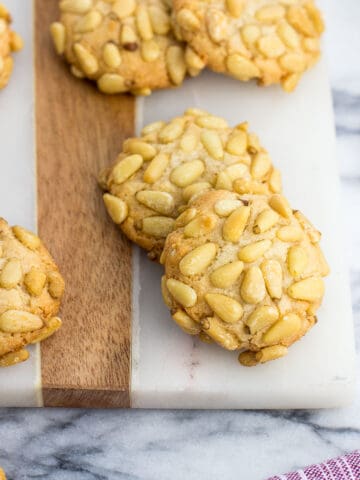
More Italian Cookies
Aficionados of Italian Christmas cookies know that pizzelle are only one of many delicious cookies popular around the holidays. If I'm not hovering over the struffoli, I'm eyeing up the cookie tray to figure out my next cookie move. Here are some of my personal favorites.


Did you enjoy this recipe? I’d love for you to leave a star rating and a comment review in the recipe card below!
Classic Italian Pizzelle
Ingredients
- ½ cup (113g) unsalted butter melted and slightly cooled
- 3 large eggs
- ¾ cup (150g) granulated sugar
- 2 teaspoons anise extract
- 1 teaspoon vanilla extract
- 1 ¾ cups (215g) all-purpose flour spooned-and-leveled
- 2 teaspoons baking powder aluminum-free recommended
- Pinch of salt
Instructions
- Melt the butter in the microwave, then let it sit for a minute or so to cool off some while you prep the rest of the ingredients.
- Add eggs and sugar to a mixing bowl and mix with an electric mixer on medium speed until smooth and thickened, about 1 minute.
- Adjust mixer speed to low and pour in the melted butter, anise extract, and vanilla extract. Continue to mix on low speed until the ingredients are evenly combined.
- In a separate bowl whisk together the flour, baking powder, and salt, then add it to the bowl with the wet ingredients. Mix until just combined. The batter will be fairly thick.
- Heat/prep your pizzelle press according to the manufacturer's instructions. For my non-stick electric press, I still brush the top and bottom grids with vegetable oil once before heating the press to eliminate any sticking issues. Before cooking also set out several wire racks on which to place the pizzelle after they come out of the press.
- Once heated, place a heaping two teaspoons of batter onto the center of each pizzelle grid (a small cookie scoop makes it efficient), then close and cook for 1 minute and 30 seconds, or until they reach your preferred doneness. Consider cooking them for 5 seconds less for rollable cannoli shells or 5 seconds more for a little extra golden brown coloring. The cook time (and amount of batter required) may vary depending upon your particular pizzelle press. Immediately remove cooked pizzelle and place flat on wire racks to cool completely. Do not stack or store pizzelle until they have completely cooled as the steam will cause them to soften.
- Once cooled, store Italian pizzelle in an air-tight container at room temperature where they should stay crisp for up to two weeks (or longer!). Dust with confectioners' sugar once cooled for serving.
Video
Notes
- This recipe was tested on an electric non-stick Cuisinart pizzelle press. As all types can differ, please follow the manufacturer's instructions and adjust the timing as needed for your particular press.
- Pizzelle harden very, very quickly once they're finished cooking. If planning to shape them, have everything right there and ready to shape within the first second or two they're off the press.
- Freezing Instructions: Wrap pizzelle gently in plastic wrap and place in an air-tight container or bag and freeze for several months. I recommend freezing cooked pizzelle versus freezing the dough, as it is a delicate recipe and the freezing/thawing process may impact how it handles.
- Make-Ahead Flexibility: Cover the bowl of prepared batter with plastic wrap and you can refrigerate it for several hours (I've tested up to 8 hours) before cooking the pizzelle if you need. I have found no difference in the crispness and end result whether cooking the batter immediately or refrigerating. The batter can be a little too firm once chilled, so you may need to let it warm up for a few minutes before cooking.
Would you like to save this?
Plus receive periodic recipe newsletter emails.
Nutrition
Nutritional information is provided as an estimate. As it can vary due to many factors (brands used, quantities, etc.), we cannot guarantee its accuracy.
Food Safety and Nutrition Disclaimer
Jody Hauersperger says
I e always used my Mom’s recipe that her mom also used. Well this year I was running low on eggs so I found this recipe and I have to say it’s even better than what I grew up on. I made a triple batch since they will be in cookie boxes everyone at my party gets and part of me wants to keep them all. Lol. This is now the only recipe I will ever use! Thank you for sharing this.
Madeline says
My yield was only 24 and they weren't overflowing, but it's still delicious and much better than the recipes that came with my iron!
Alyssa says
I'm glad you liked them, Madeline! Thanks for letting me know how it went.
Leslie Francisco says
I also have an electric that makes two at a time. Mine is about 10 years old and I have been making them every year. My family loves them but I use oil of anise. If you can’t find it, you can get it at any drugstore they use it to flava medication’s. You use a lot less because it is stronger than the anise that you buy.
Alyssa says
Good to know, Leslie! I would have never thought to look there. It's on my list to track it down. Believe it or not a large grocery chain near me doesn't even carry anise extract or anise seed, so I figured finding oil of anise in person was a lost cause!
Eleanor Matteson says
I am going to try your recipe.
Alyssa says
I hope you love it!