
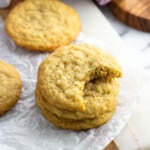
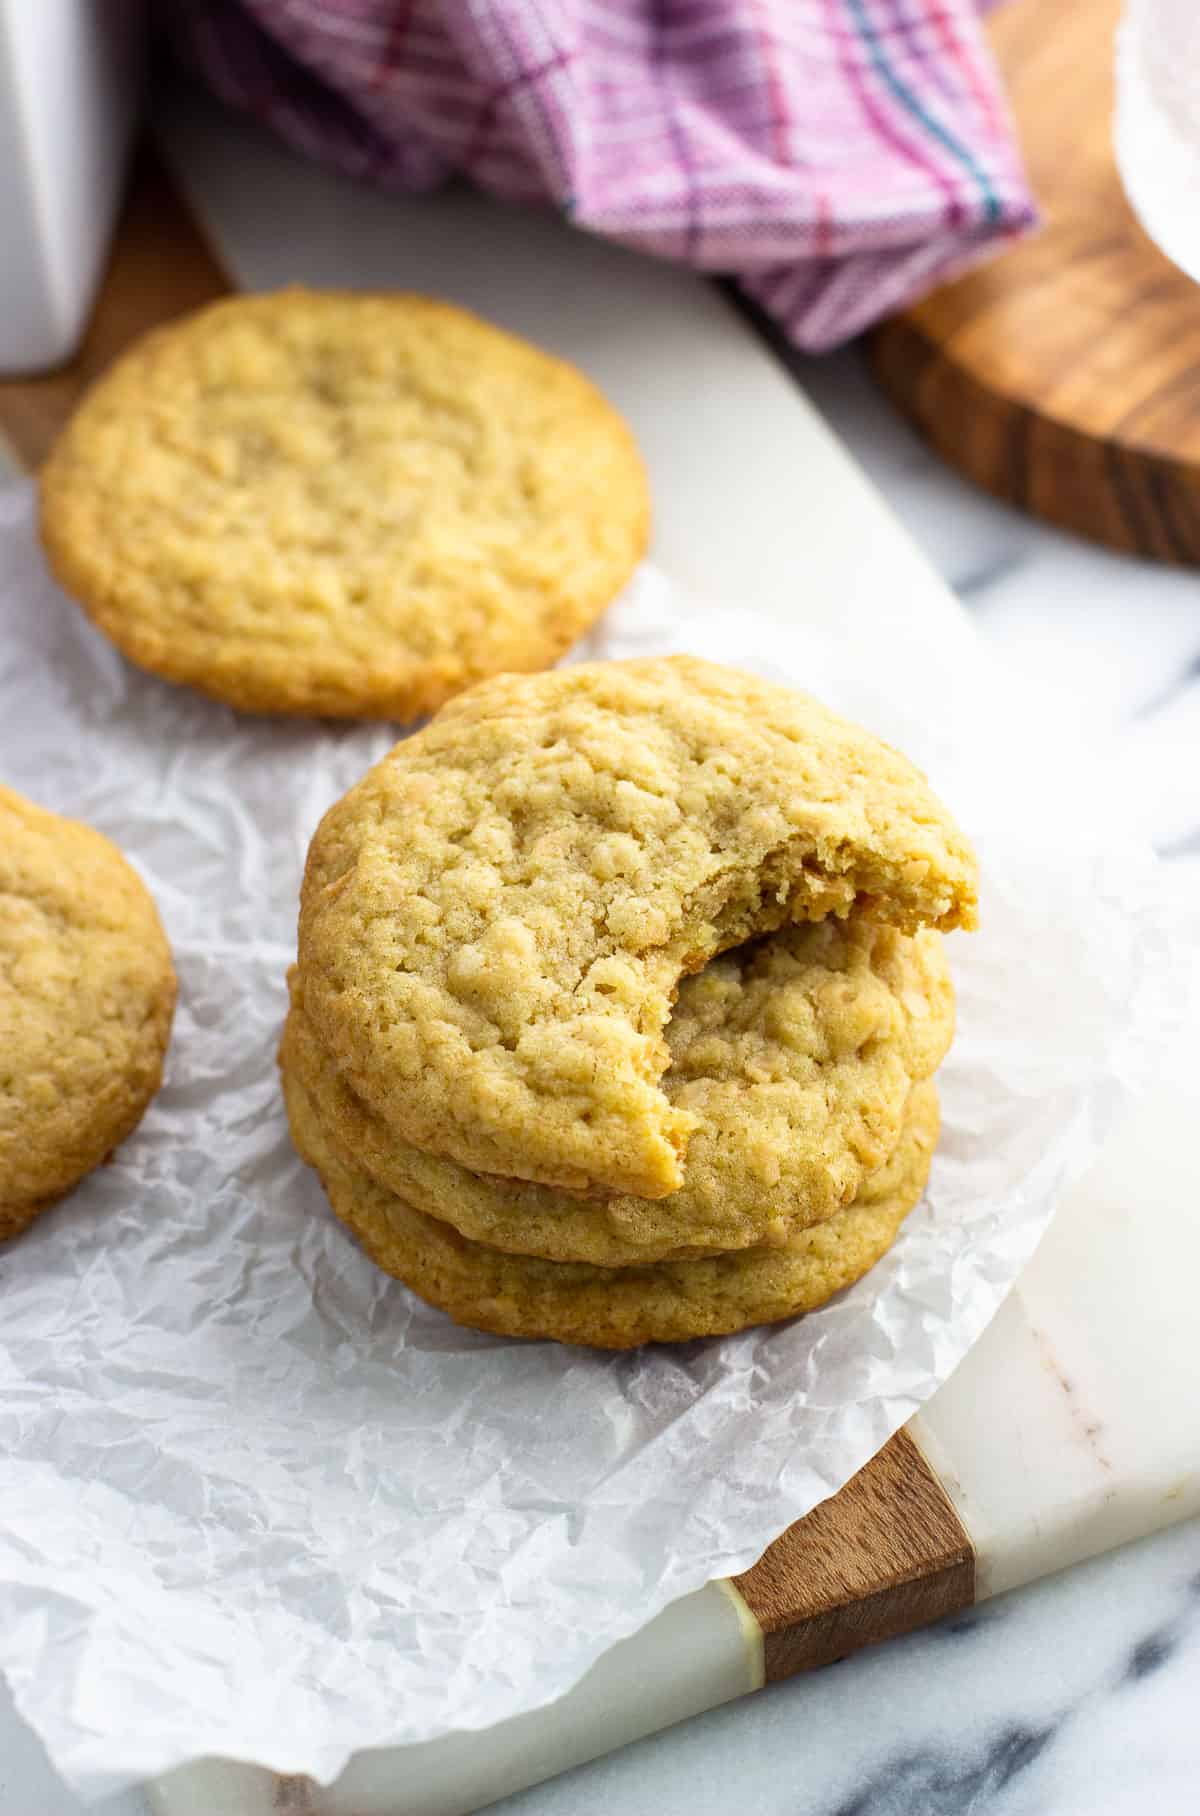
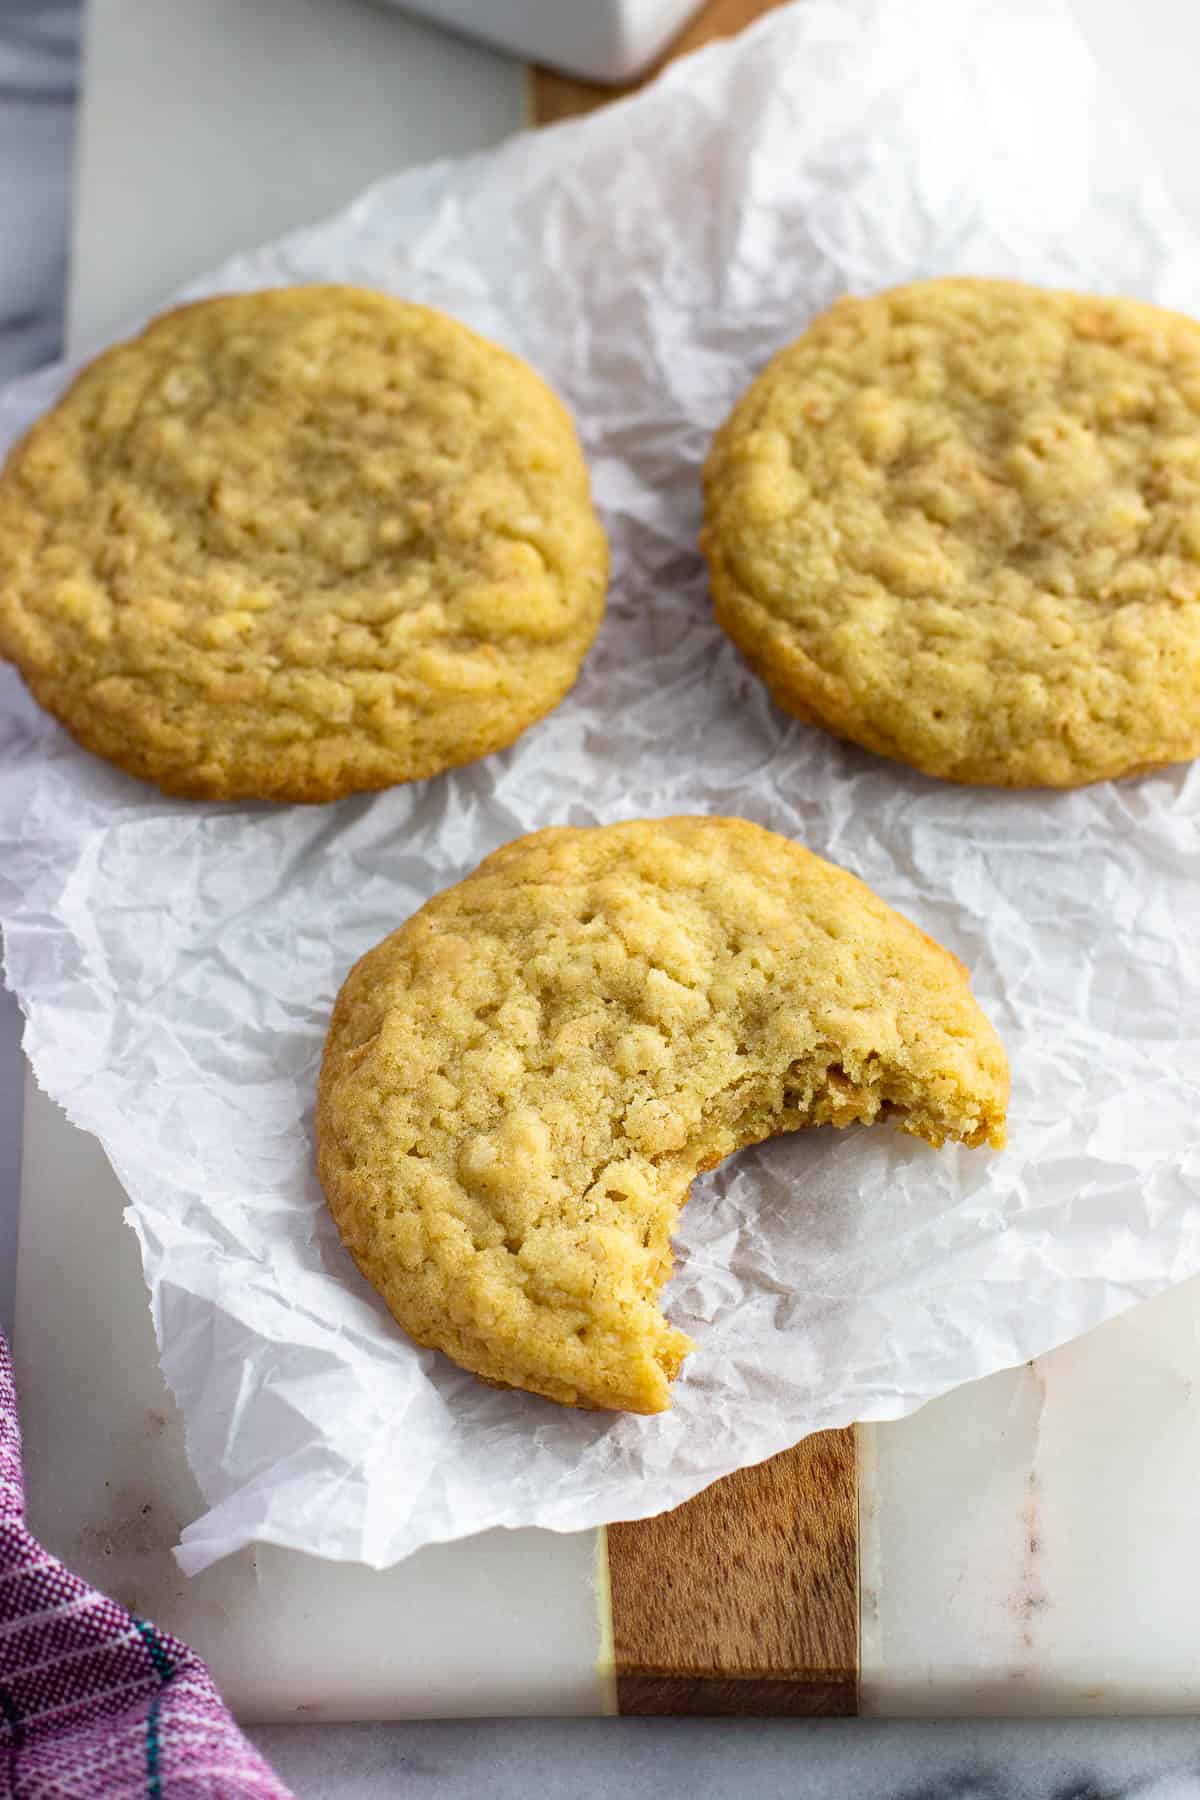
Switch up your cookie repertoire! These toasted coconut cookies have a deliciously chewy texture that stays perfectly for days. This recipe is very simple to make (no chilling) and yields a big flavor payoff in the end.
The first thing that comes to mind when I think of coconut cookies is a macaroon. With those beauties the majority of the dough is made up of flaked coconut, which get nice and toasty around the edges in the oven.
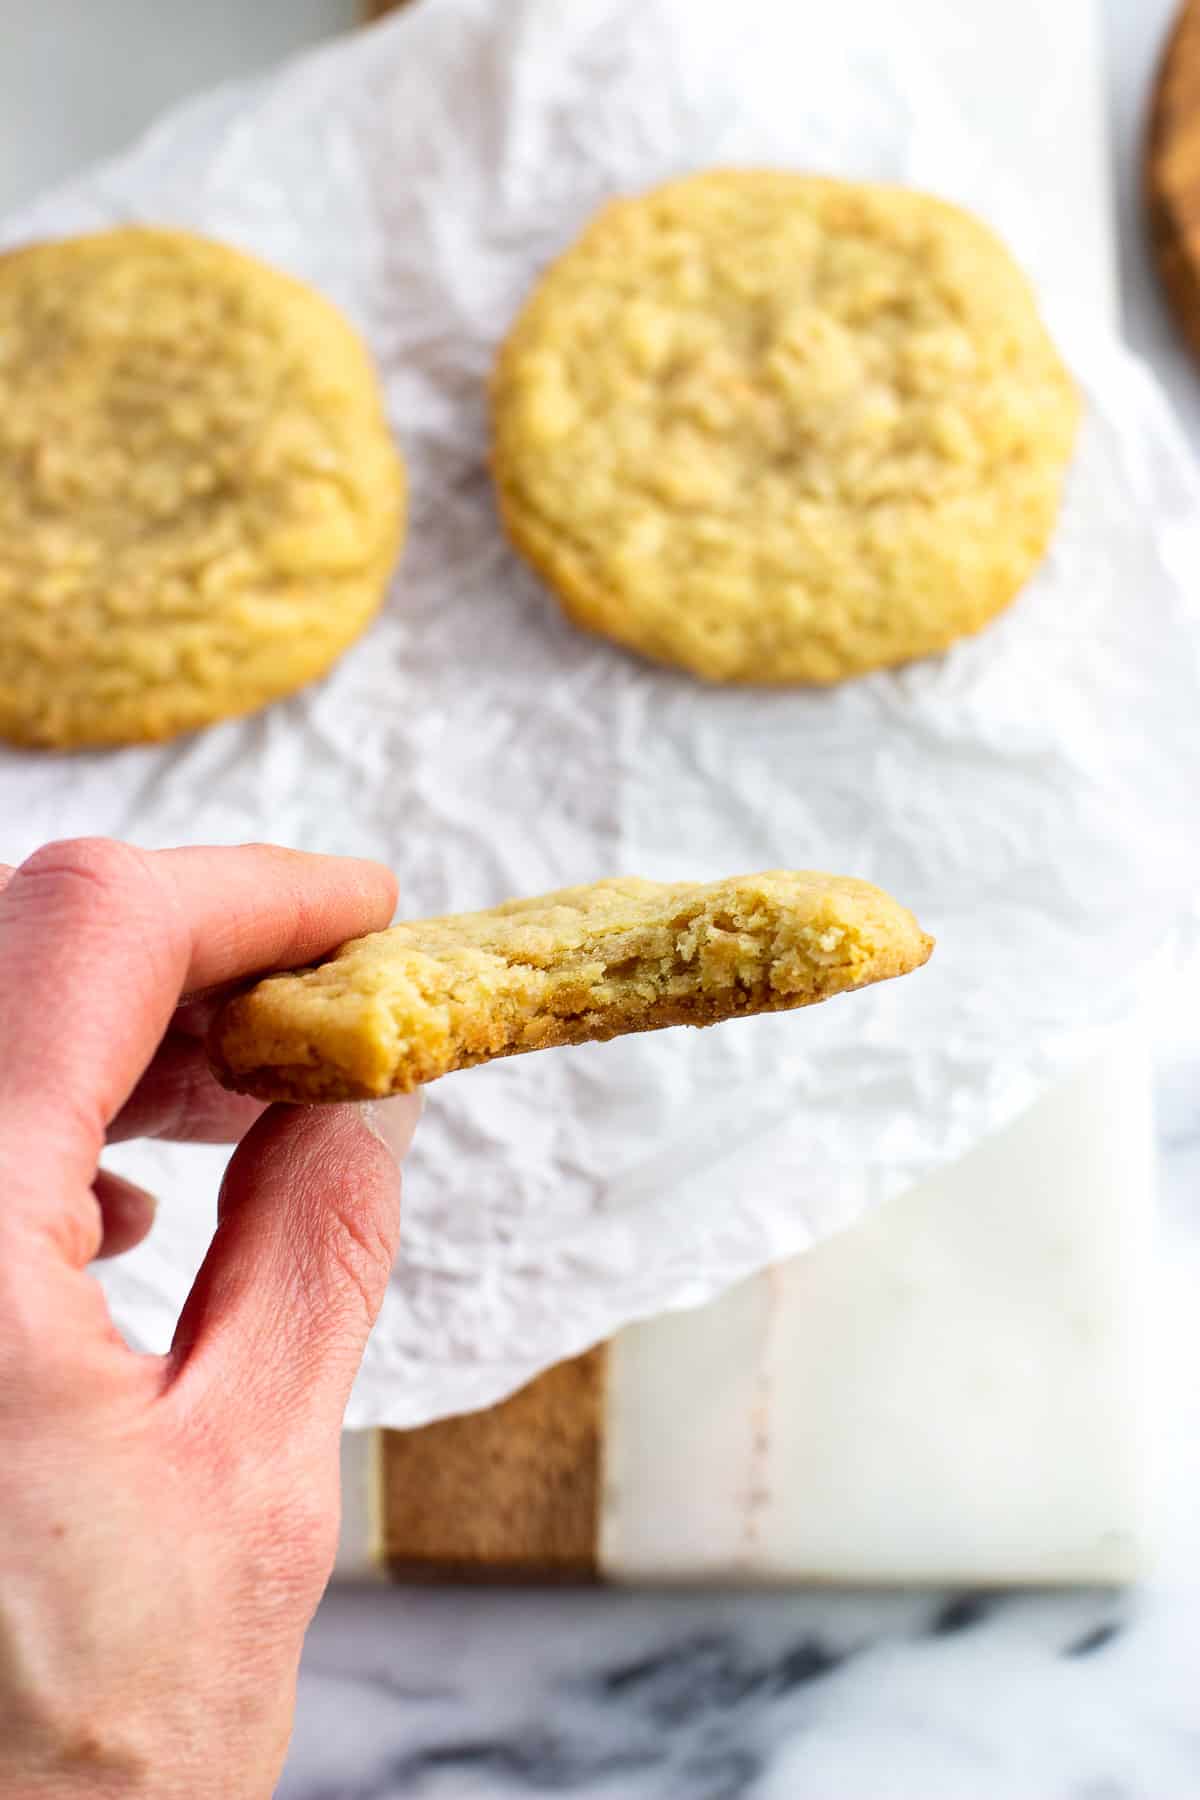
These toasted coconut cookies are decidedly different than macaroons. The dough is more like a chewy sugar cookie that's bursting with toasted coconut flavor throughout. Coconut fans are going to LOVE them.
I'm well-versed in freezing leftover cookies as a household of two, but my husband and I managed to get through the whole batch ourselves, which is a rare feat in nearly ten years of sharing cookie recipes on this site. They're that good.
Reasons to Love These Cookies
- The flavor. Toasting the coconut before mixing it into the cookie dough is an easy way to amplify the coconuttiness (not a word, but conveys my meaning). Then a small amount of almond extract acts as a deliciously complementary flavor note.
- No chilling. This dough doesn't need it.
- The texture. These coconut cookies stay chewy for DAYS. The last one will be just as satisfying as the first.
- The versatility. Many warm weather favorites (like, say, a piña colada mocktail) are coconut-focused, but these are excellent additions to holiday cookie assortments and trays. And they mail well, too. An all-year round favorite.
Recipe Ingredients
- Toasted Coconut: Toasting sweetened flaked coconut (also called snowflake coconut) is key in developing a rich coconut flavor. Mixing coconut flakes into the dough also helps add to the chewiness.
- Butter: Soften unsalted butter to room temperature before beginning for a proper texture for creaming with the sugars.
- Sugars: A combination of granulated and brown sugars provides the best of both worlds: crisper edges from the white sugar and extra chewiness from the brown.
- Almond Extract: Not a standard cookie flavoring, but the unmistakable sweet almond flavor is a perfect foil for the coconut without overpowering.
Step-by-Step Instructions
Before Beginning - Toast your coconut, either on the stovetop or in the oven. Full instructions are featured in the recipe card below.
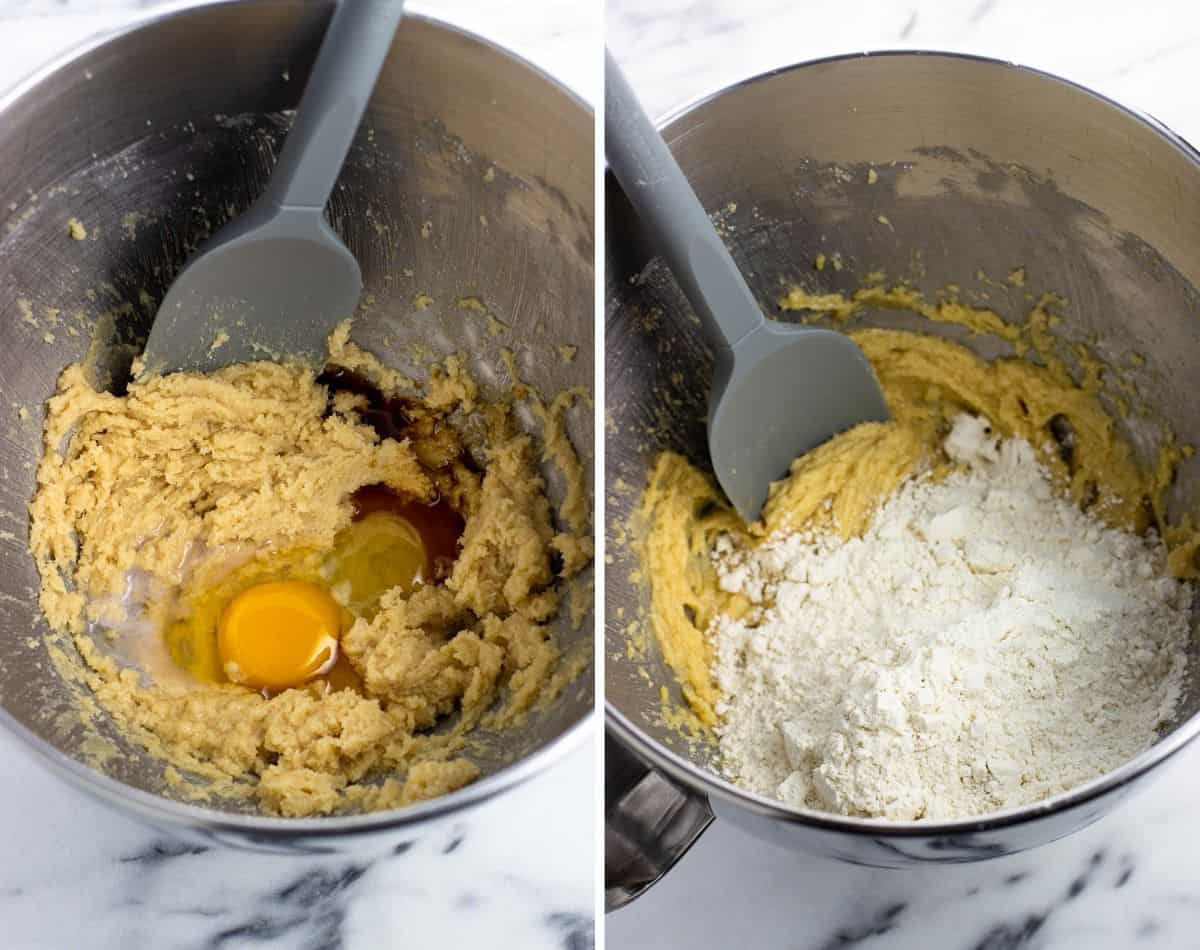
- Wet Ingredients - Mix together the softened butter and sugars using an electric mixer for a few minutes until light and creamy. Then beat in the egg and extracts.
- Dry Ingredients - Separately whisk together the flour, baking soda, baking powder, and salt, then mix into the wet ingredients until just combined.
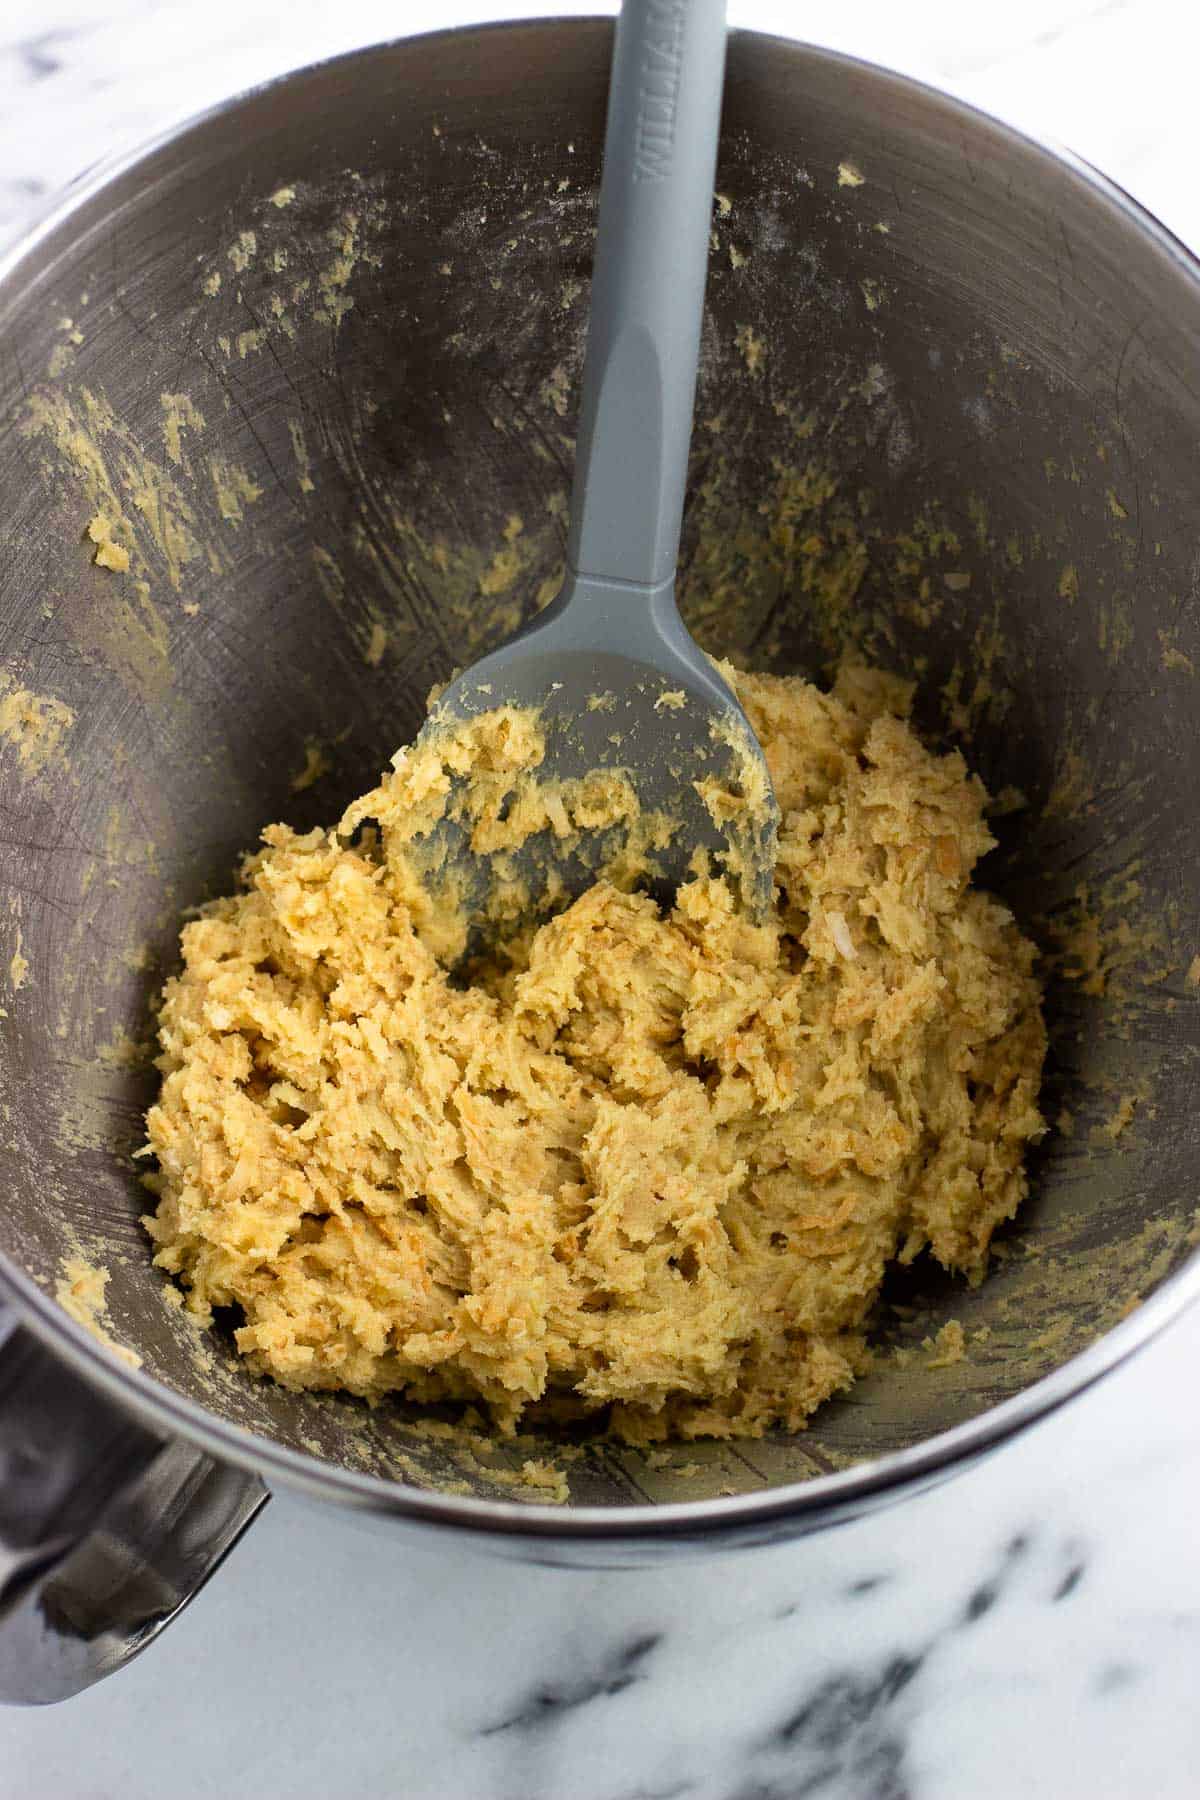
- Fold in Coconut - Add the toasted coconut to the cookie dough and stir until combined evenly.
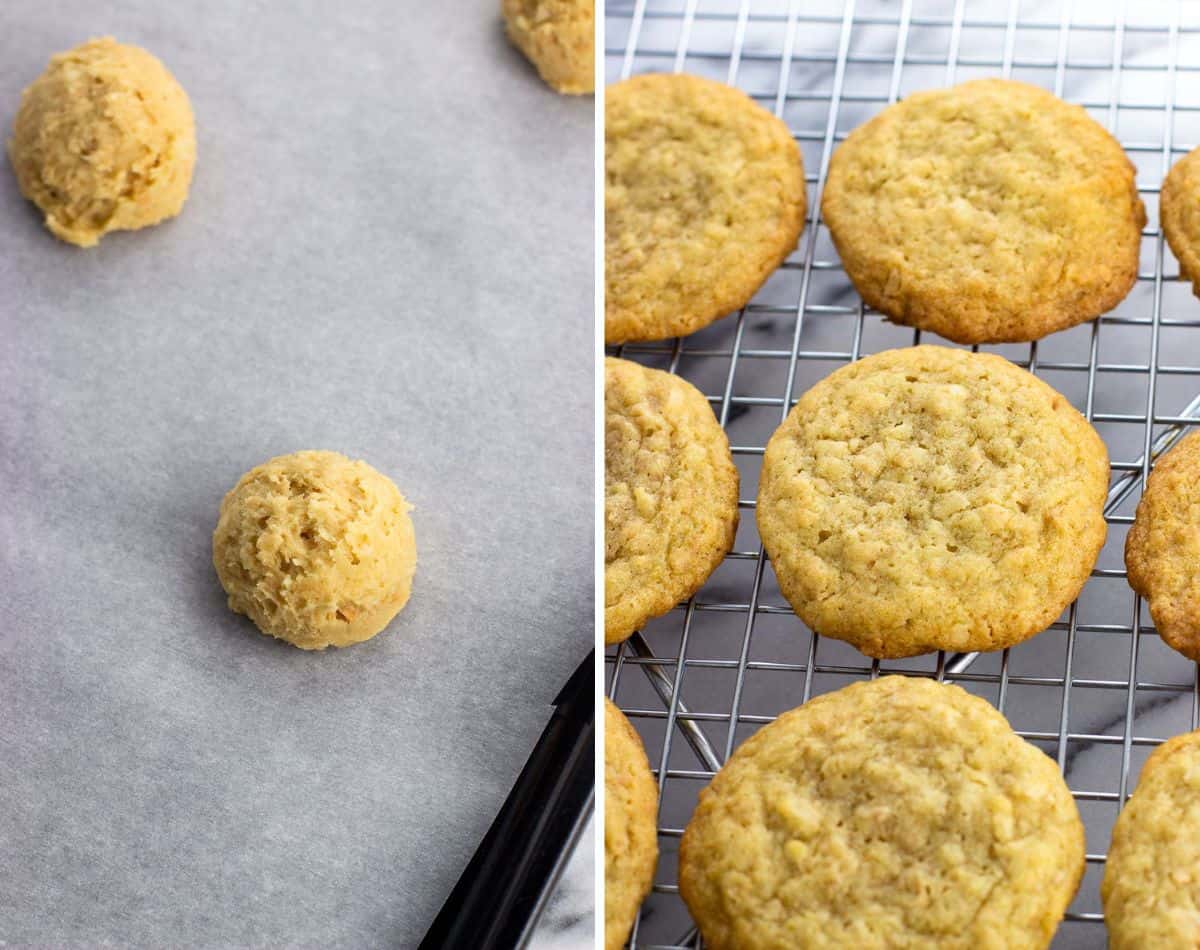
- Shape - Scoop one-and-a-half tablespoons of dough and place on parchment-lined cookie sheets at least three inches apart from one another.
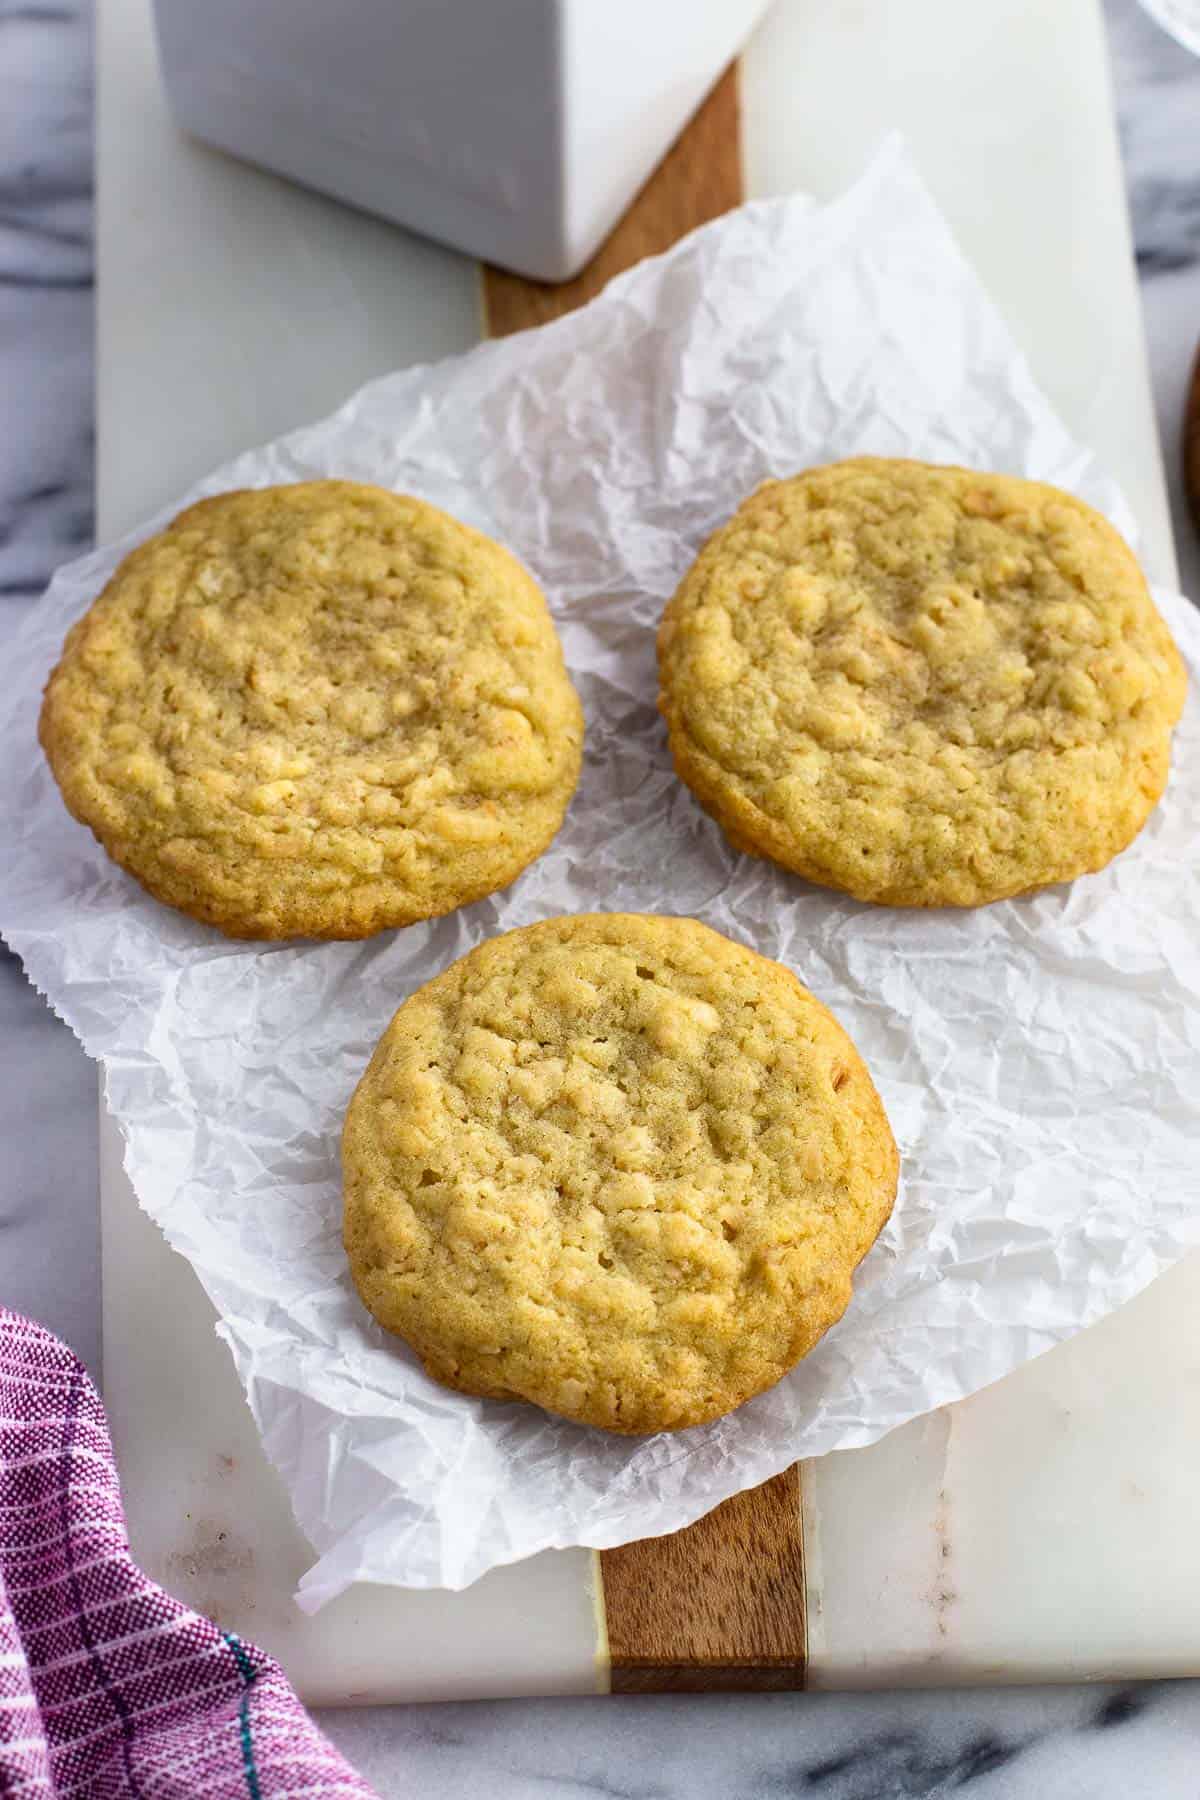
- Bake - Bake at 350°F (177°C) for 10-12 minutes, or until the edges are turning just golden-brown and the tops have set. Cool on the cookie sheet for 5 minutes, then transfer to a wire rack to cool completely.
Recipe Tips and Tricks
- Make-ahead tip. You can toast the coconut flakes ahead of time to streamline day-of baking. Once cooled completely, store them in a sealable bag or air-tight container at room temperature for up to several days.
- Less mess. Using a cookie scoop is all but a must in efficiently producing evenly-shaped balls from cookie dough you need to scoop.
- Dough ball size. I would not go much larger than using a one-and-a-half to two tablespoon capacity cookie scoop for these toasted coconut cookies. They naturally will spread out as they bake as they have a chewy, softened-butter based dough (not dry at all!), and larger cookies may spread too much to fit many on a pan.
- Cookie sheet options. In my experience, darker metal cookie sheets produce taller cookies that don't spread as much, and are a good option to use here. This is because a darker pan absorbs heat more quickly the oven.
More Coconut Recipes

Note: The original photos and recipe itself in this post were updated in May 2023 from its initial publish date in 2018. I have tweaked some of the ingredient measurements to be less finicky (10 Tablespoons of butter, "plus 2 Tablespoons" of flour, etc.), and have bumped up the sweetened coconut (even more coconut flavor!) subsequently decreasing the granulated sugar to balance.

Did you enjoy this recipe? I’d love for you to leave a star rating and a comment review in the recipe card below!

Chewy Toasted Coconut Cookies
Ingredients
- 1 cup sweetened coconut flakes toasted
- ½ cup unsalted butter softened
- ½ cup brown sugar
- ⅓ cup granulated sugar
- 1 large egg
- 1 teaspoon vanilla extract
- ½ teaspoon almond extract
- 1 ⅓ cups all-purpose flour
- ½ teaspoon baking soda
- ¼ teaspoon baking powder
- ¼ teaspoon salt
Instructions
To Toast Coconut:
- Preheat the oven to 350°F (177°C). Place sweetened flaked coconut on an ungreased rimmed baking sheet in a single layer and toast in the oven for 5-10 minutes, or until the coconut just becomes fragrant and turns golden-brown. Keep a close eye because it can go from perfectly toasty to burnt quickly.
- Remove the baking sheet from the oven and immediately transfer coconut to a plate or bowl to stop it from toasting on the hot pan. Once cooled, store in an air-tight container if not using right away.
To Make Cookies:
- Heat oven to 350°F and line a baking sheet or two with parchment paper.
- Add softened butter, brown sugar, and granulated sugar to a large mixing bowl and cream with an electric mixer on medium speed for 2-3 minutes, or until light and creamy.
- Add the egg, vanilla extract, and almond extract and mix in until well combined.
- In a separate bowl, whisk together flour, baking soda, baking powder, and salt. Pour into the bowl of wet ingredients and beat until just combined. Stir in the toasted coconut flakes.
- Using a 1-½ Tablespoon capacity cookie scoop, scoop cookies onto parchment-lined baking sheet at least three inches apart from one another. Bake for 10-12 minutes, or until the bottoms are just golden-brown and the tops have set.
- Let the cookies sit for 5 minutes on the baking sheet, then carefully transfer them to a wire rack to cool completely before serving or storing.
Notes
- The coconut can be toasted up to a few days ahead of time, cooled, then stored in an air-tight bag or container until ready to use.
- These coconut cookies will spread on their own, so there's no need to flatten then prior to baking.
- A darker metal cookie sheet absorbs heat quicker and will help your cookies spread less than a lighter metal pan.
- A two-tablespoon capacity scoop can be used, too. Give the cookies a little extra room to spread on the pan, and check to see if they might need an additional minute or two of bake time.
- Once cooled, store in an air-tight container at room temperature for up to a week. These cookies can also be frozen in the same manner.
Would you like to save this?
Plus receive periodic recipe newsletter emails.
Nutrition
Nutritional information is provided as an estimate. As it can vary due to many factors (brands used, quantities, etc.), we cannot guarantee its accuracy.
Food Safety and Nutrition Disclaimer
Carol says
Excellent recipe and lovely photos too! Makes you wonder why anyone would ever buy those expensive store bought cookies when you can enjoy these made at home. I could eat these forever.
kathy connolly says
My new favorite cookie! Easy to make. Made a few cookies with craisins to taste test. Gives an oatmeal raisin vibe. Toast extra coconut to sprinkle on top or for later use. Thank you!
Alyssa says
You're very welcome, Kathy! I'm so glad you love this recipe - great idea with the craisins + extra coconut topping. I'll have to try that out next time!
Allynne says
I had to try this recipe as I love everything with toasted coconut. These cookies were excellent. The dough was easy to work with and yielded 24 cookies for me using a 1 tablespoon scoop. They have excellent flavor and perfect texture.
Alyssa says
I'm so glad you liked these cookies! Thank you for letting me know your experience with the recipe. 🙂
Ruth Boss says
I accidentally left a tray in the oven too long and they were golden brown on the top. Chewy on the outside and tender in the middle. I actually prefer the ones that were in longer. It’s a tasty cookie and easy to make.
Ps. I have no idea how much longer I left them in.
Alyssa says
I'm so glad you like them, Ruth. Thank you for letting me know how they went!
Lynn says
You should roll the dough into a log and put it into the refrigerator for an hour, then you can easily cut them instead of making a mess with a scoop or spoon. It's much easier and you can get the same size cookie. Thanks for the recipe. Enjoyed them.
Candi says
I just made these and they are a wonderfully buttery cookie. I bake a LOT of cookies, and these really are simple and delicious. I only used vanilla extract bc I wanted to see how they were as is without something possibly over powering. I love almond extract, too! I also think a small amount of lemon would be delicious in these. Definitely putting this recipe in my lineup! Thank you!
Alyssa says
So glad you liked them, Candi! You're very welcome. 🙂 And yes - lemon sounds delicious. I'll have to try that next time.
Margaret Eberl says
Can I use unsweetened coconut? That is what I have on hand.
Alyssa says
Hi Margaret, I'm not sure how that would turn out. Besides the sweetness factor, unsweetened coconut is drier and may negatively impact the texture.
Tessa says
Can you substitute coconut flour for the AP flour?
Alyssa says
Hi Tessa, I don't think that will work without some recipe rework. I haven't worked with it much at all, but I know coconut flour is very absorbent and may need extra liquid added to a recipe that typically uses AP flour to work.
Darlene H says
can you tell me the best way to store these cookies, and how long they last?
Thank you.
Alyssa says
Hi Darlene, I store them at room temperature in an air-tight container or a plastic bag with as much air pressed out of the bag as you can. They should last for about a week that way, or maybe even longer.