
Knowing how to grill pizza is a real treat! Simple, thin crust pizza dough develops a CRISP bottom when cooked right on the grill. No special tools required.

You know when you love something and think it couldn't possibly get any better? But then it does? That's been happening a lot around here lately. (Not that I'm complaining.)
Grilled Pizza
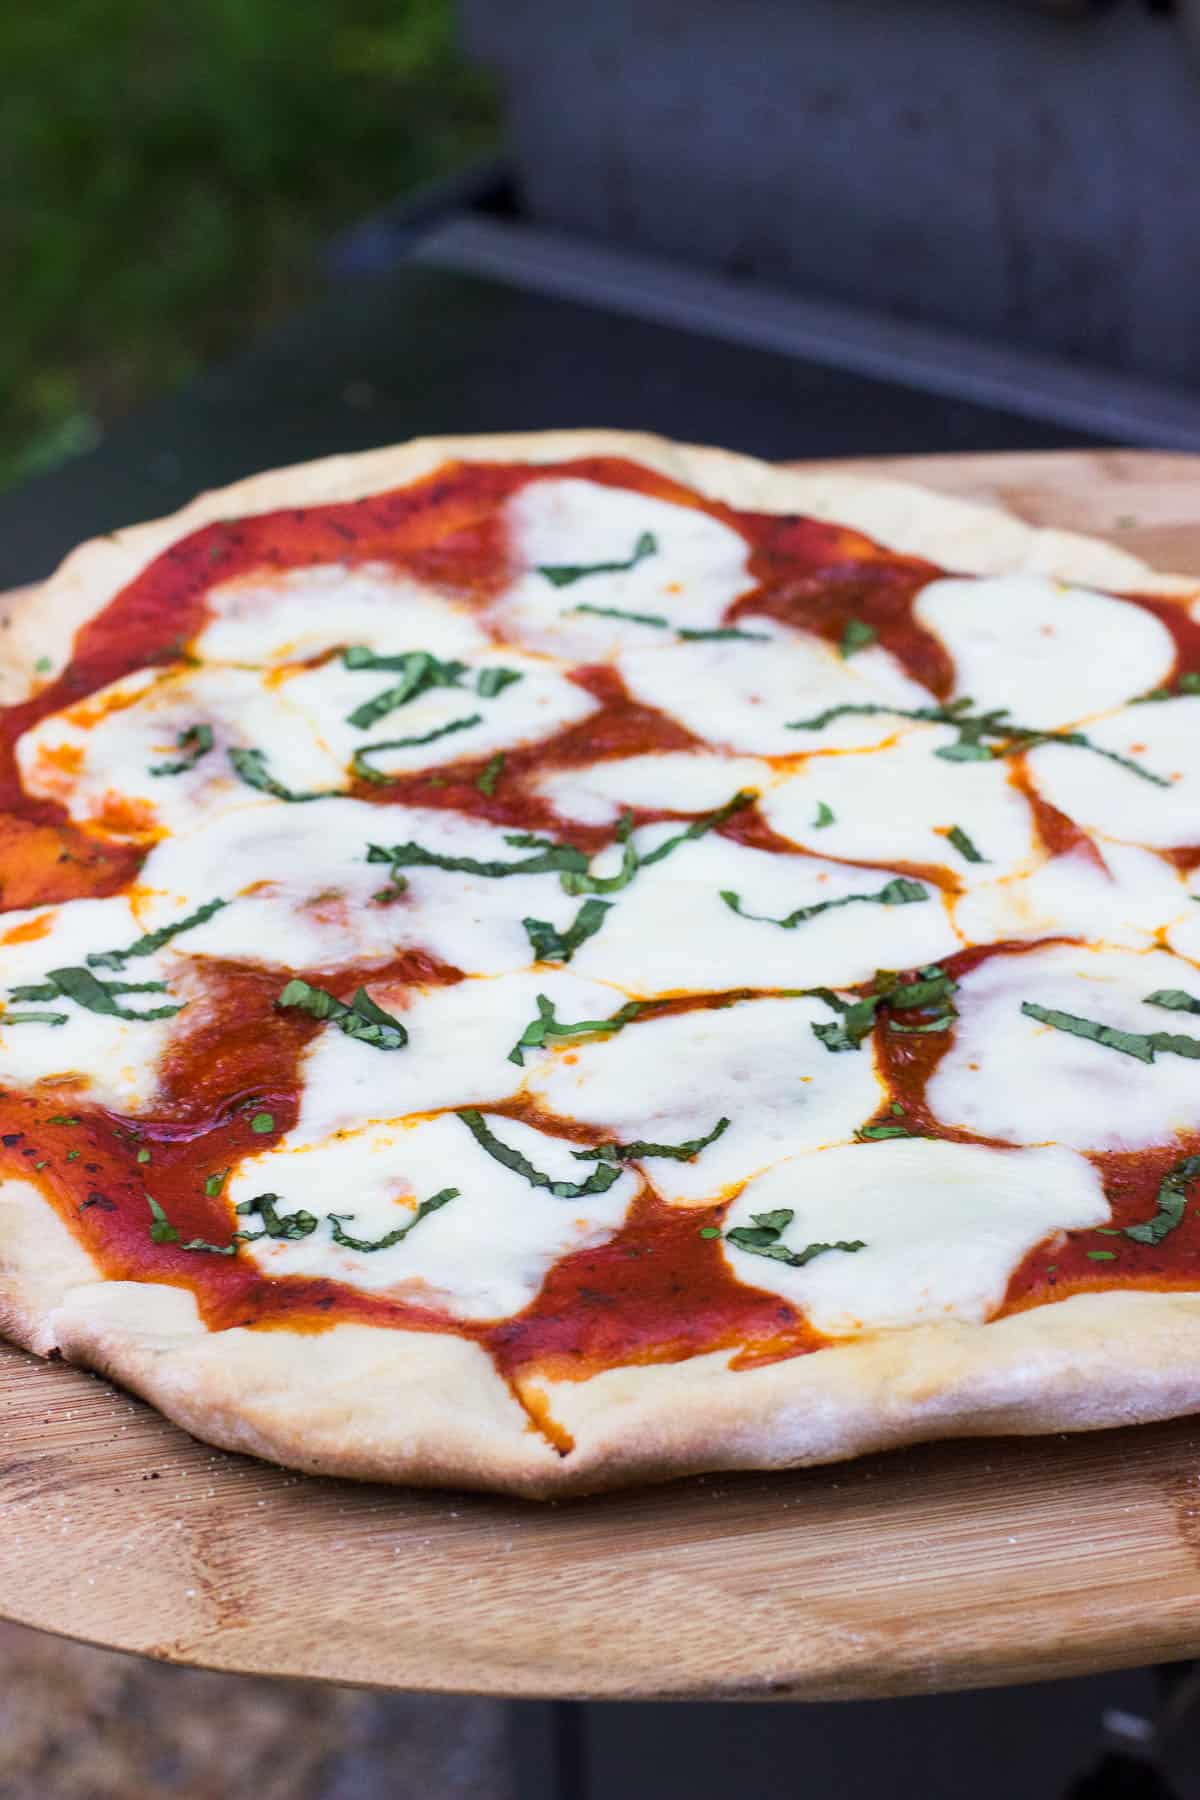
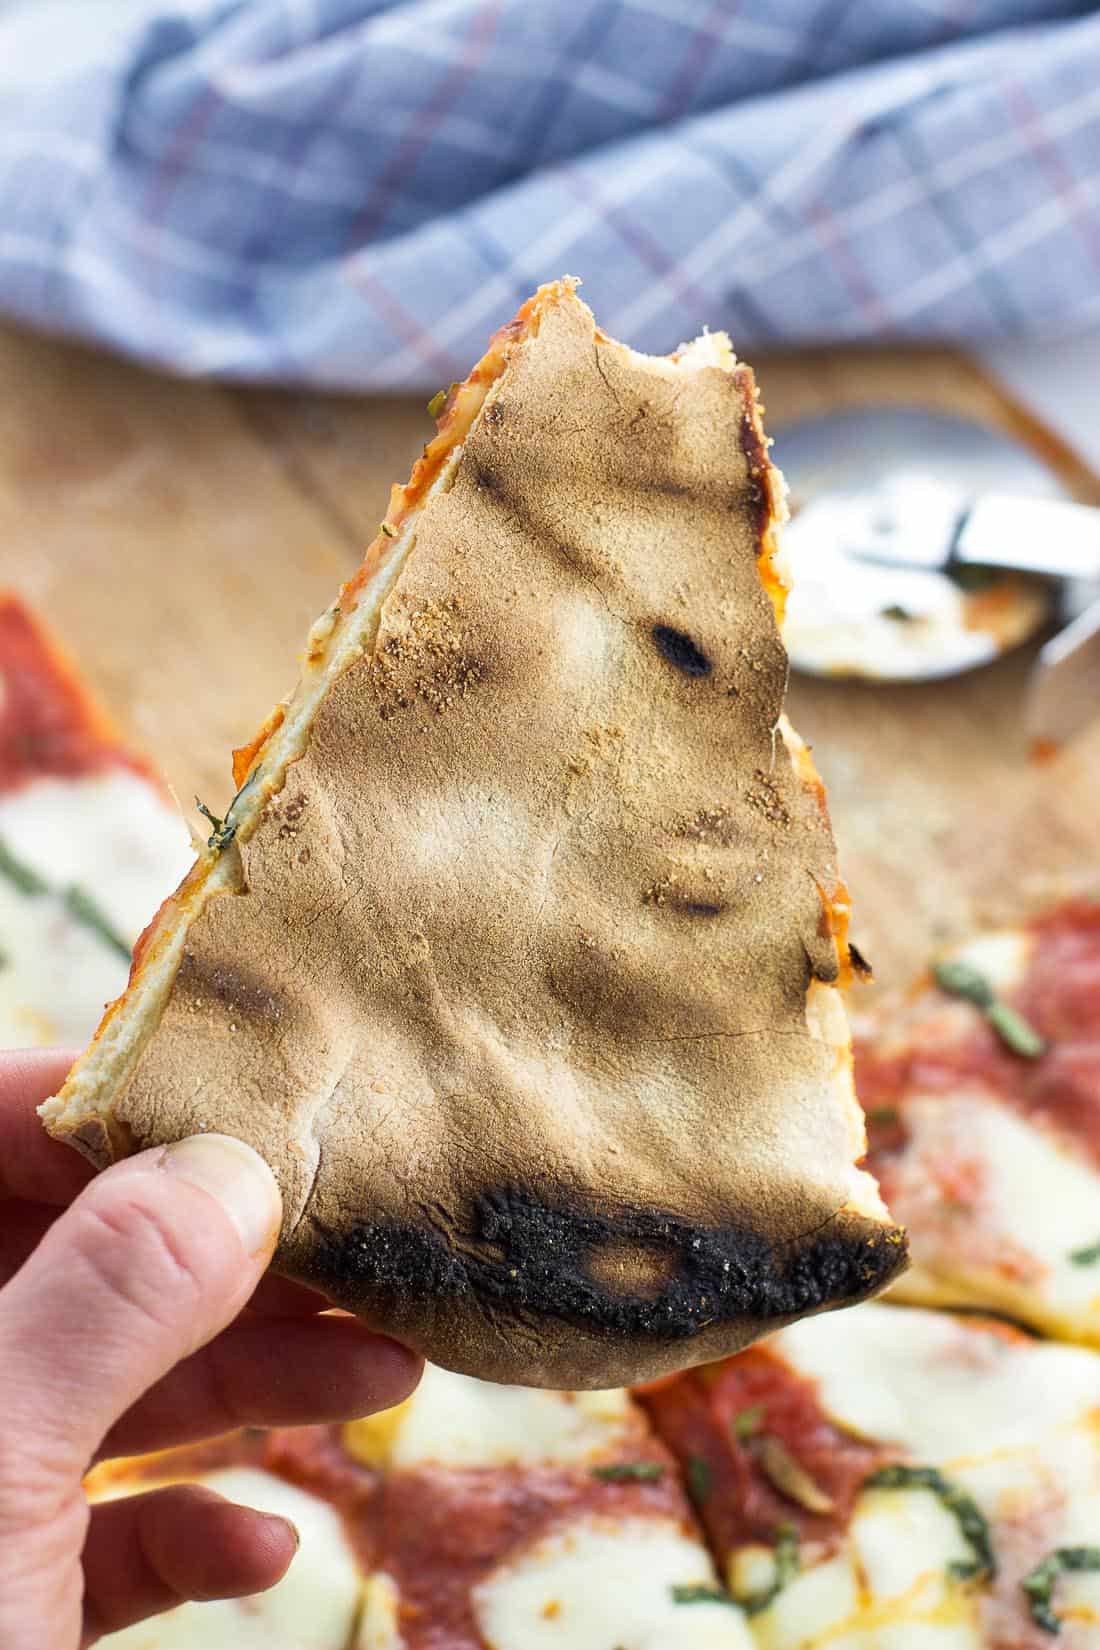
It goes without saying that homemade pizza is a staple year-round, but cooking it on the grill in the warmer months is extra special. The crust becomes SO crisp with little semi-charred spots that may just be my favorite part.
Another bonus: you won't have to turn the oven on, which is HUGE here in the south where summer and its humidity starts in the spring and ends in the fall.
Recipe Ingredients
This recipe-slash-tutorial has a ton of wiggle room, as pizza recipes usually do. The big ingredient to talk about is the pizza crust.
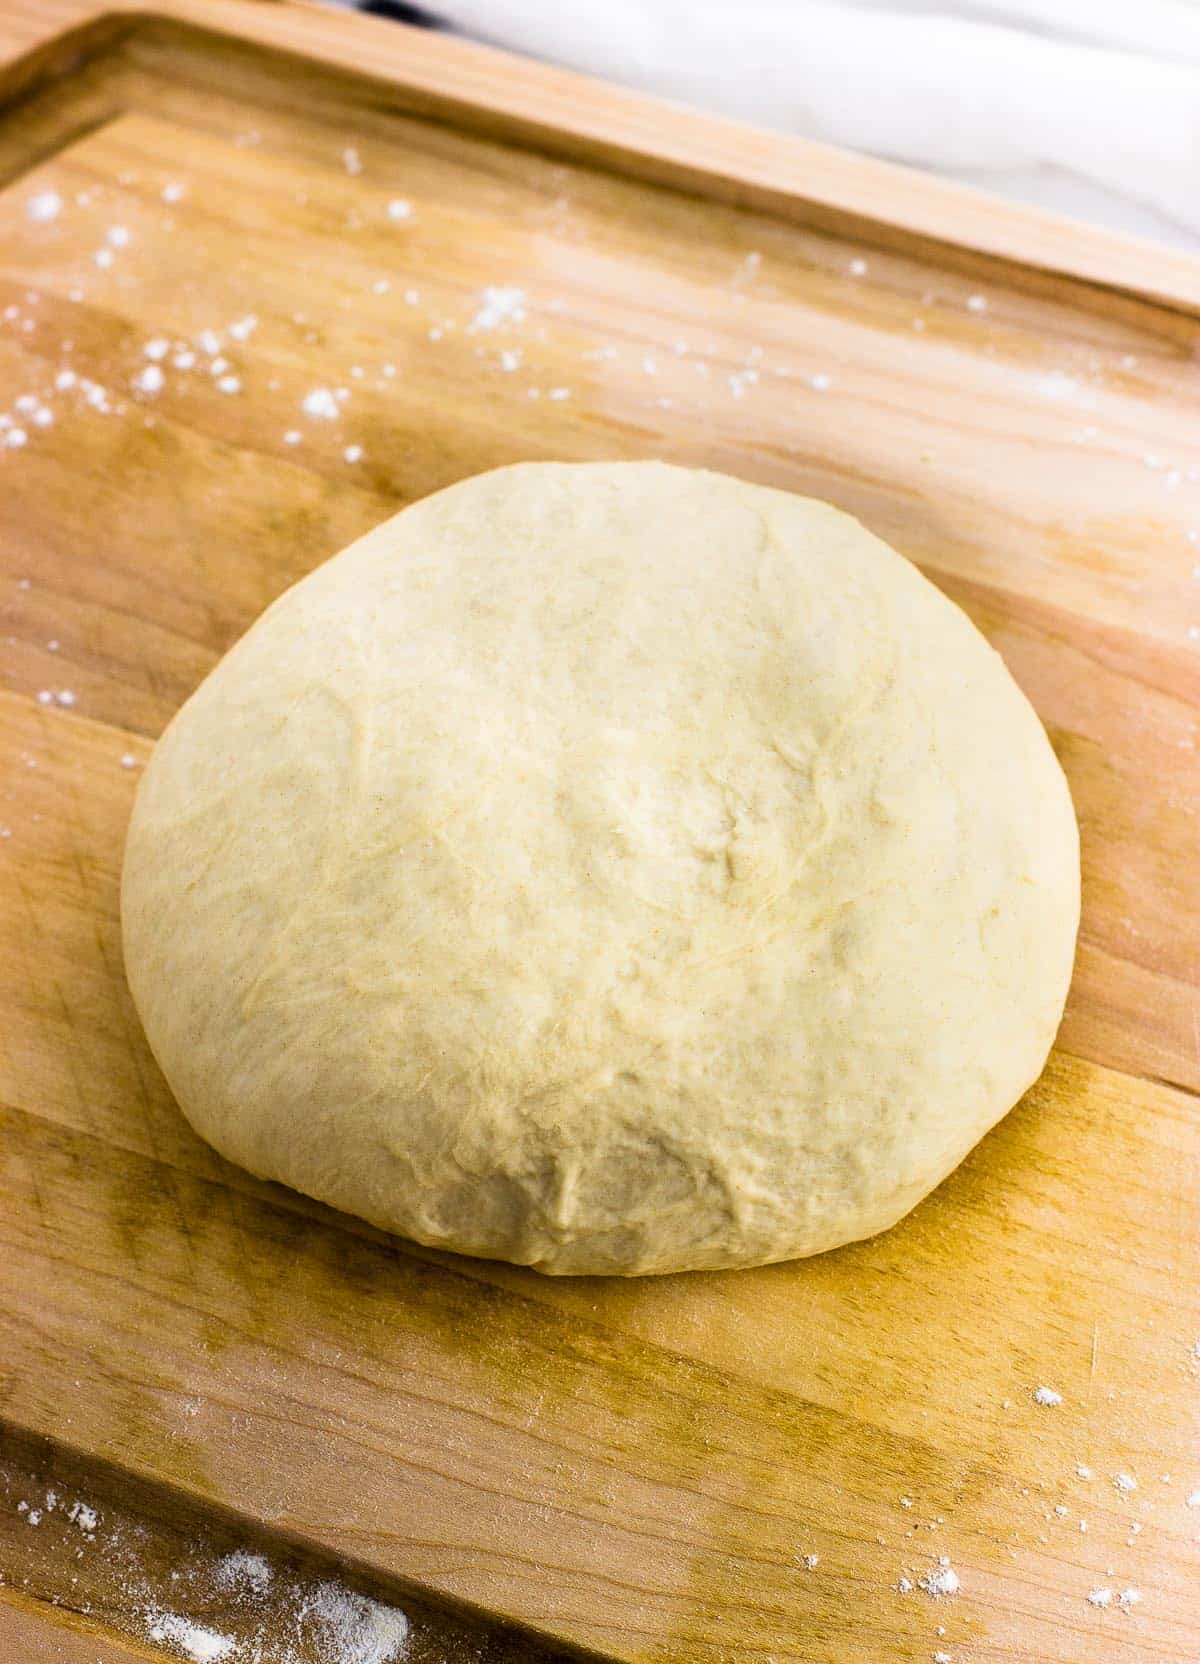
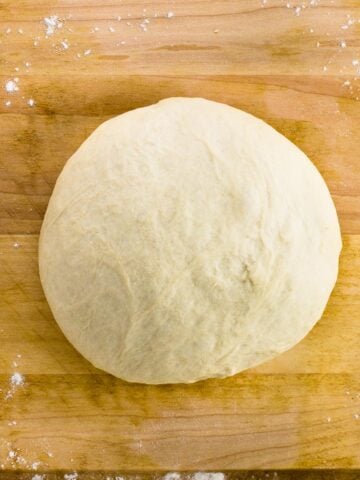
You can use whatever pizza dough you like, including store-bought balls, but I always use my easy homemade pizza dough recipe. It's simple and straight-forward (no specialty flours or extended rise time or anything) and is reliably unfussy when it comes to rolling thin and maneuvering around the hot grill.
One batch of dough yields two average-sized pizza crusts, of which you can make both or freeze one for a later date (the linked post has instructions).
Besides crust, you'll need standard pizza ingredients:
- Olive oil
- Pizza sauce
- Cheese
- Meat and/or veggies
Step-by-Step Instructions
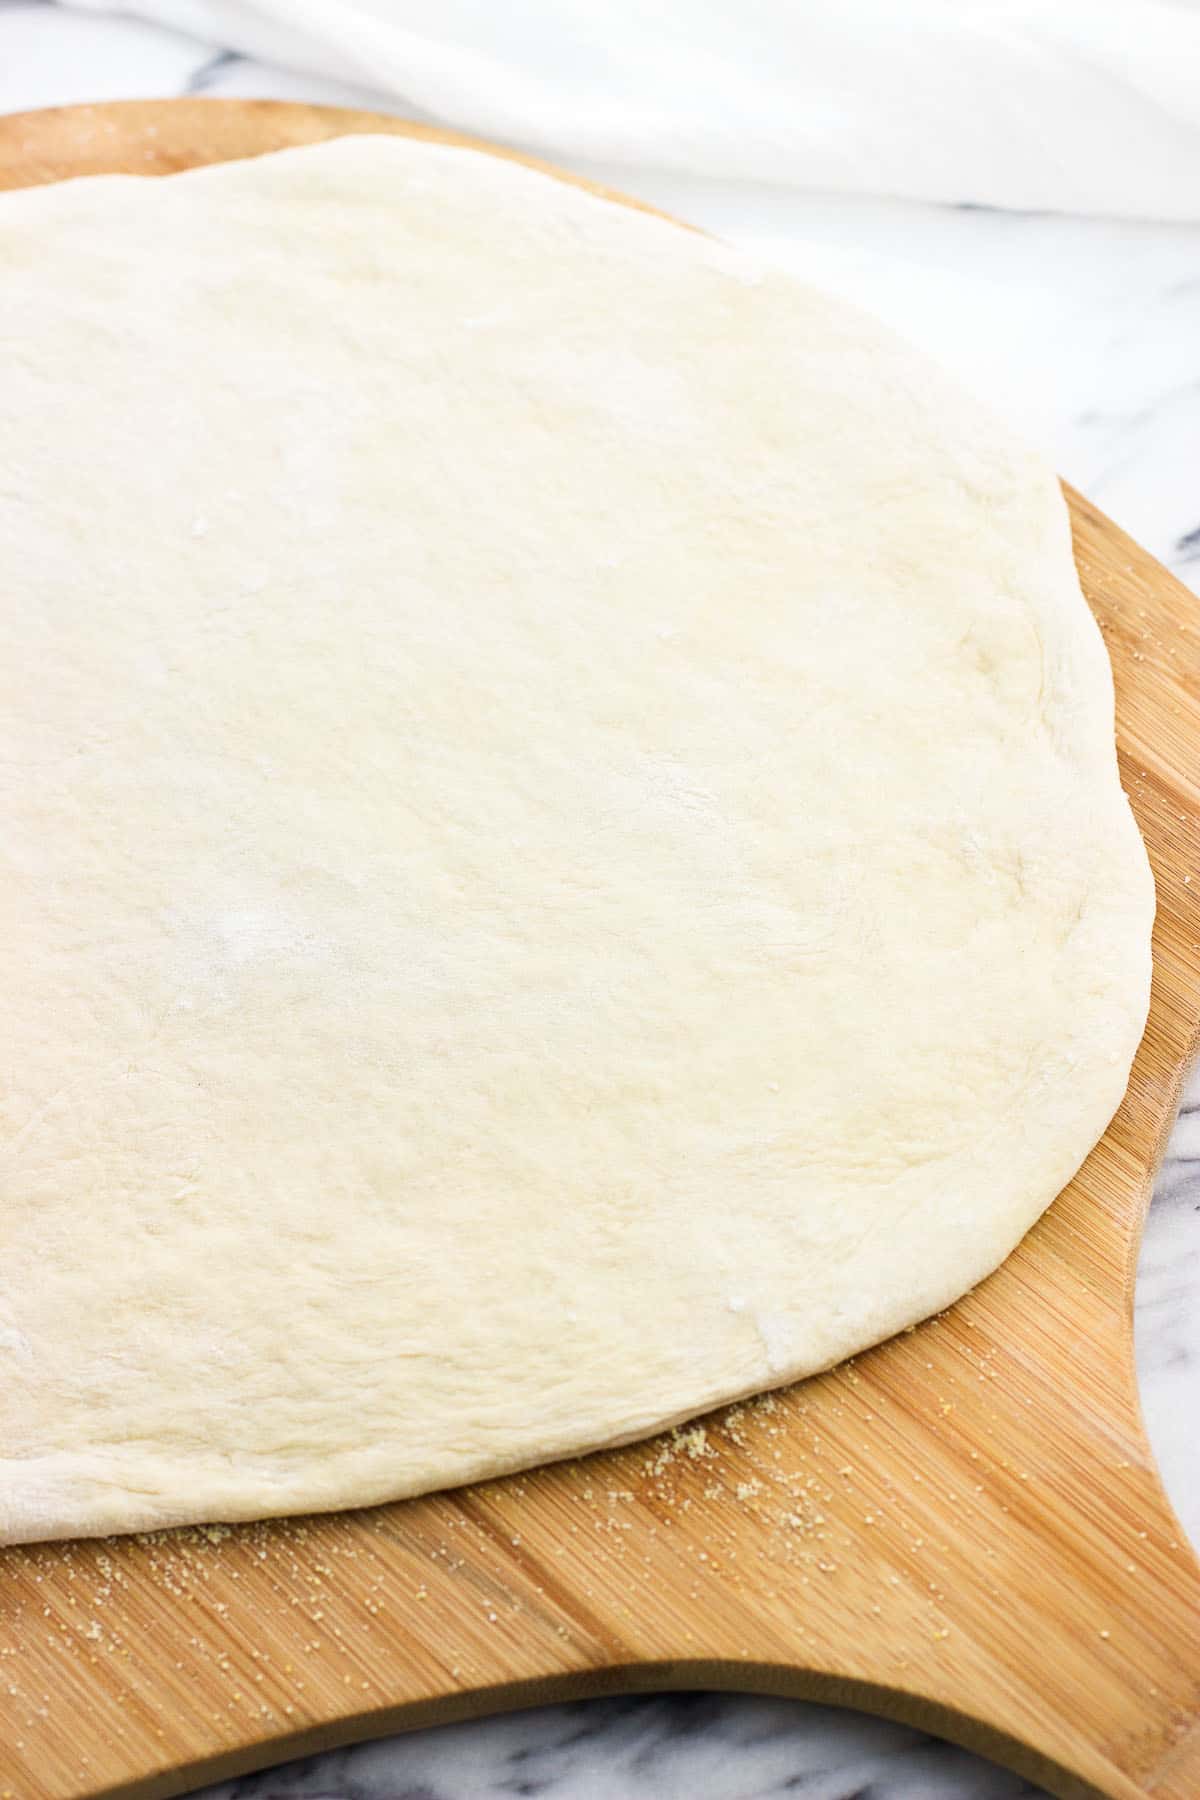
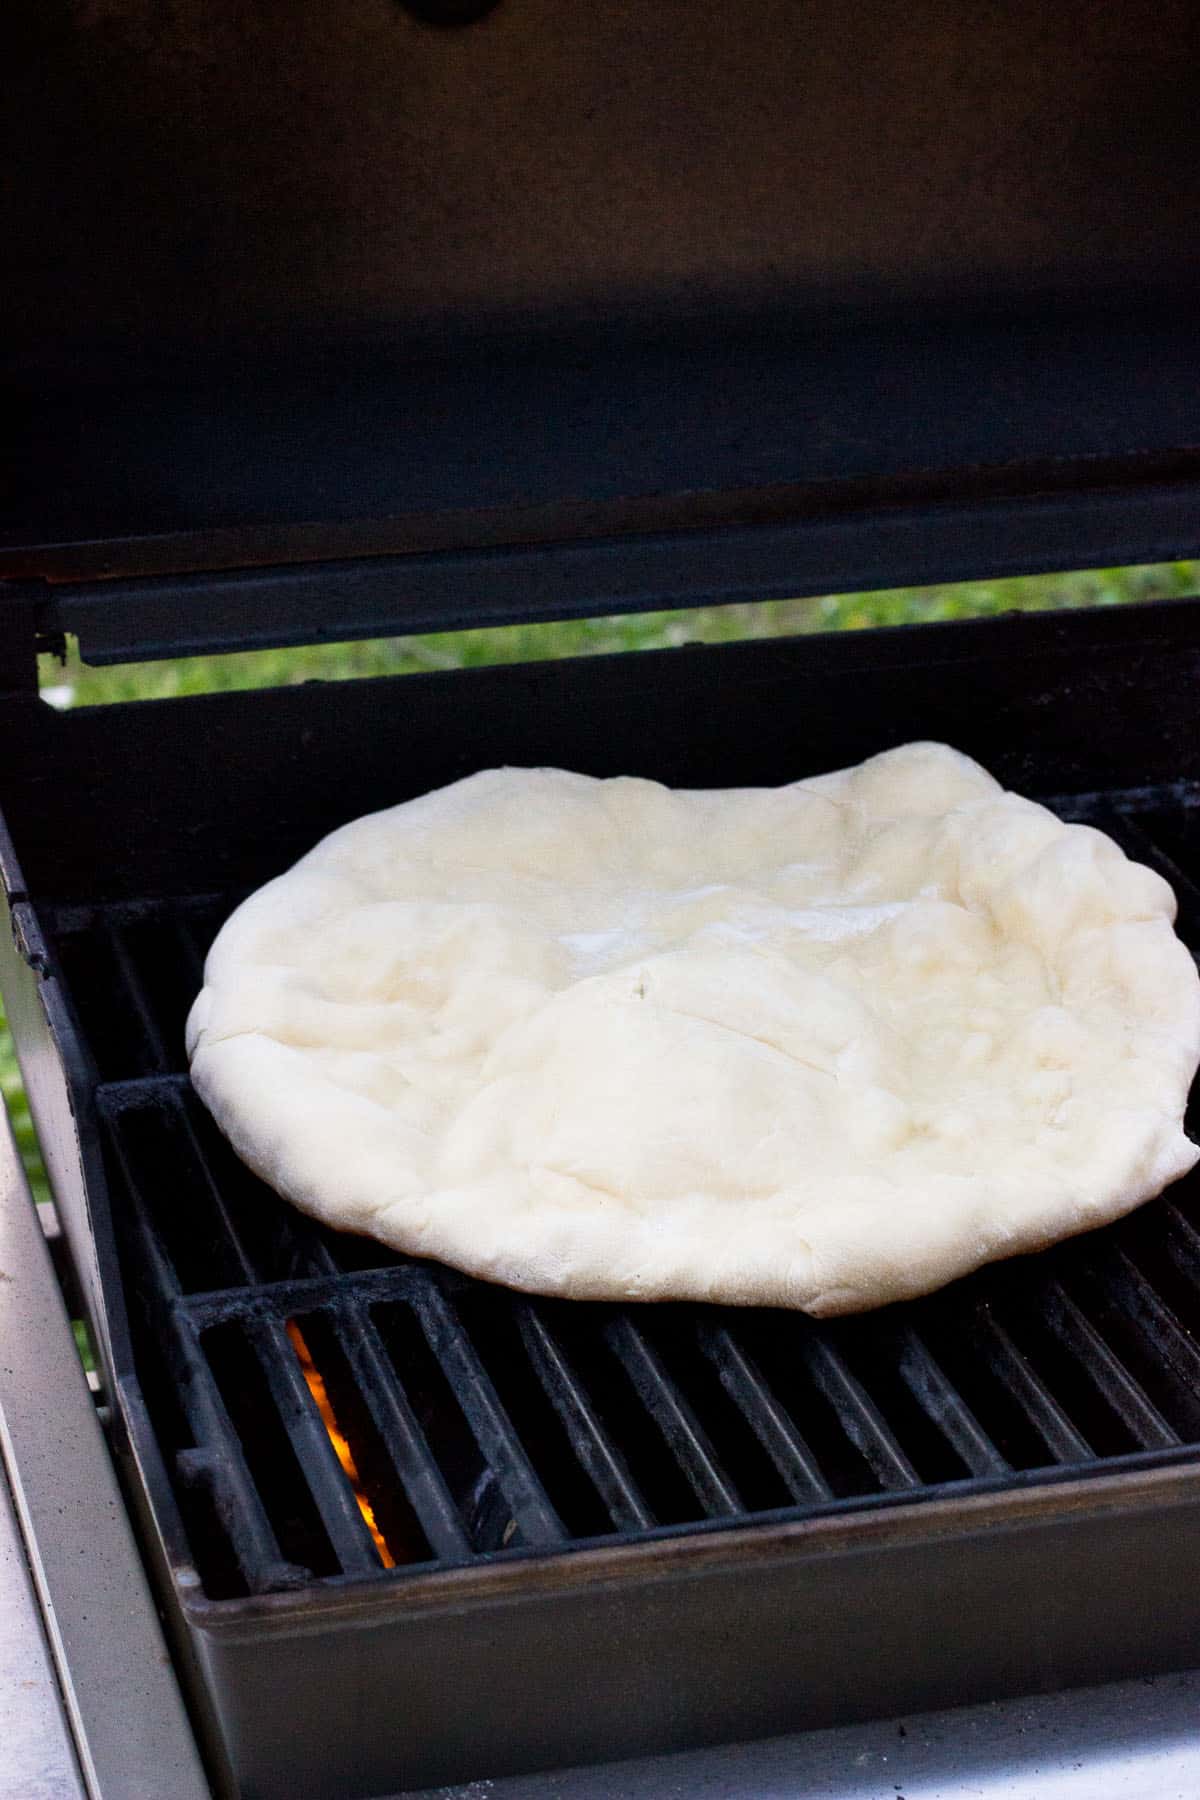
Hand-stretch or roll out your ball of dough until it's evenly thin and about twelve-inches all around, though the size doesn't matter so much as long as you have a pizza peel (or board/pan) large enough to transfer it onto the grill. If you see bubbles developing in your pizza dough - great! Those will be delicious with little charred spots. Try not to pop them as you're flattening and shaping the crust.
Then sprinkle cornmeal onto a pizza peel (or large cutting board or the back of a sheet pan). The cornmeal helps prevent the dough from sticking to the peel and allows for an easier transfer onto a pizza stone, or in this case, the grill.
Transfer the shaped pizza dough crust onto the peel, trying not to press down to cause it to stick.
Before turning the grill on, brush the grill grates with high-heat oil to prevent sticking. One with a neutral flavor, such as canola, corn, or vegetable oil, works great.
You can oil the grates either before heating the grill (my preference) or after, though do use caution if oiling them once hot. You'll want to use enough to coat the grates, but not too much that it's dripping off everywhere. And please, don't spray cooking spray onto a hot grill as this may cause flare-ups.
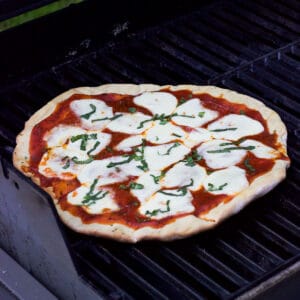
Then turn on and heat the grill to high heat, at least around 400°F/204°C. You'll want to grill pizza over direct heat. Once the grill comes up to temperature, carefully slide the pizza crust onto the greased section.
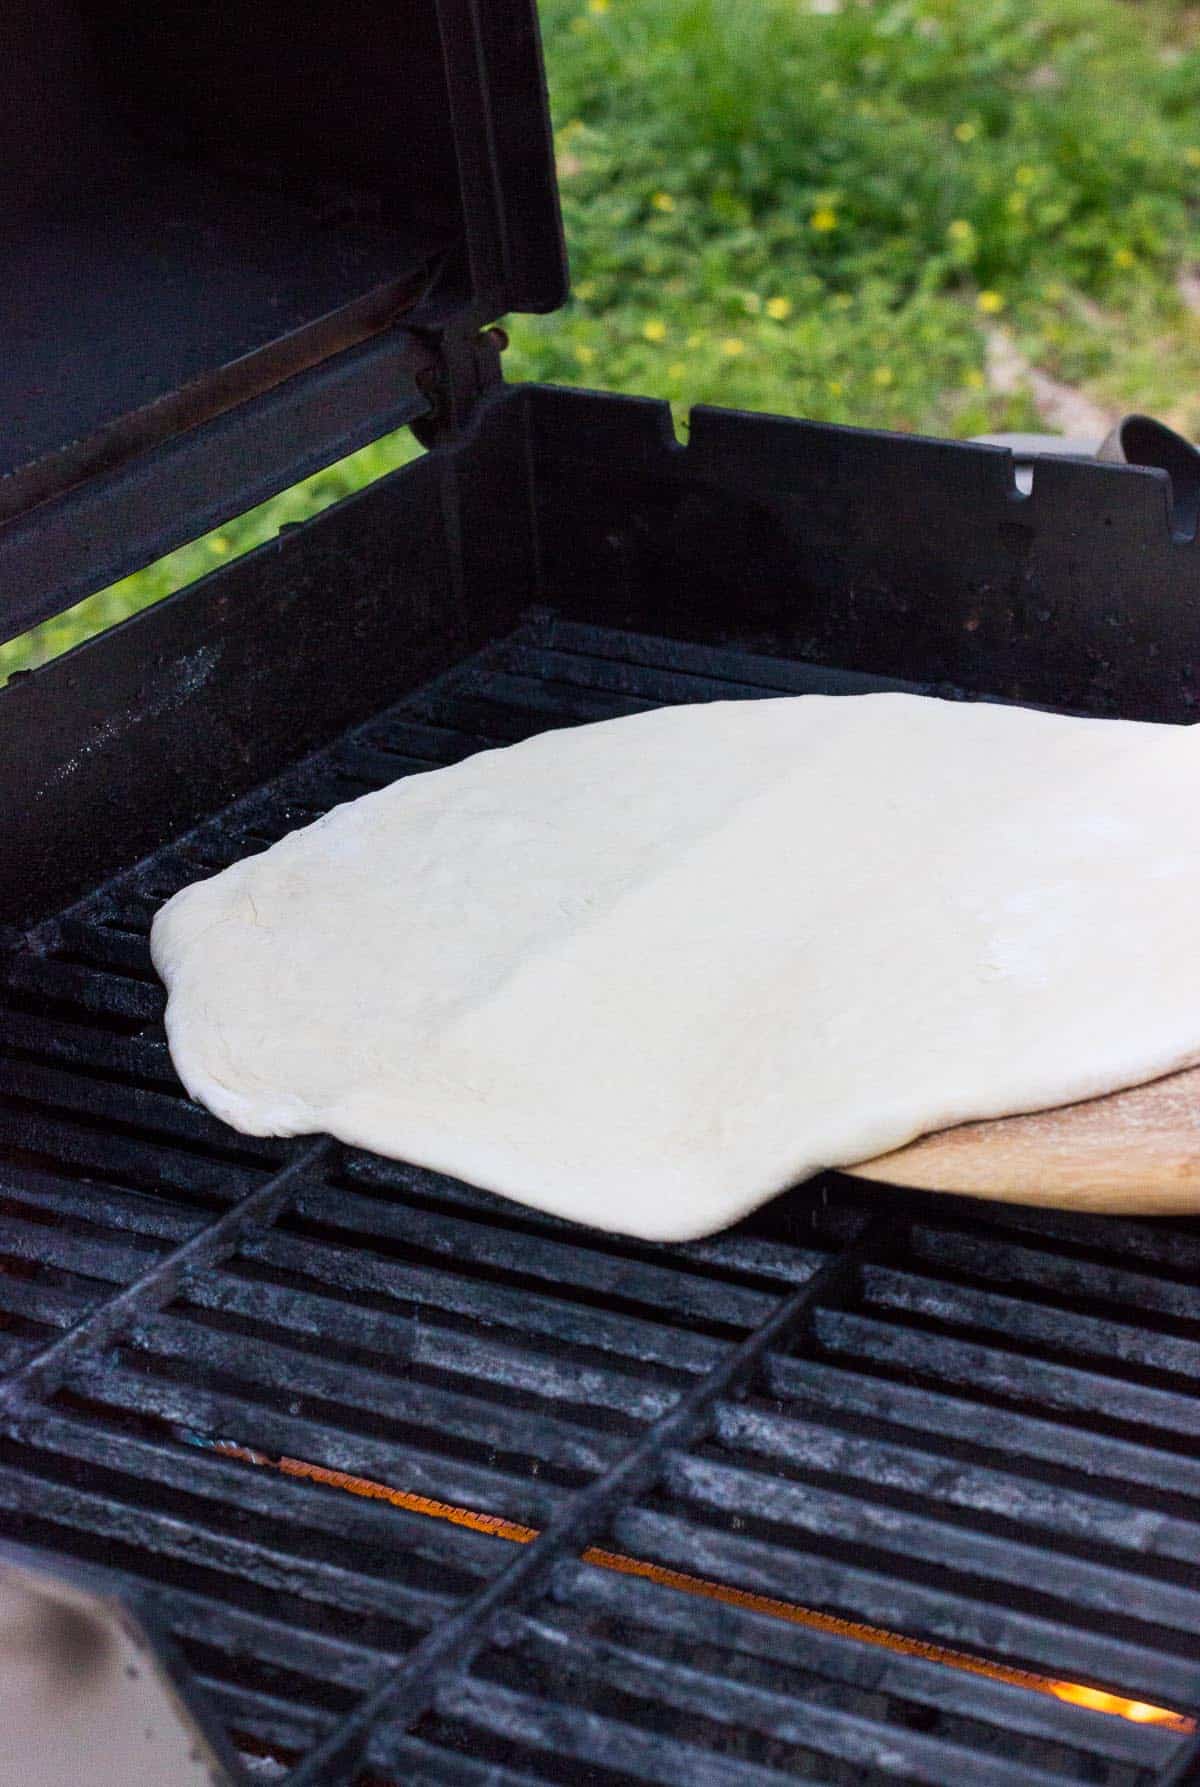
Because the grill is so hot, you won't have the ability to zhush the crust and shape it once it hits the grates. This means that grilled pizza can look a little "rustic". 🙂
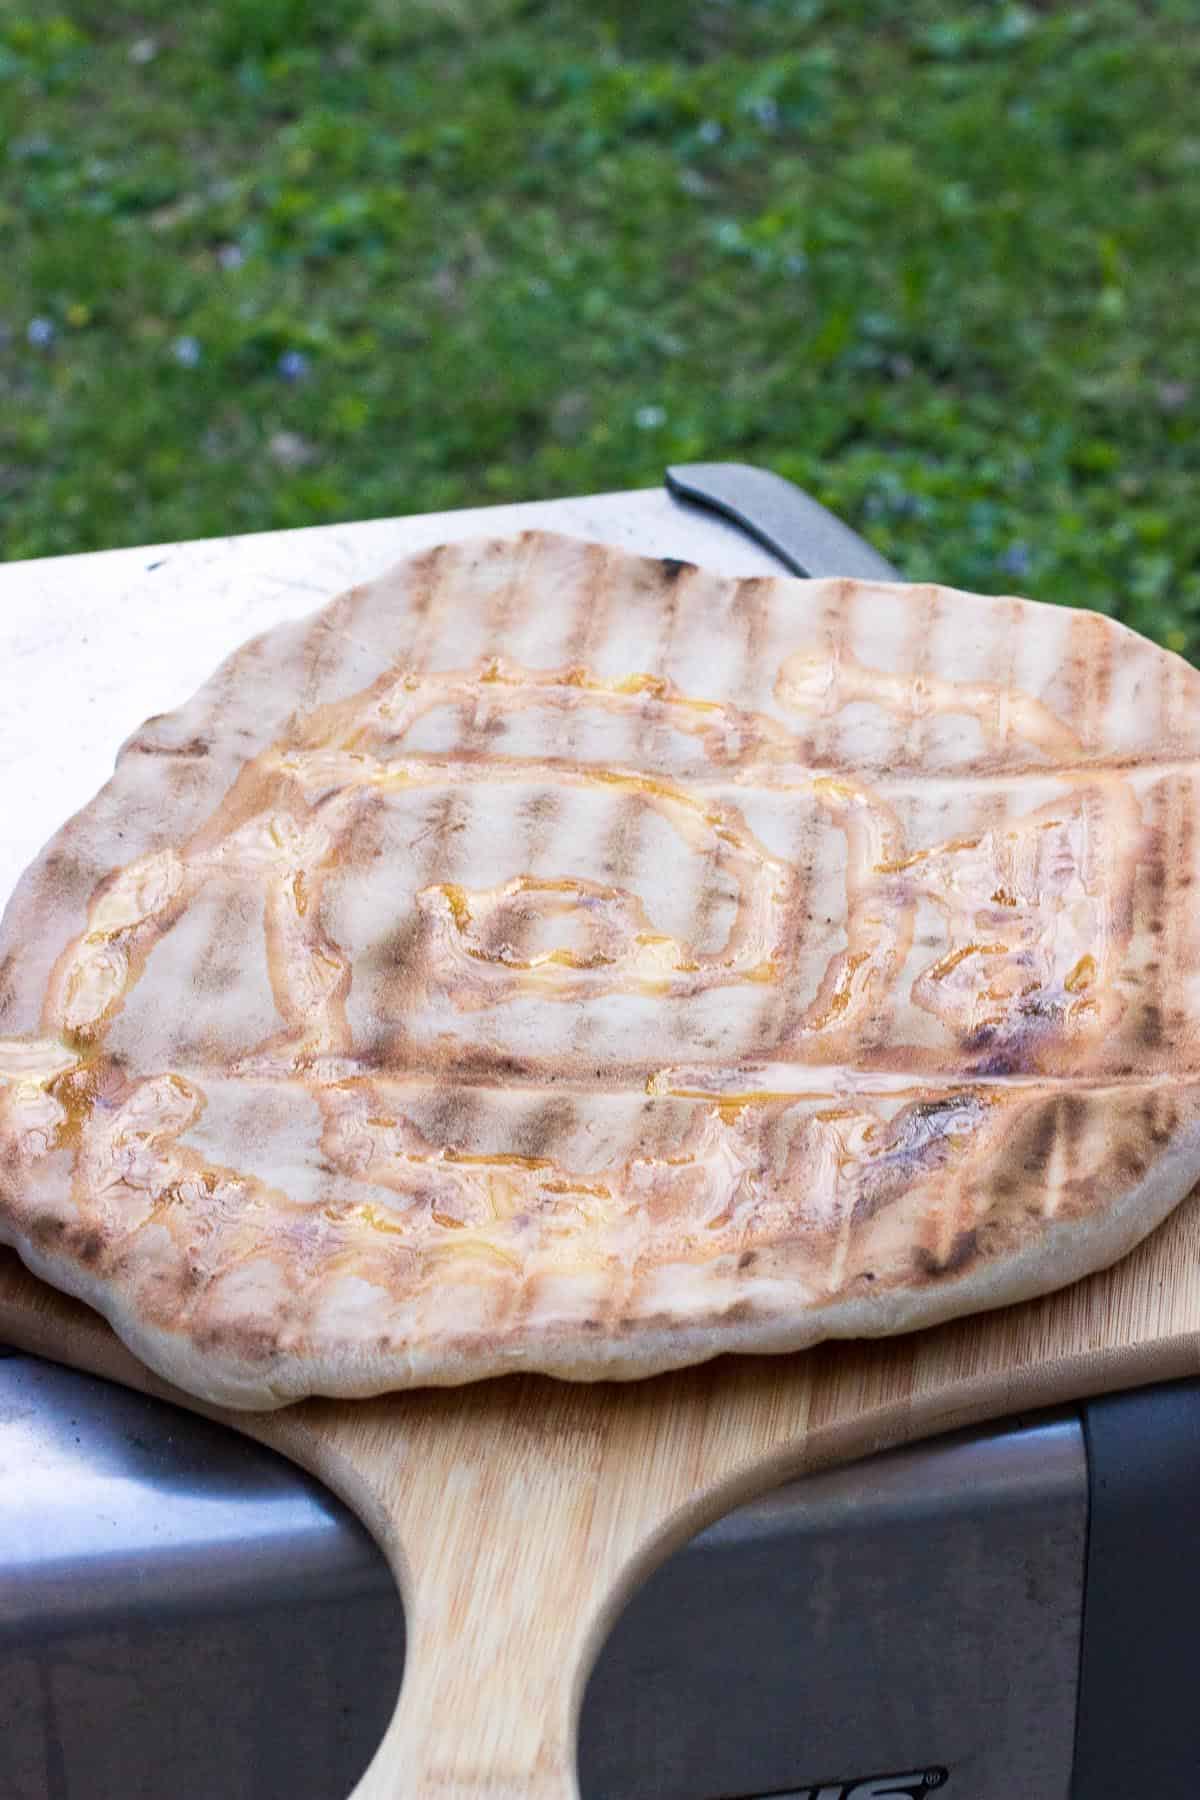
Close the lid to retain the heat and cook the pizza for several minutes, or until the crust has bubbled up significantly and the bottom has browned and developed grill lines and toasty spots. Some charred spots are fine (actually more than fine, mmmm) but do use tongs to adjust the pizza around in case there are hot spots that'll cause it to cook unevenly.
The bottom side now will ultimately become the side with all the toppings, so once it reaches your preferred level of doneness, carefully remove it from the grill (I use tongs) and flip it over onto a board with the browned side up.
Close the lid of the grill to keep the heat in.

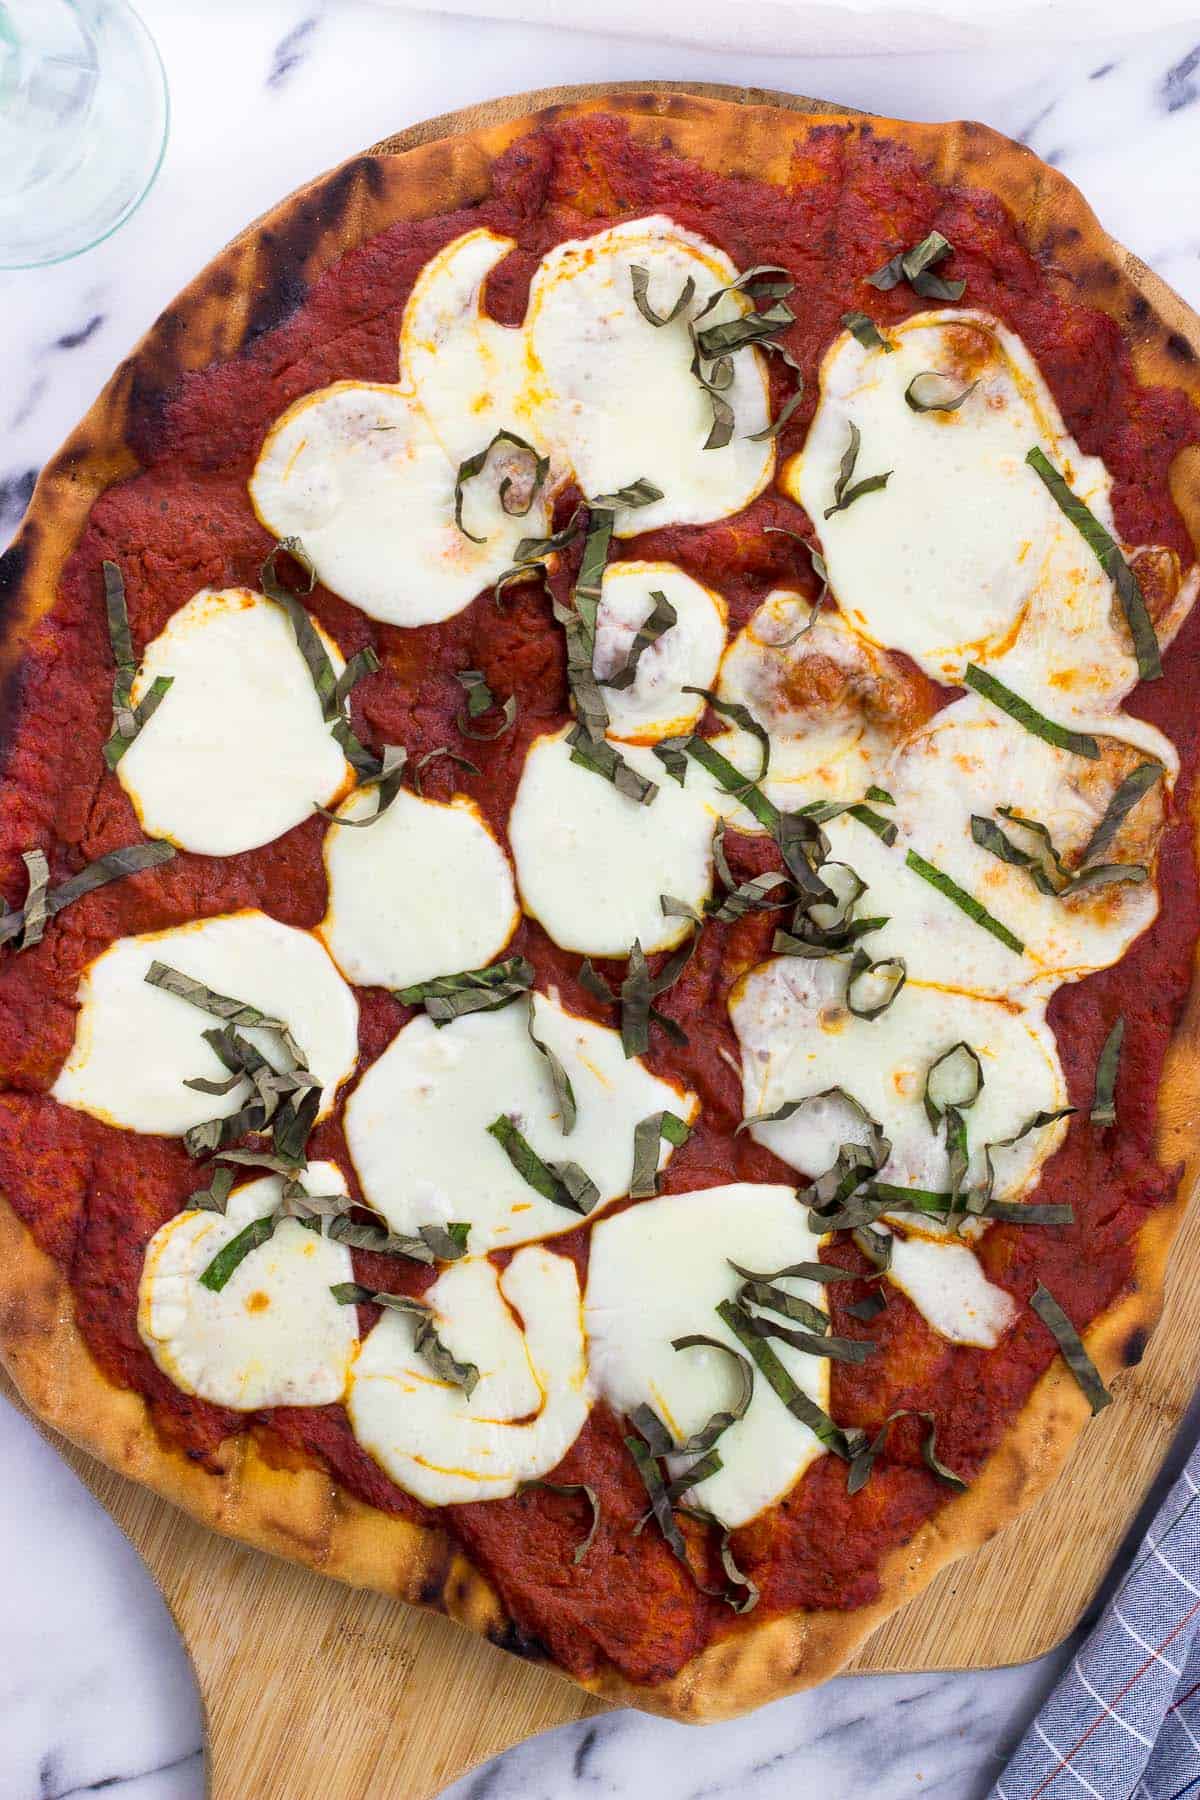
Now it's time to dress your pizza. First drizzle olive oil and brush it evenly over the top side. Adding a thin layer of olive oil creates a barrier between the already-cooked side of the crust and the pizza sauce, ensuring it stays crisp and not soggy.
Then top with pizza sauce and your toppings of choice. Reserve fresh basil, if using, until the very end. See how to chiffonade basil for the most efficient, easy way to slice fresh basil.
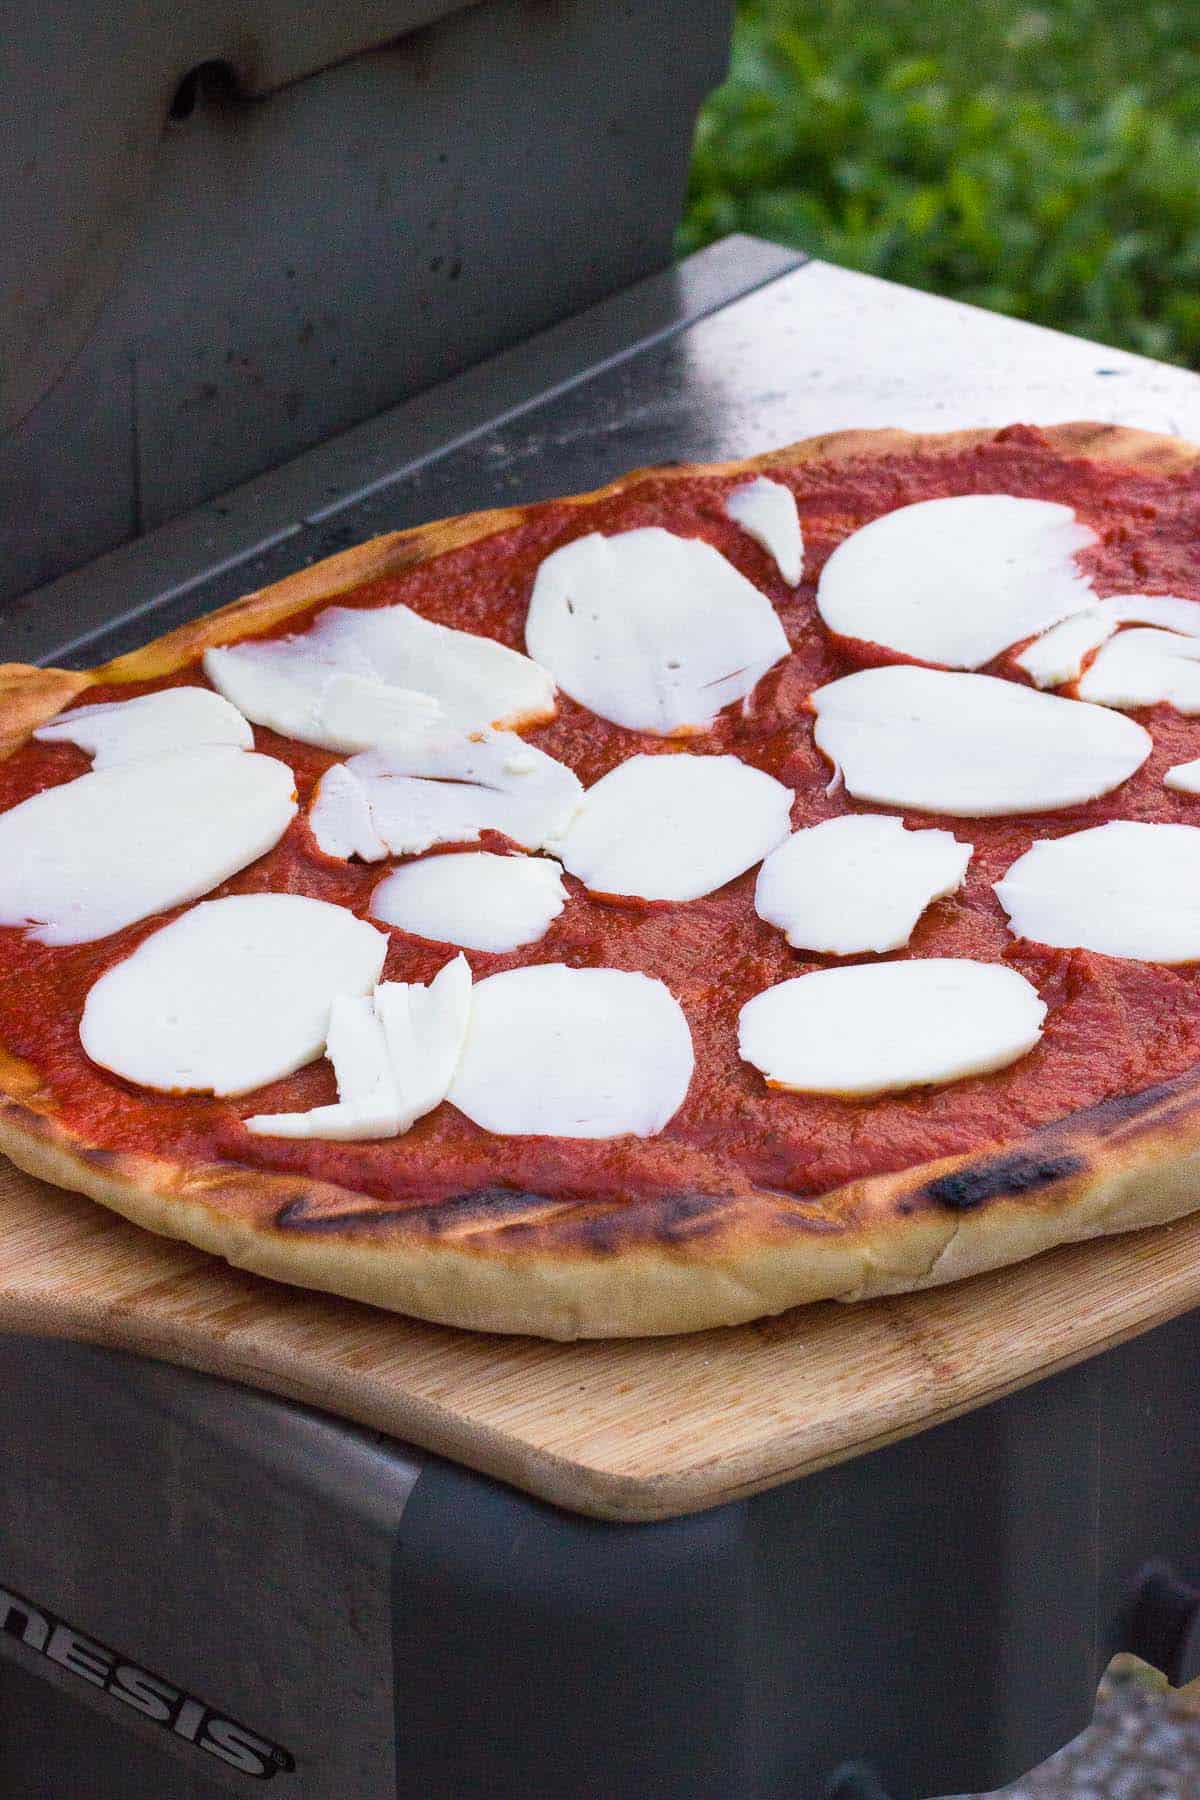
Once the toppings are on, back onto the grill grates it goes. This part requires a little finessing as you'll want the toppings to heat/melt before the bottom burns up.
When figuring out how to grill pizza, I found this part to be smoother when doing a mix of direct and indirect heat for this stage. Keeping one burner on high heat and one on low (or off) will allow the grill to stay hot, and you can move the grilled pizza between the zones as needed to cook fully without burning.
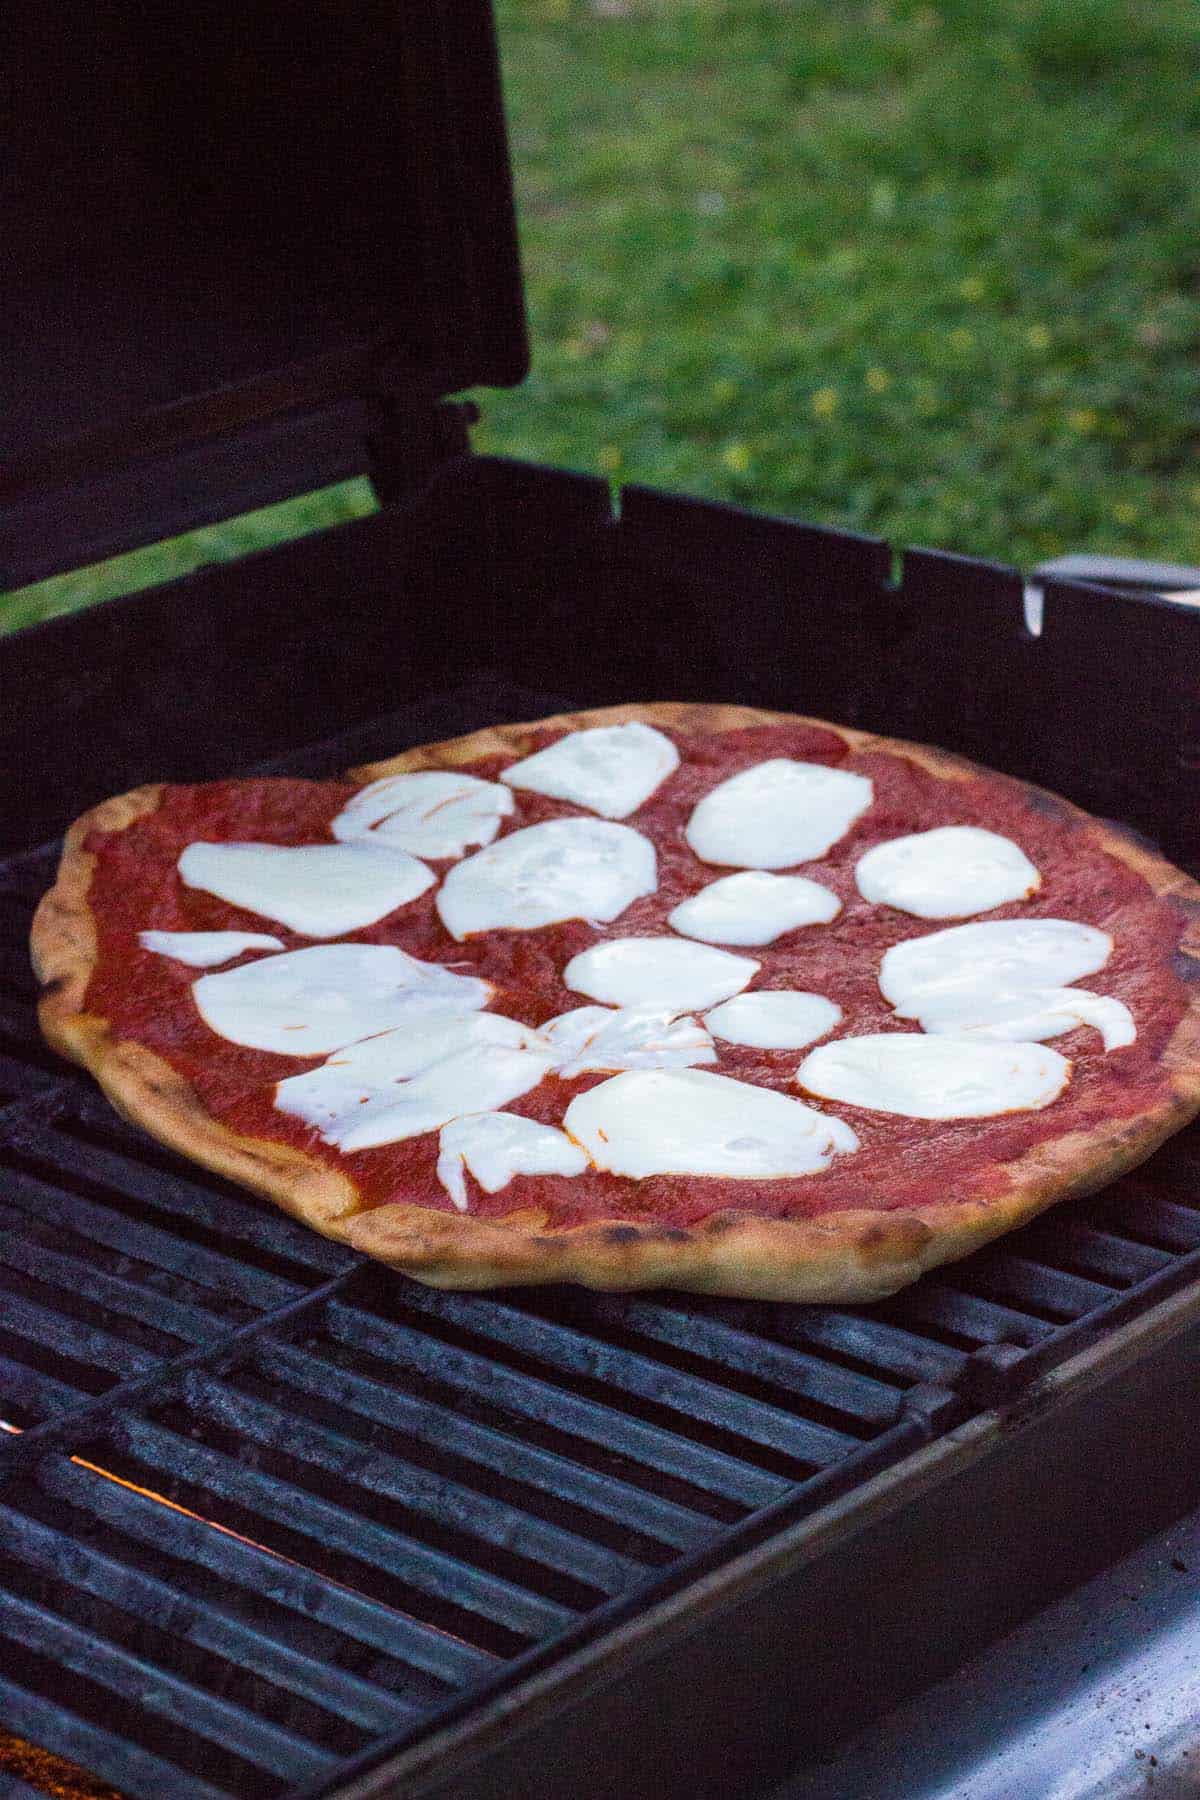
And there you have it. Once the cheese has melted, remove the pizza and serve right away to preserve that nice and crisp crust.
Expert Tips
- Since you'll be outside and the process will go fairly quickly once things get rolling, you'll want to prep all of your topping ingredients first and have them with you once the pizza goes on the grill.
- Be sure to roll out the pizza dough to your preferred thinness before putting it on the grill, as it's hard to straighten it out/adjust it once it goes over high heat on the grill.
- All grills are different, so think of the instructions below as guidelines and not absolutes. After adding the toppings, be mindful of the heat level and direct/indirect grilling so that the toppings heat and melt before the bottom becomes too charred. Adjust as needed.
Recipe FAQs
No. While helpful for producing a crisp crust on oven-baked pizzas, that benefit isn't necessary here. Grilling the pizza directly on the grates over direct heat (the crust won't fall through the cracks!) does more than a good job at crisping the crust.
Yes, that should work just fine.
I recommend the lower end of the high heat range (around 400°F) for grilling pizza. It can be tricky finding the line between a slightly-charred and crispy crust and a solid burnt mess. You know your grill best so do keep an eye on it and adjust the temperature as needed or utilize different zones throughout the cooking process.
Related Recipes


Did you enjoy this recipe? I’d love for you to leave a star rating and a comment review in the recipe card below!
How to Grill Pizza
Ingredients
- 1 batch pizza dough (this recipe makes enough for 2 pizzas)
- Cornmeal to prevent sticking
- Olive oil for brushing
- Pizza sauce
- Mozzarella cheese
- Meat (pepperoni, any other cooked meat)
- Veggies (cooked)
- Fresh basil
Instructions
- Stretch or roll out pizza dough to your desired shape. If making the pizza dough recipe linked it in the ingredients list, it will make enough for two pizzas.
- Sprinkle cornmeal on a pizza peel (or a large cutting board or back of a sheet pan) and transfer shaped pizza crust onto it. Try not to press down on it to cause the dough to stick. Prep the rest of your toppings.
- Clean and brush the grill grates with a high-heat cooking oil (such as canola, corn, vegetable, etc). Then turn on the grill and preheat to the lower range of high heat (around 400ºF).
- Once the grill is heated, use the peel to carefully slide the rolled out dough directly onto the greased grill grates over direct heat. You won't have much time to be picky with its shape as the grill is hot, so you might not get a perfectly round pizza.
- Once the pizza is on the grill, close the lid and cook for 3-4 minutes, then give it a peek and see how the bottom is doing. The crust will be bubbling up. Use tongs to adjust the placement of the pizza if some spots are cooking quicker than others. Continue cooking until the bottom side is crisped to your liking.
- Once that point is reached, use tongs to flip the pizza onto your pizza peel or cutting board so the cooked side is now facing up. Close the lid of the (now empty) grill to keep in the heat.
- Brush olive oil over your pizza, then add sauce and whatever toppings you're using.
- Transfer the pizza back on the grill, and cook until the cheese is melted and the bottom has now crisped to your liking. You know your grill best so play with the heat here. Consider keeping one burner on high and the other on low (or even off) so you can move the pizza to the indirect/cooler side if the bottom is crisping up too quickly.
- Slice and serve soon after cooking to enjoy that crispy crust.
Notes
- This recipe moves quickly once the pizza hits the grill. Prep all of your toppings (grate cheese, slice meat and veggies, etc.) and have them beside the grill before starting to cook to cut down on time-sensitive stress.
- All grills are different so keep an eye on your pizza to see if/when you need to adjust the heat. High-ish heat works well for my grill, but if you know your grill runs hot, try with medium to medium-high. Check the bottom of the crust soon after beginning during its first cook to see if any adjustments need to be made before it burns.
Would you like to save this?
Plus receive periodic recipe newsletter emails.
Nutrition
Nutritional information is provided as an estimate. As it can vary due to many factors (brands used, quantities, etc.), we cannot guarantee its accuracy.
Food Safety and Nutrition Disclaimer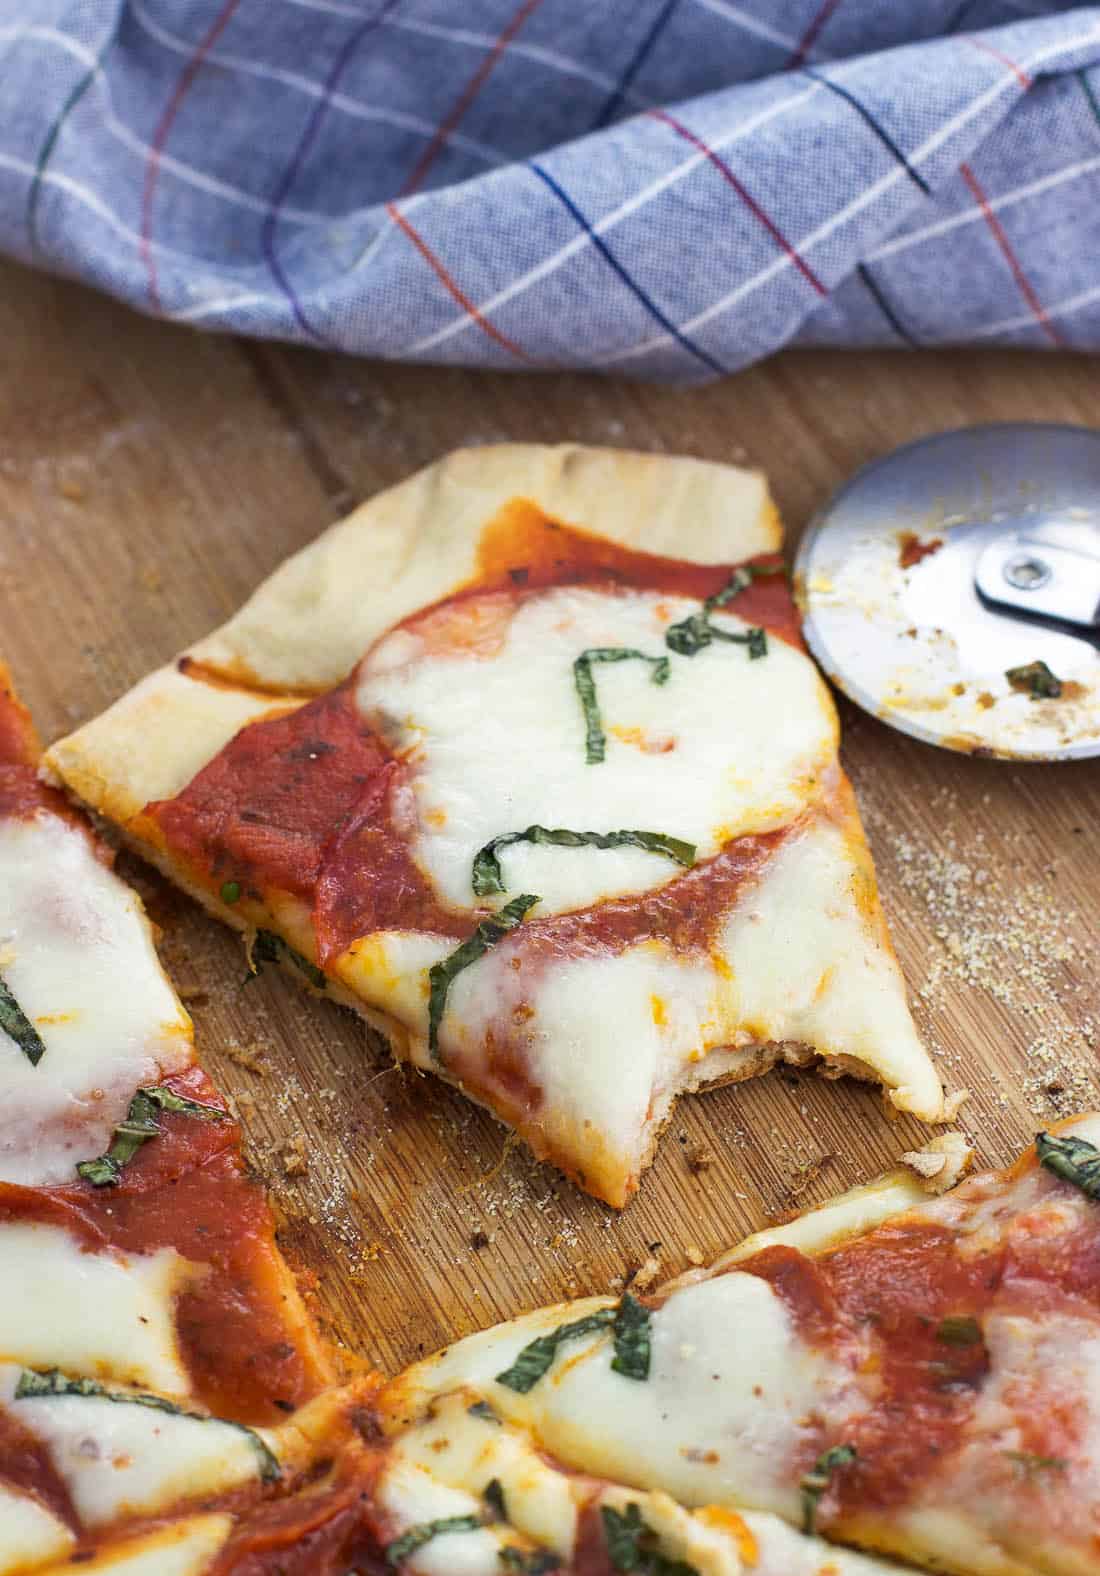
Allynne says
Delicious!
catherinebrownell says
I can still remember when I first discovered grilled pizza. So tasty! And it's so hard going back to the oven when I can't use the grill. Your pictures look absolutely delicious!
Alyssa says
Thank you so much! And you're so right - having my first grilled pizza was a total "aha" moment. I crave the grilled crust!
Lynette says
I love your photos and easy to follow recipes.
Alyssa says
Thank you! The extra step is so worth it here 🙂