
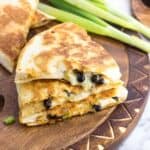
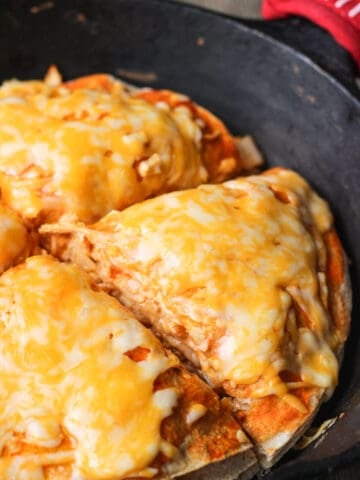
A creamy, smoky spread adds a flavorful touch to these impossibly easy chipotle chicken quesadillas. Not too spicy, this customizable recipe makes great use of rotisserie or leftover cooked chicken for a hit the whole family will love.
Quesadillas are at the top of my list of dinners to make when we have a little of this and a little of that on the leftovers front, without any real idea of how to put them together. It's amazing how well random proteins and vegetables can come together when combined with cheese and heated in a folded tortilla.
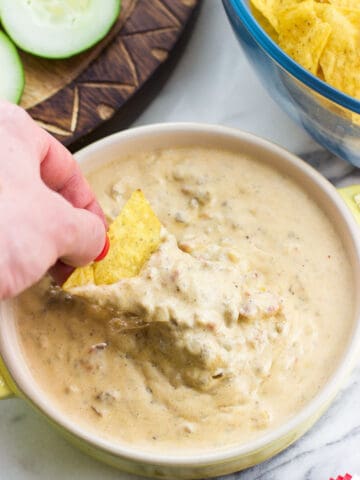
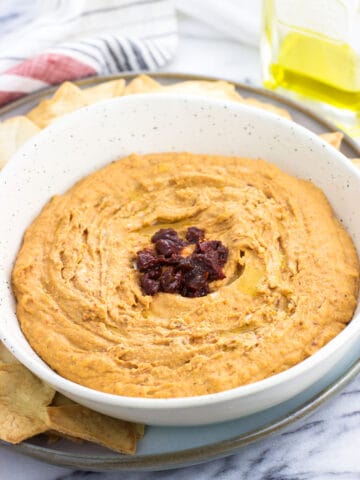
Usually this means quesadillas in my house happen fairly haphazardly, but since using easy chipotle aioli in a quesadilla last year, I make sure to always have a batch made when quesadillas are looking likely on the menu.
Reasons to Love This Recipe
- It's an efficient way to use up leftover cooked chicken, cooked vegetables, and other fridge odds and ends.
- This recipe is quick to prep, getting on the table in less than 30 minutes.
- These chipotle chicken quesadillas (named for chipotle peppers in adobo, not the fast casual restaurant) feature a DELICIOUS creamy, smoky, and not too spicy sauce that combines with chicken, melty cheese, and more in a great way.
Recipe Ingredients
Chipotle chicken quesadillas (and, I mean, quesadillas in general) are a very forgiving food to make. There are many ways to make it your own, including switching up the types of ingredients used, wiggle room with quantities, etc. Think of this recipe as a solid suggestion and feel free to deviate as you like.
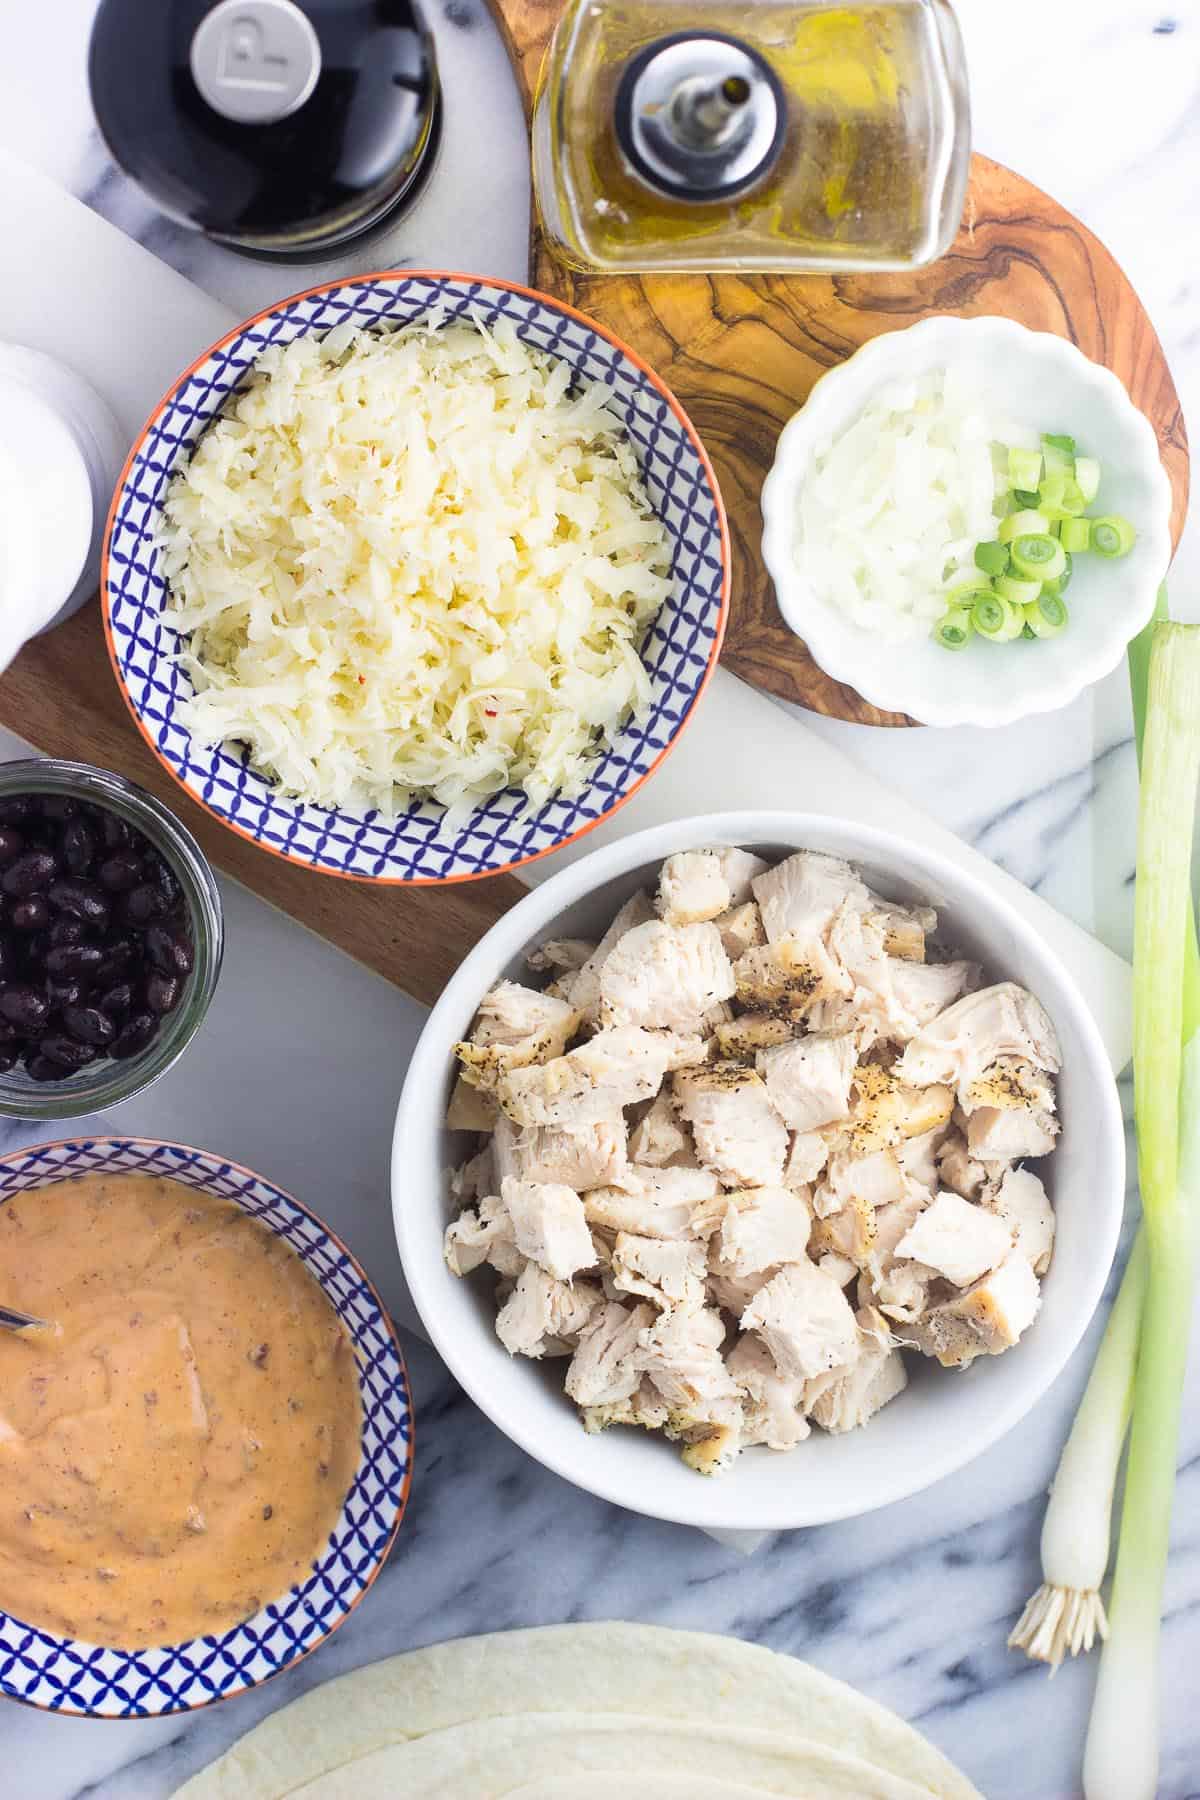
- Tortillas: The larger, the better for quesadillas as this allows sufficient room for spreading the filling so the tortilla has an easier time of folding. Recommended are 10-inch diameter flour tortillas, often described as "burrito-size" on the packaging. Regular flour or whole wheat tortillas work well.
- Chipotle aioli: Linked in the recipe card, "easy" is in the title as it uses a shortcut and starts with mayo, so there's no messing around with raw egg. Instead of adding chipotle peppers directly to the filling, adding them to a creamy spread tempers the spice level.
- Chicken: Either leftover cooked chicken breasts or thighs or rotisserie chicken are great options here.
- Cheese: Lots of opportunity to pick your favorite. Cheddar, Monterey/Colby/pepper jacks, Oaxaca, etc. Basically any meltable cheese that meshes with southwestern flavors would work.
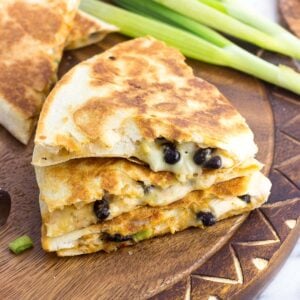
- Everything else: While not main ingredients, black beans, diced onion, chopped green onions and/or fresh cilantro work well as complements here. This is an easy category for wiggle room as none of these are essential.
Step-by-Step Instructions
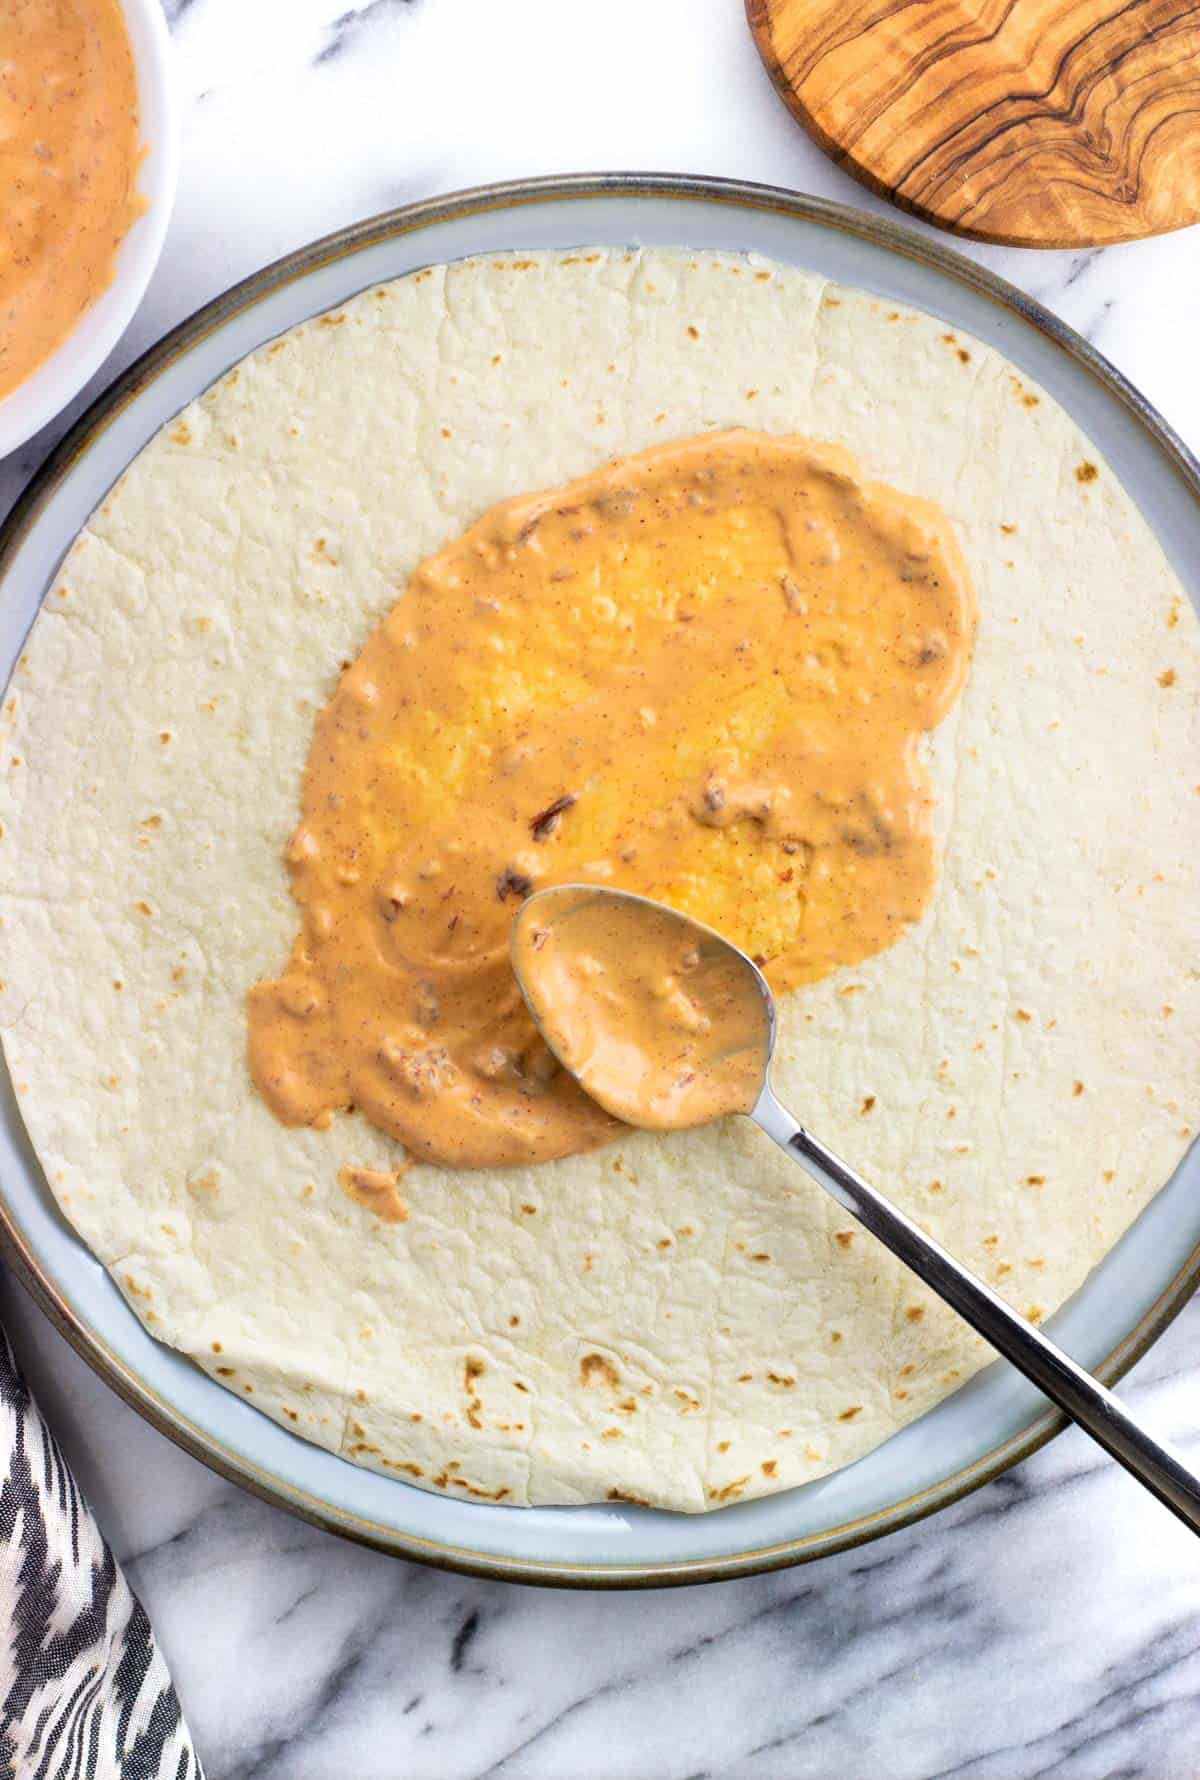
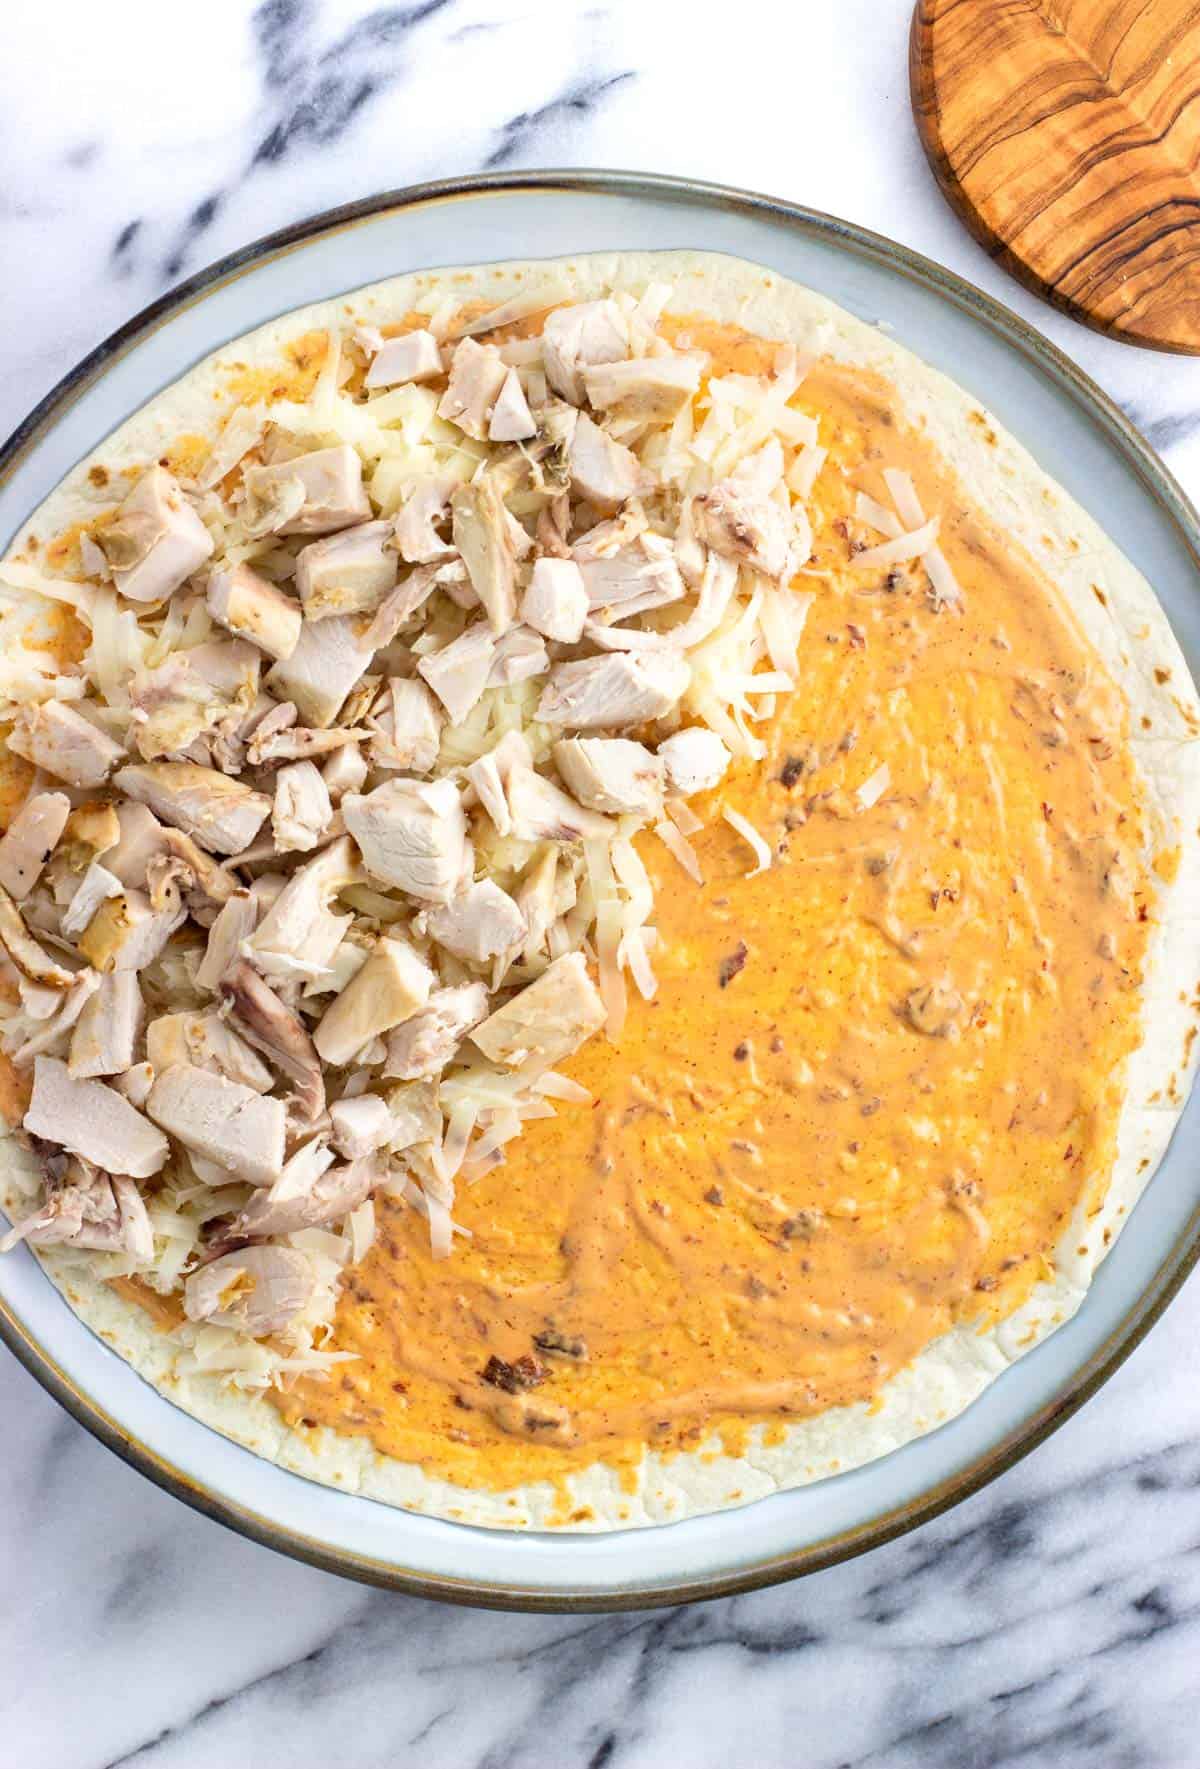
- Make the chipotle aioli, then spread it all over each tortilla, leaving a small buffer of around a half-inch around the perimeter. Don't skimp the aioli, either, as its great flavor totally makes this simple chicken quesadilla.
- Next add the cheese, chicken, and other filling ingredients to one side only and spread them into an even layer.
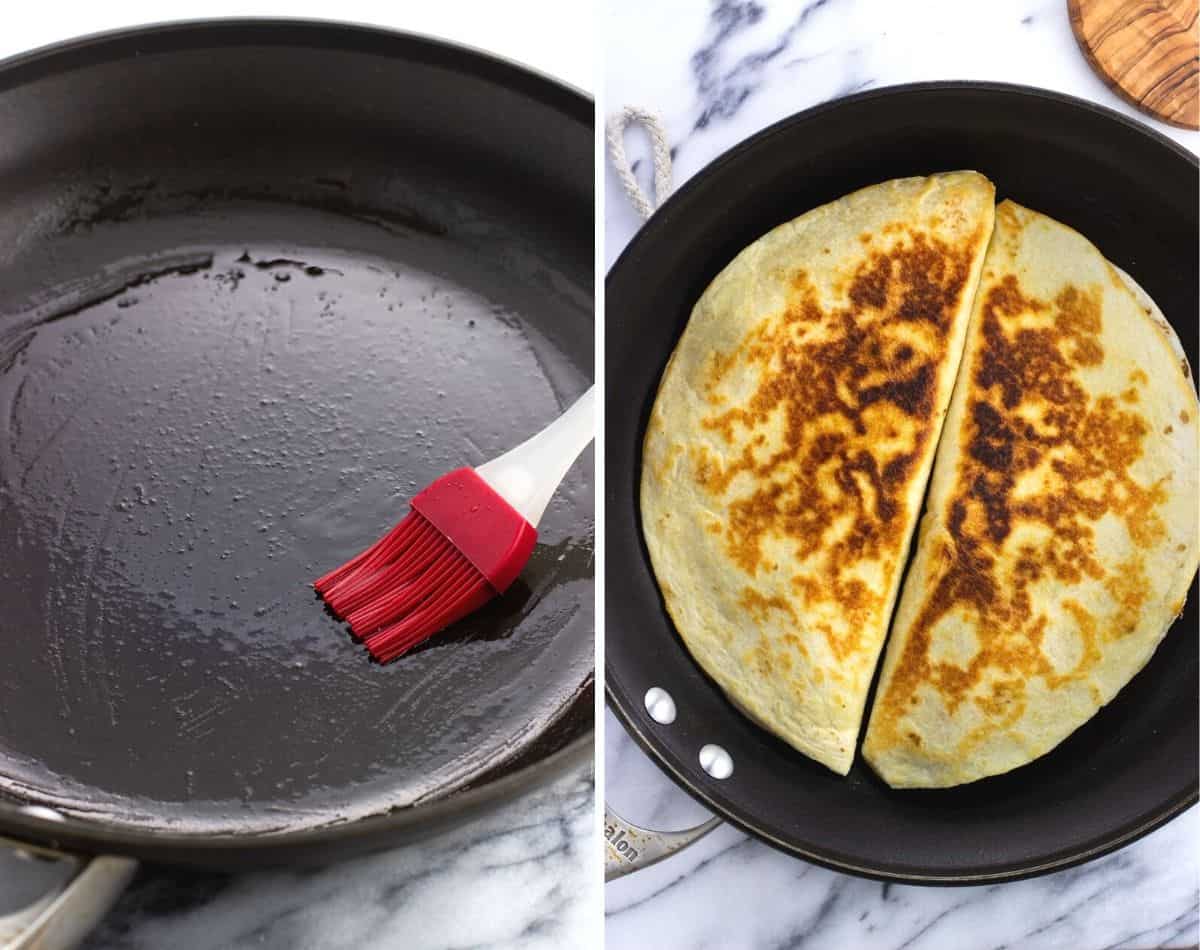
- Brush about three-quarters of a teaspoon of olive oil on the bottom of a large pan. It doesn't look like a lot, but you want just enough oil to cover the bottom without any excess pooling.
- Heat the pan over low-medium heat and cook the chicken quesadillas until they're golden-brown to your liking on both sides.
Quesadilla Tips and Tricks
Quesadillas don't exactly require a handbook to make, but there are a few tips that make the process easier.
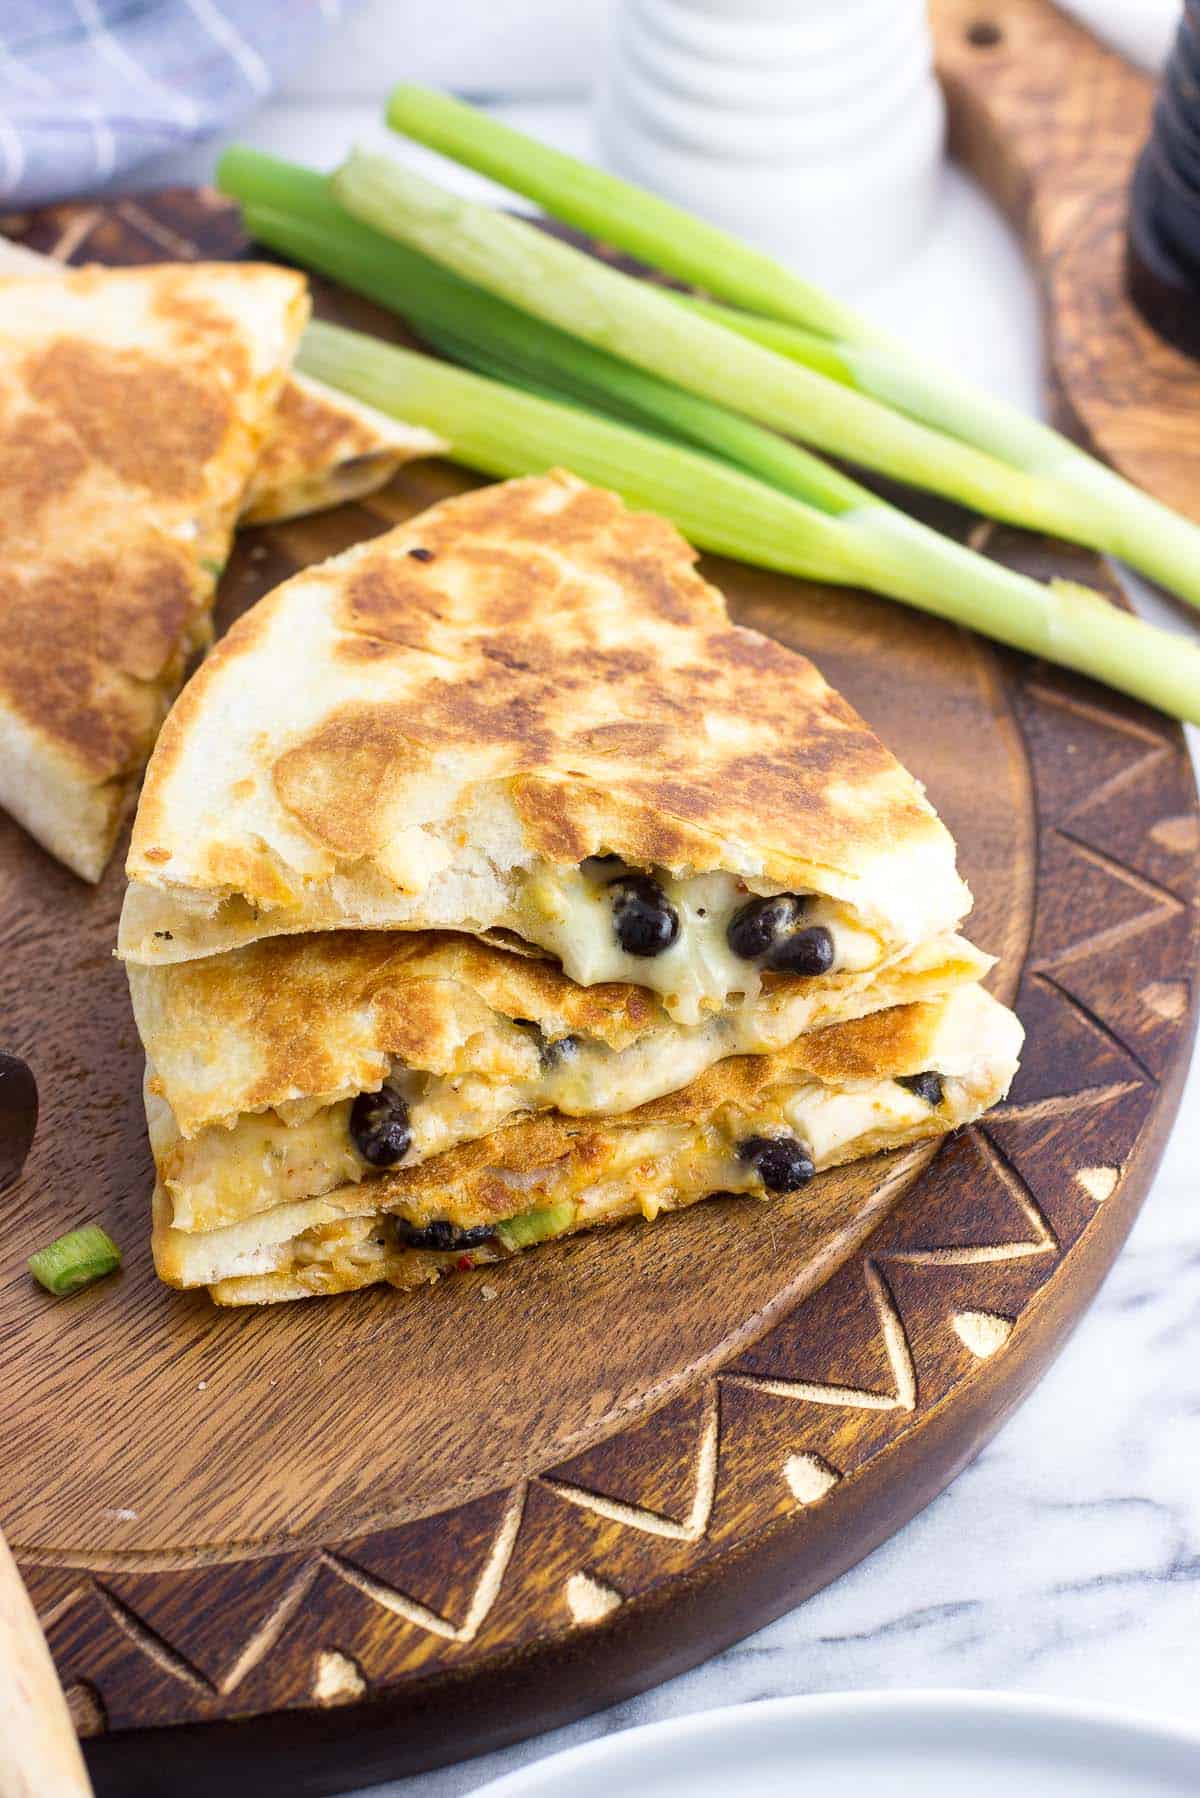
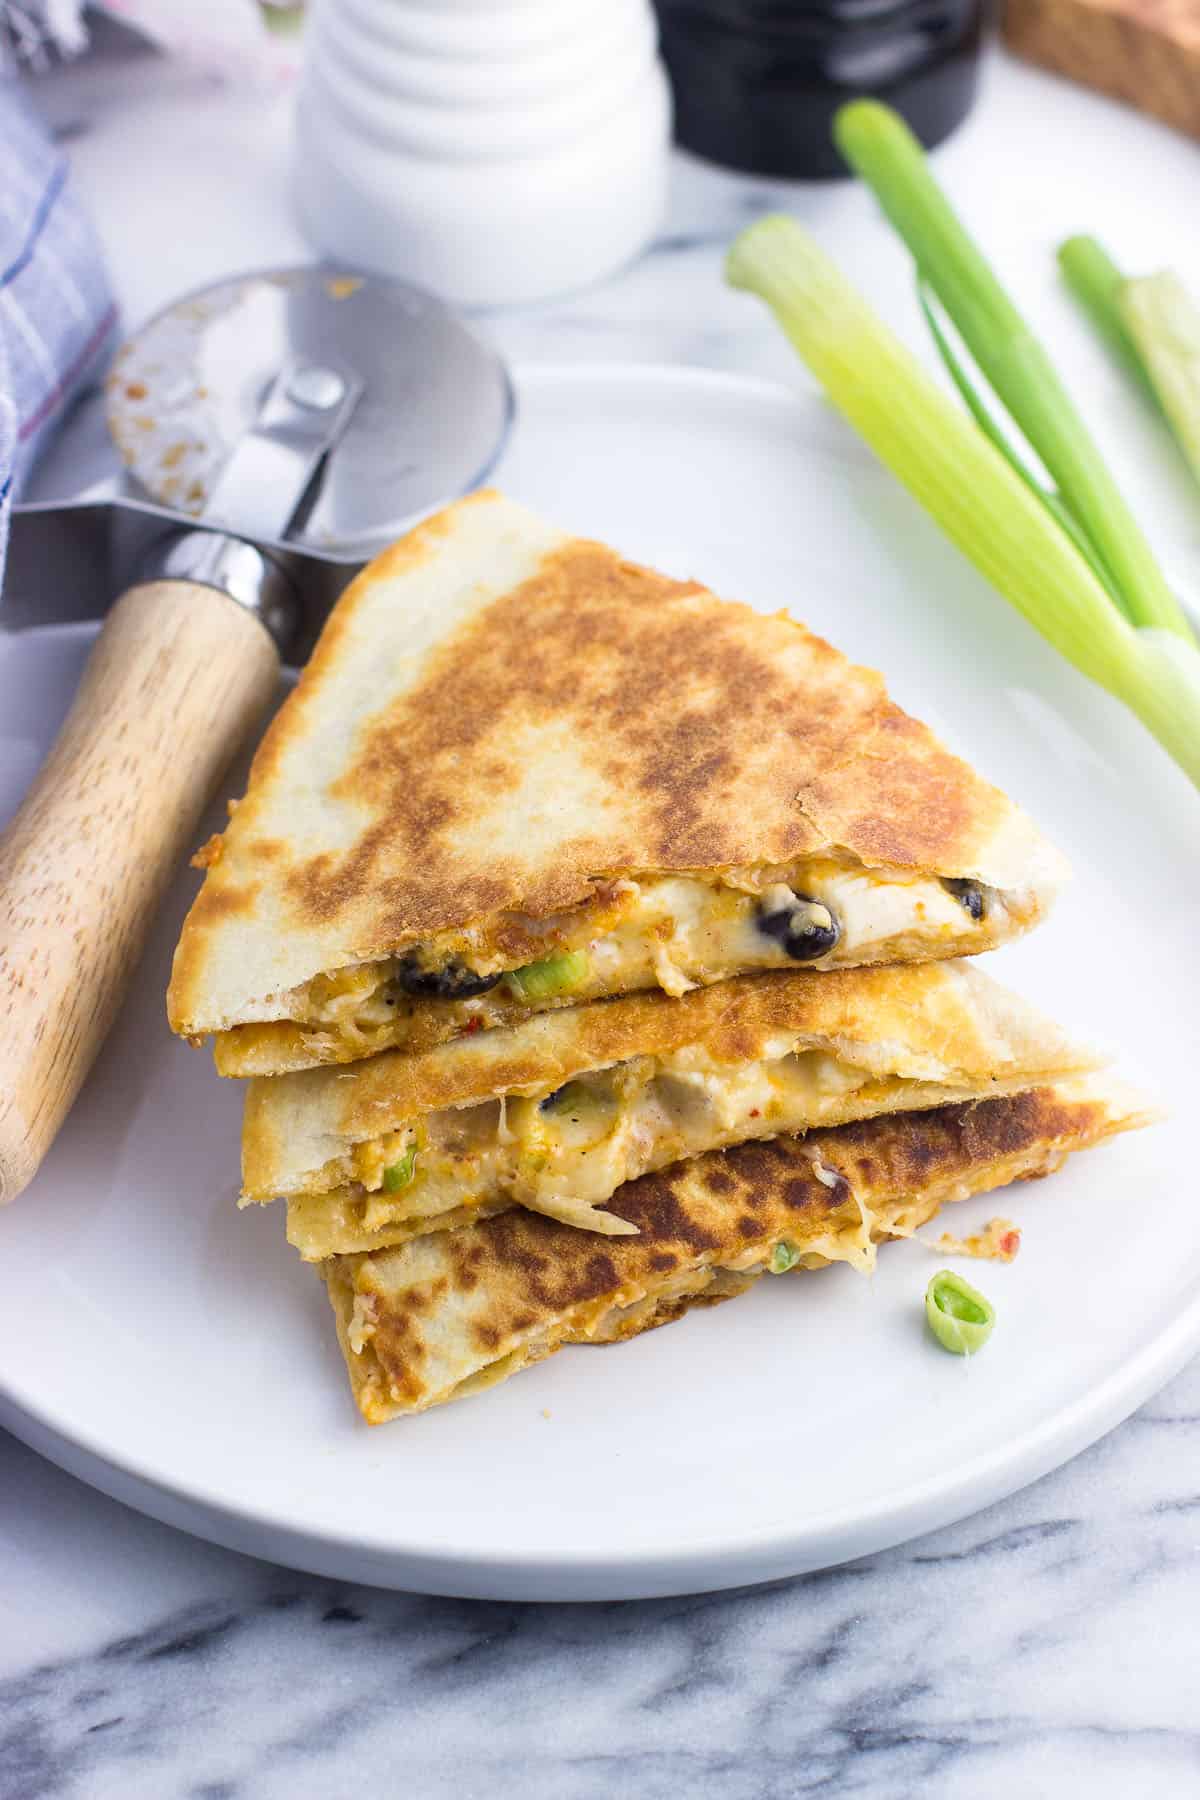
- Use one tortilla: While assembling a quesadilla with two whole tortillas (like a sandwich) can work for one with just cheese, once you add chicken and other things to the filling it can turn into a big mess when slicing/eating. Folding one tortilla not only helps the filling stay in while it's cooking and being flipped, it also gives you an assist while eating, as two wedges have a folded edge.
- Oil vs. cooking spray: I prefer to use a small amount of olive oil over cooking spray when cooking quesadillas as I find it helps crisp the tortillas even more. You can use another neutral-flavored cooking oil if you like, such as avocado, vegetable, or canola.
- Low(er) and slow(er): Start with a low-medium stovetop temperature. Cooking these chipotle chicken quesadillas at too high a temperature will lead to the tortillas becoming too browned before the cheese gets a chance to thoroughly melt throughout.
- Slicing: A pizza wheel or pastry wheel makes slicing through the cooked quesadillas a breeze. I usually cut a folded-in-half quesadilla into three wedges, leaving the point of the center wedge connected to better hold it all together.

Recipe FAQs
Yes! You can prep all of your filling ingredients (cut the chicken, shred the cheese, etc.) and refrigerate them separately so once it's meal time all you need to do is assemble and cook. You can also assemble the quesadillas and refrigerate them whole until it's time to cook.
Heat your oven to 325°F (163°C) and place quesadilla wedges on a pan lined with foil or parchment paper. Cook until warmed thoroughly, 10-15 minutes. You can also use the microwave but they'll lose some of their crispness.
Vegetarian: Use a meat-free chicken alternative or omit and instead bump up the plant-based protein additions, such as black beans, chickpeas, tofu crumbles, tempeh, etc.
Gluten-free: Use a gluten-free tortilla and do check the labels on the chipotle peppers in adobo and rotisserie chicken (if using) to be sure the particular brand/seasonings used don't contain gluten.
Dairy-free: Pick a dairy-free cheese (contrary to what many people assume, mayonnaise isn't dairy!).
Related Recipes


Did you enjoy this recipe? I’d love for you to leave a star rating and a comment review in the recipe card below!
Chipotle Chicken Quesadillas
Ingredients
- 4 10-inch flour tortillas (usually "burrito size")
- 6 Tablespoons chipotle aioli divided
- 2 cups shredded cheese see notes for recommendations
- 2 cups cooked and shredded/chopped chicken
- ½ cup diced onion
- ¼ cup canned black beans rinsed and drained
- 1 - 2 green onions diced (optional)
- ¼ cup chopped cilantro (optional)
- ¾ teaspoon olive oil for cooking
Instructions
- Make one batch of chipotle aioli, linked in the ingredients section. This recipe for four quesadillas will use up most of it, but you'll have some leftover.
- Lay four tortillas flat and evenly spread about 1 ½ Tablespoons of chipotle aioli onto the entire surface of each one.
- Next evenly sprinkle ½-cup shredded cheese onto one half of each tortilla. Onto each of the cheese halves scatter ½-cup of chicken, two tablespoons of diced onion, one tablespoon of black beans, and sliced green onion and/or chopped cilantro, if using. The quantities of each ingredient don't have to be ultra precise. Fold each tortilla in half to close and press gently.
- Add ¾ teaspoon olive oil to a 10"-diameter pan set over low-medium heat. Swirl the oil around (or spread it with a brush or spatula) so that it covers the whole bottom. You can add a little extra oil if you need, but you just want for the surface area to be covered just enough.
- Once the pan is heated, place two folded quesadillas in the pan, arranging them with the folded sides in the center so they fit following the pan's shape. Cook until the bottom side of the tortillas are crisp and golden-brown, then flip and cook until the other side has crisped up as well. Remove from the pan and slice each into wedges (a pizza wheel makes this easy). Repeat for the remaining two quesadillas and serve immediately.
Notes
- While there's certainly space for you to do your own thing and mix up the ingredients here, (try to!) resist the urge to load up your quesadilla with a ton more fillings. It makes it messy and difficult to fold and maneuver around the pan as it cooks.
- Prep-Ahead: You can prep all of the ingredients (cut the chicken, shred the cheese, etc.) and refrigerate them separately, or you can assemble the whole quesadillas, refrigerating them and cooking just prior to mealtime.
- Reheat Instructions: Heat oven to 325°F (163°C) and line a baking sheet with foil or parchment paper. Add quesadilla wedges in a single layer and cook until warmed throughout, 10-15 minutes. You can also microwave them, but they'll lose a bit of their crispness.
Would you like to save this?
Plus receive periodic recipe newsletter emails.
Nutrition
Nutritional information is provided as an estimate. As it can vary due to many factors (brands used, quantities, etc.), we cannot guarantee its accuracy.
Food Safety and Nutrition Disclaimer
Comments
No Comments