
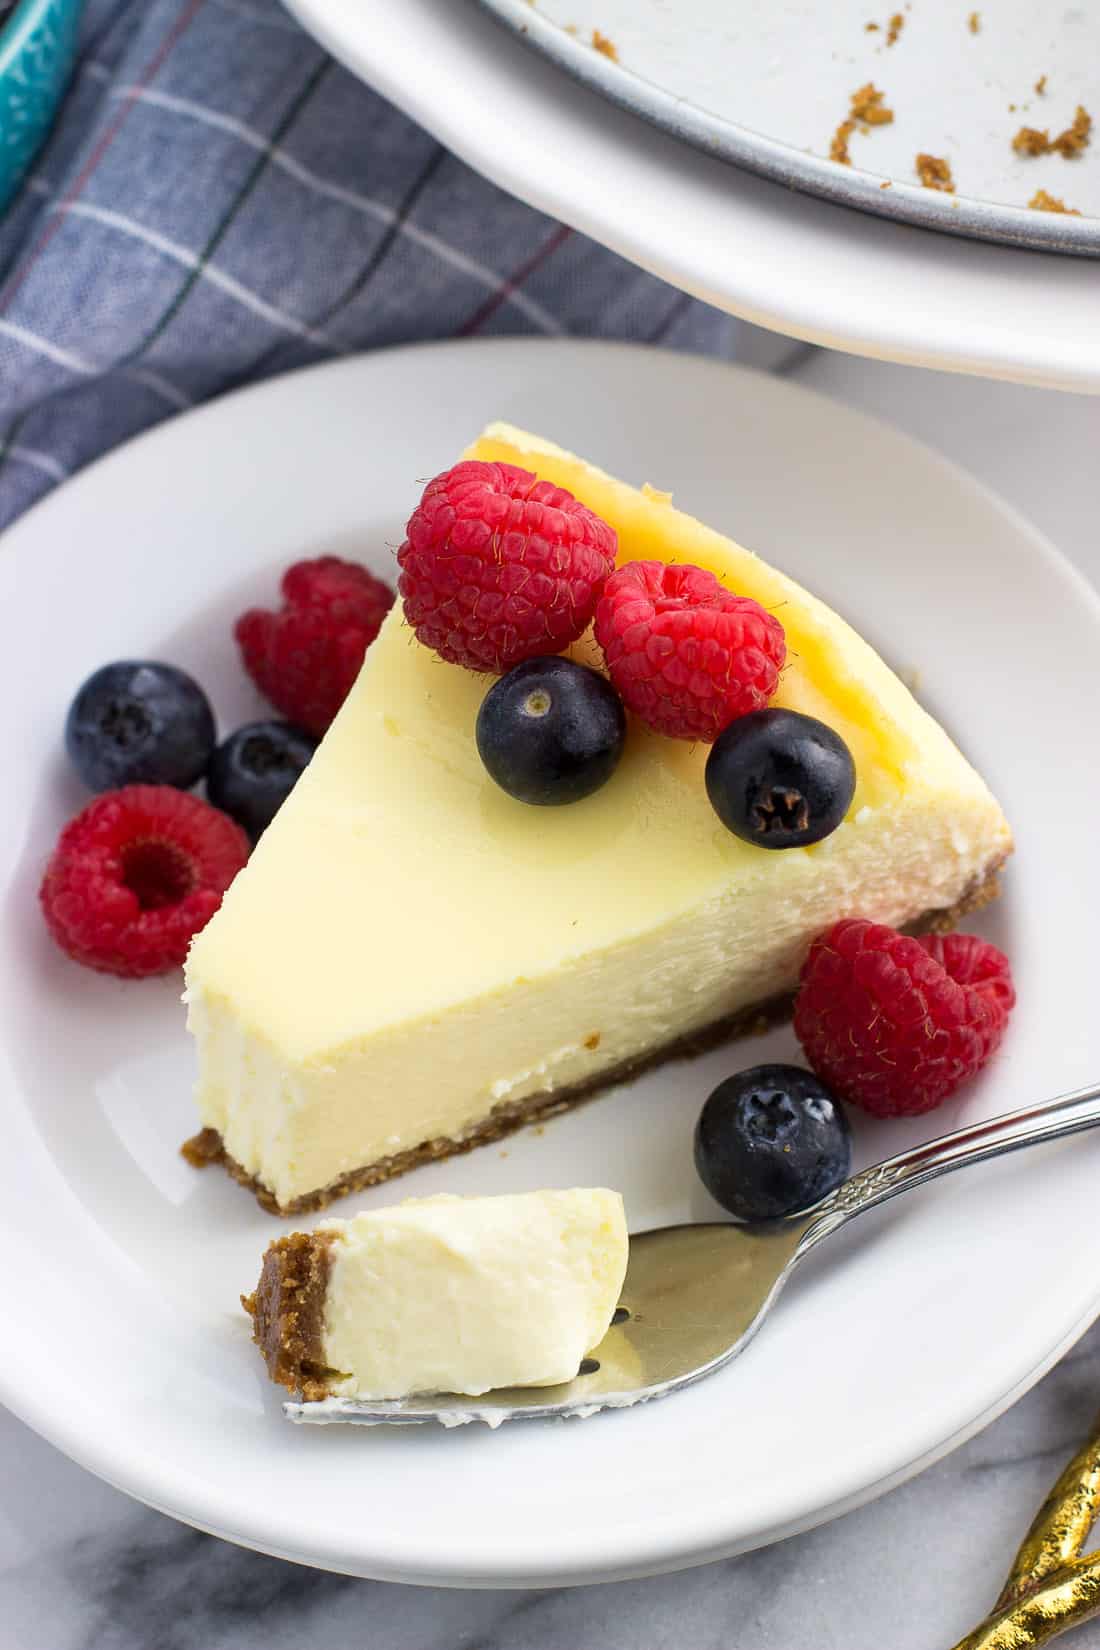
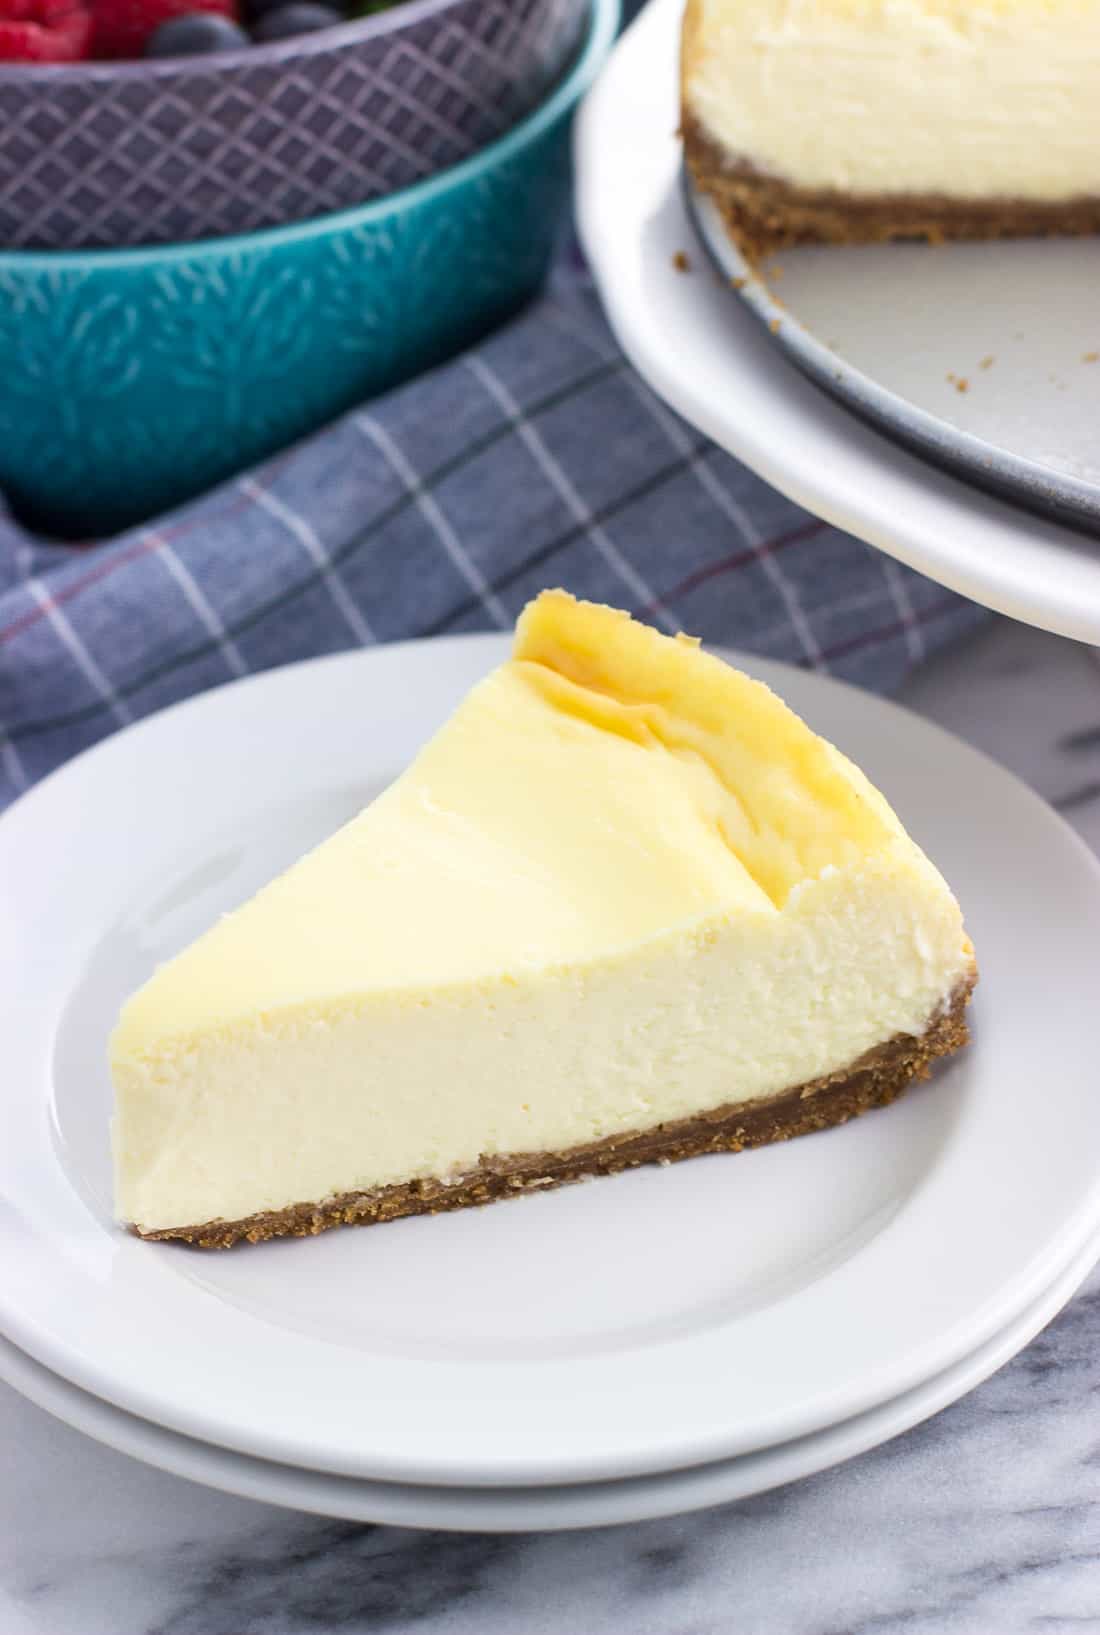
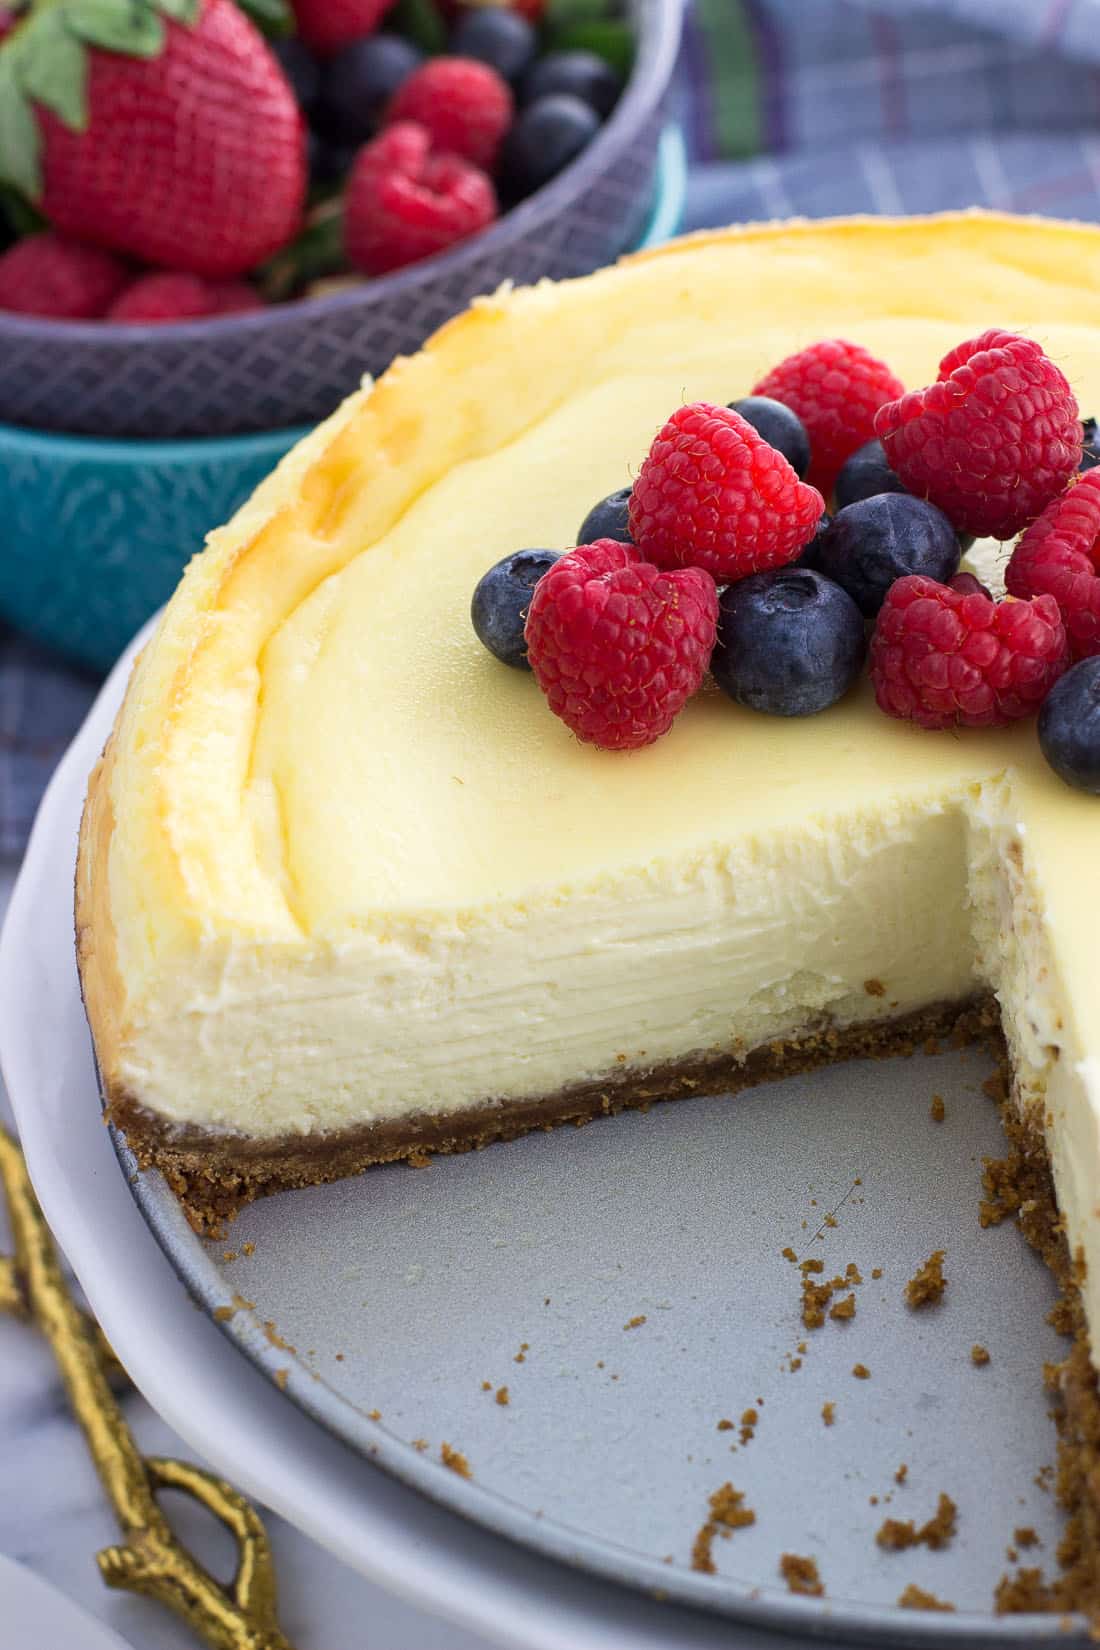
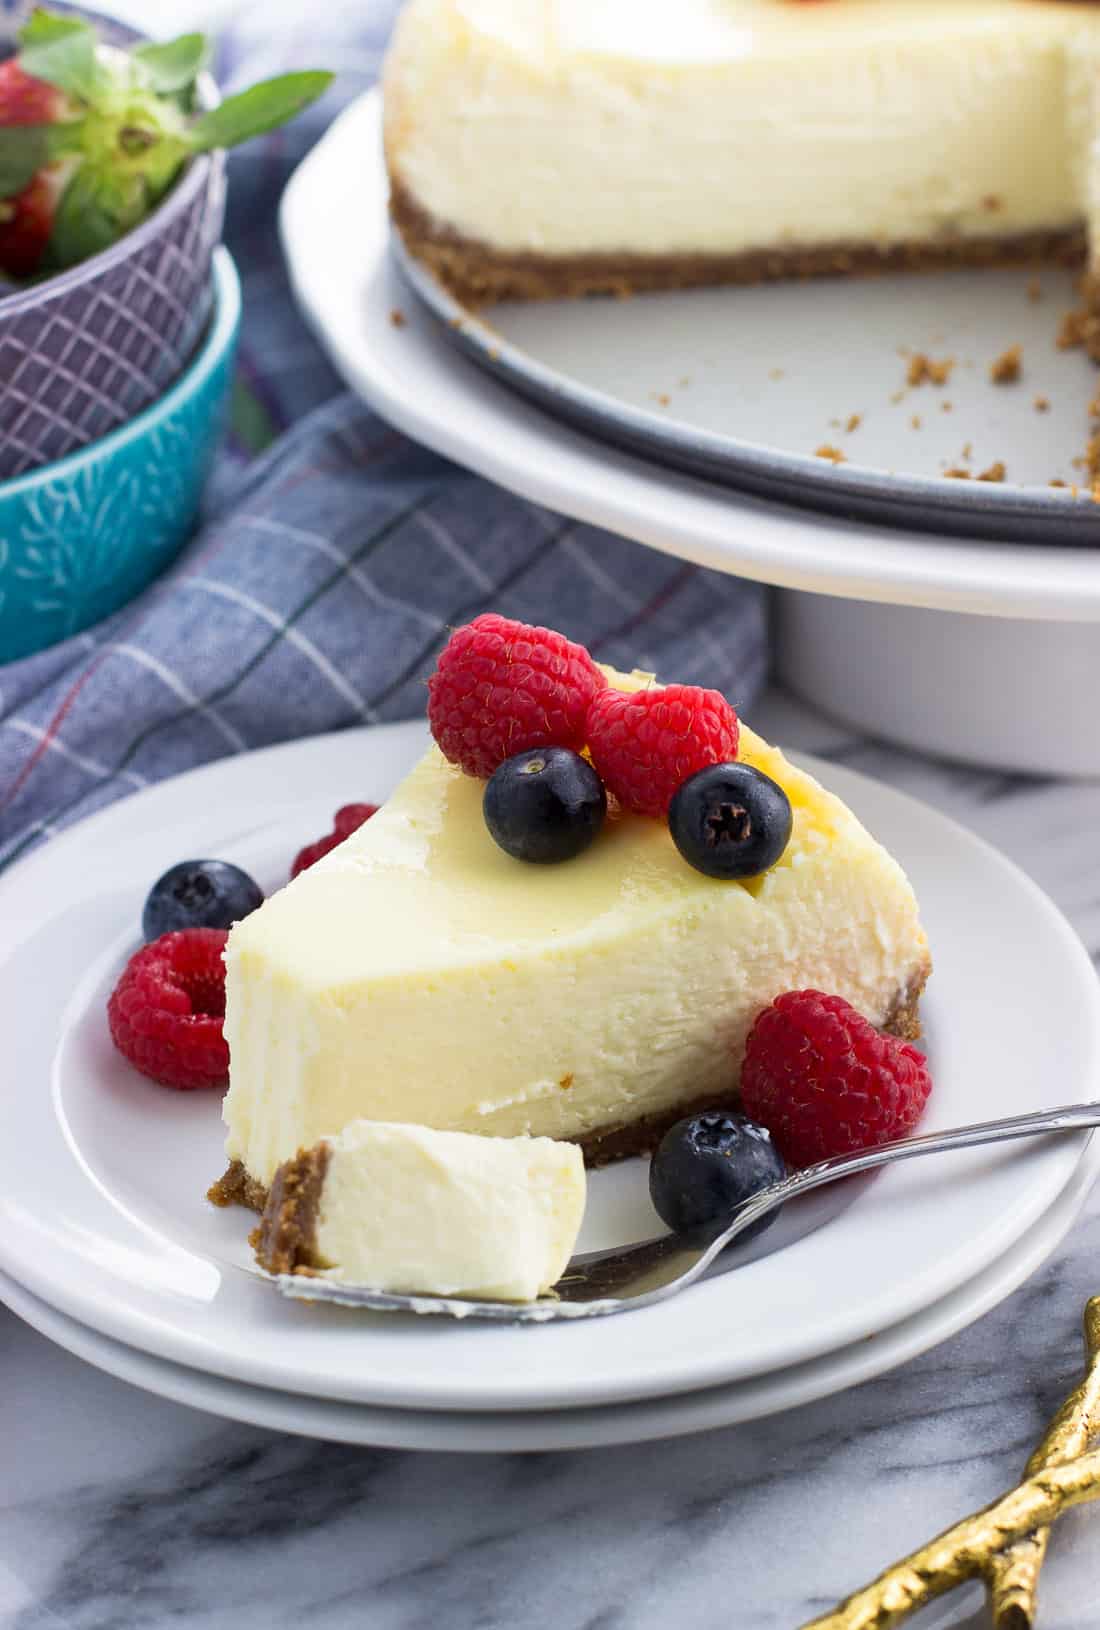
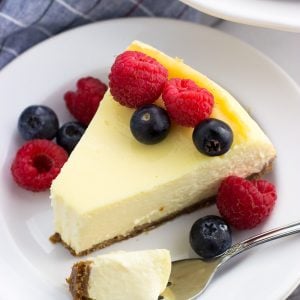
This sour cream cheesecake recipe is a family favorite! Sour cream adds a wonderful tang to this perfectly sweetened baked cheesecake. An easy graham cracker crust and a simple method of prep (no water bath!) round out this classic dessert staple.

This post has been a long time coming. It's my mom's cheesecake recipe, which has been a mainstay in my dessert memory for decades.
As the story goes, many years ago my mom misread a recipe that called for a layer of sour cream to be added to the top of the cheesecake. Instead of reserving some of the two cups of sour cream, she added it all to the batter, only realizing her "mistake" once the cheesecake was already in the oven.
We say "mistake" in quotes because the end result turned out to be the best cheesecake she ever made. With a few additional tweaks, it's now our beloved family cheesecake recipe.
Perfectly sweetened and creamy with a complementary tang, this sour cream cheesecake is always the star of the dessert table.
Reasons to Love This Sour Cream Cheesecake
- Sour cream entirely mixed into the filling provides the most delicious tang that matches up beautifully with the sugar for a balanced sweetness.
- There is no separate sour cream layer on top, which a) saves a step, and b) makes this a great option for those who may find that idea off-putting.
- This recipe contains plenty of tips to help you achieve a crack-less cheesecake without the fuss of a water bath.
- It's a perfect make-ahead dessert for a gathering or event as it benefits by an overnight chill in the refrigerator.
Recipe Ingredients
One of the (many) things I love about cheesecake is the simplicity of the ingredients, in both the crust and the filling.

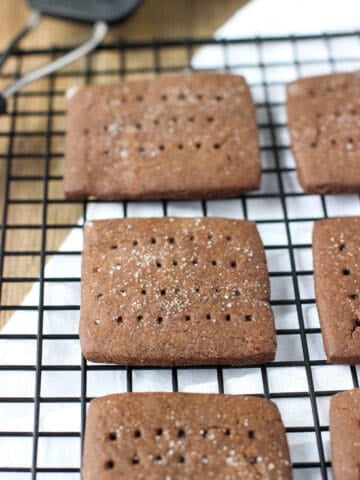
Graham crackers: Standard grocery store honey or cinnamon graham crackers are a classic, though do use chocolate graham crackers instead for a fun twist.
Cream cheese: Full-fat cream cheese is preferred here to deliver the rich and decadent dessert flavor we know and love with cheesecake.
Sour cream: Again, a full-fat variety works best.
Step-by-Step Instructions
There are two parts to this cheesecake: the crust and the filling. The full instructions with all the small details are in the recipe card at the bottom of this post.
Graham Cracker Crust
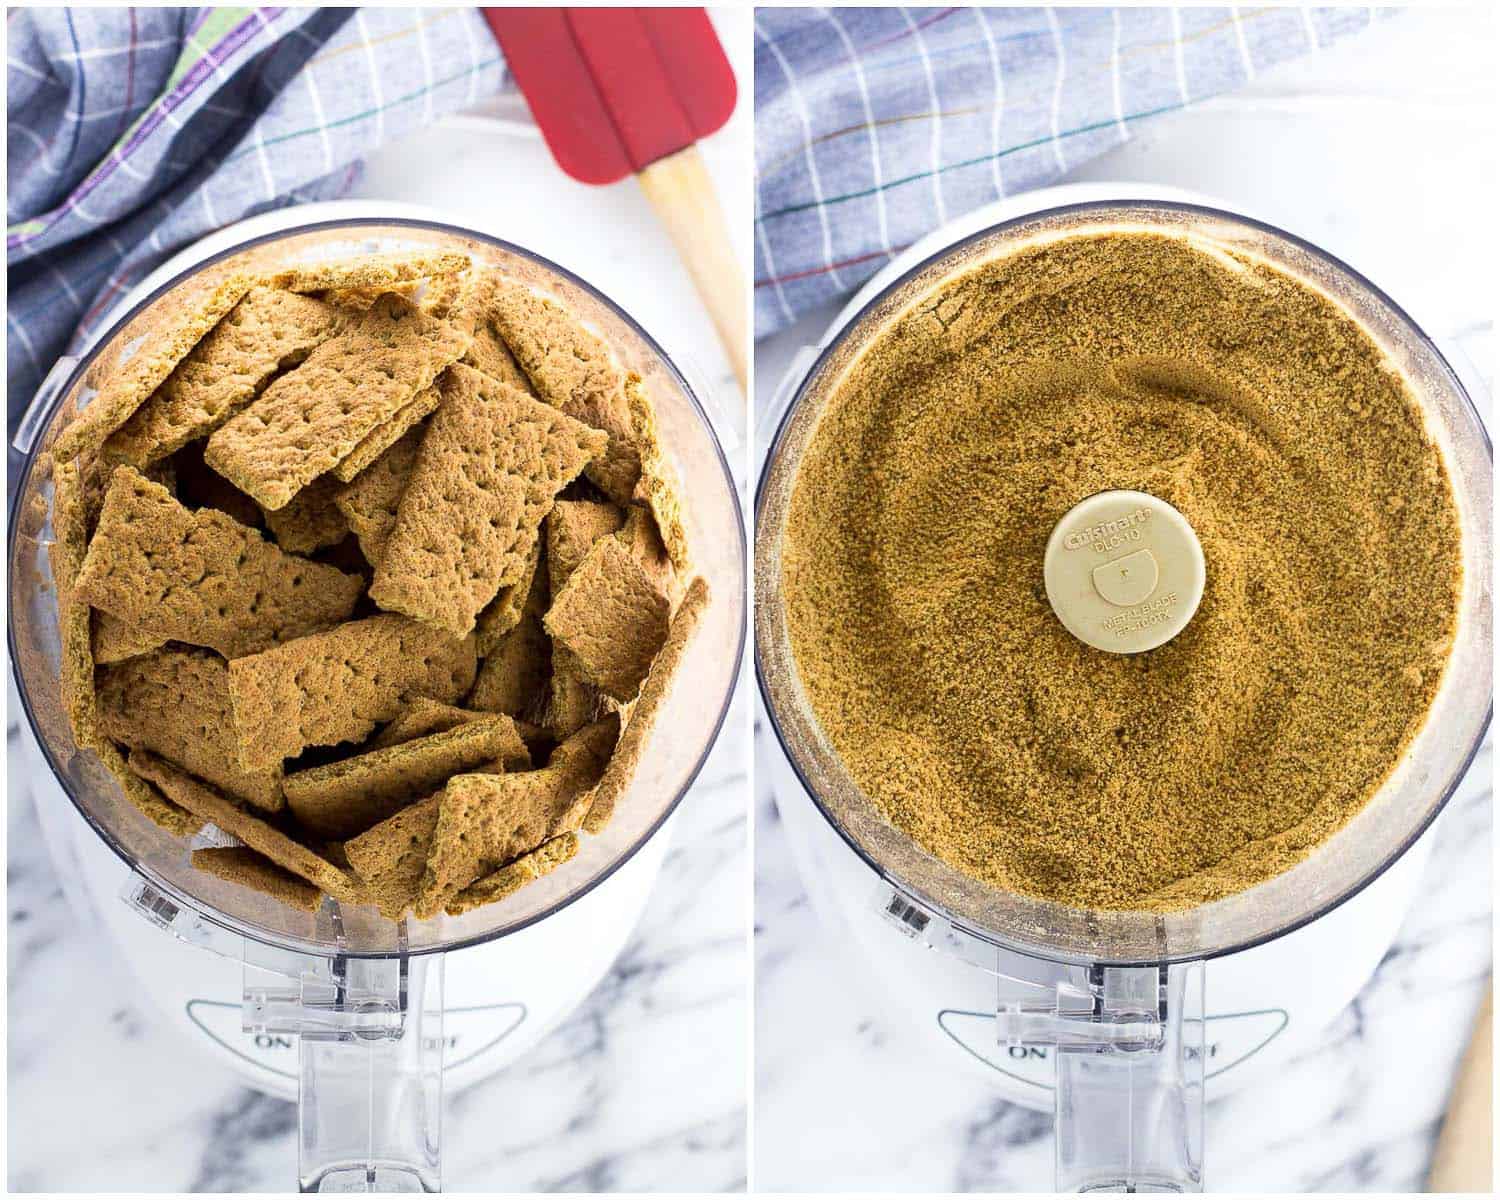
- Give the graham crackers a whirl in the food processor to break them up into fine crumbs. If you don't have a food processor, you can place them in a sealable plastic big and roll them with a rolling pin.
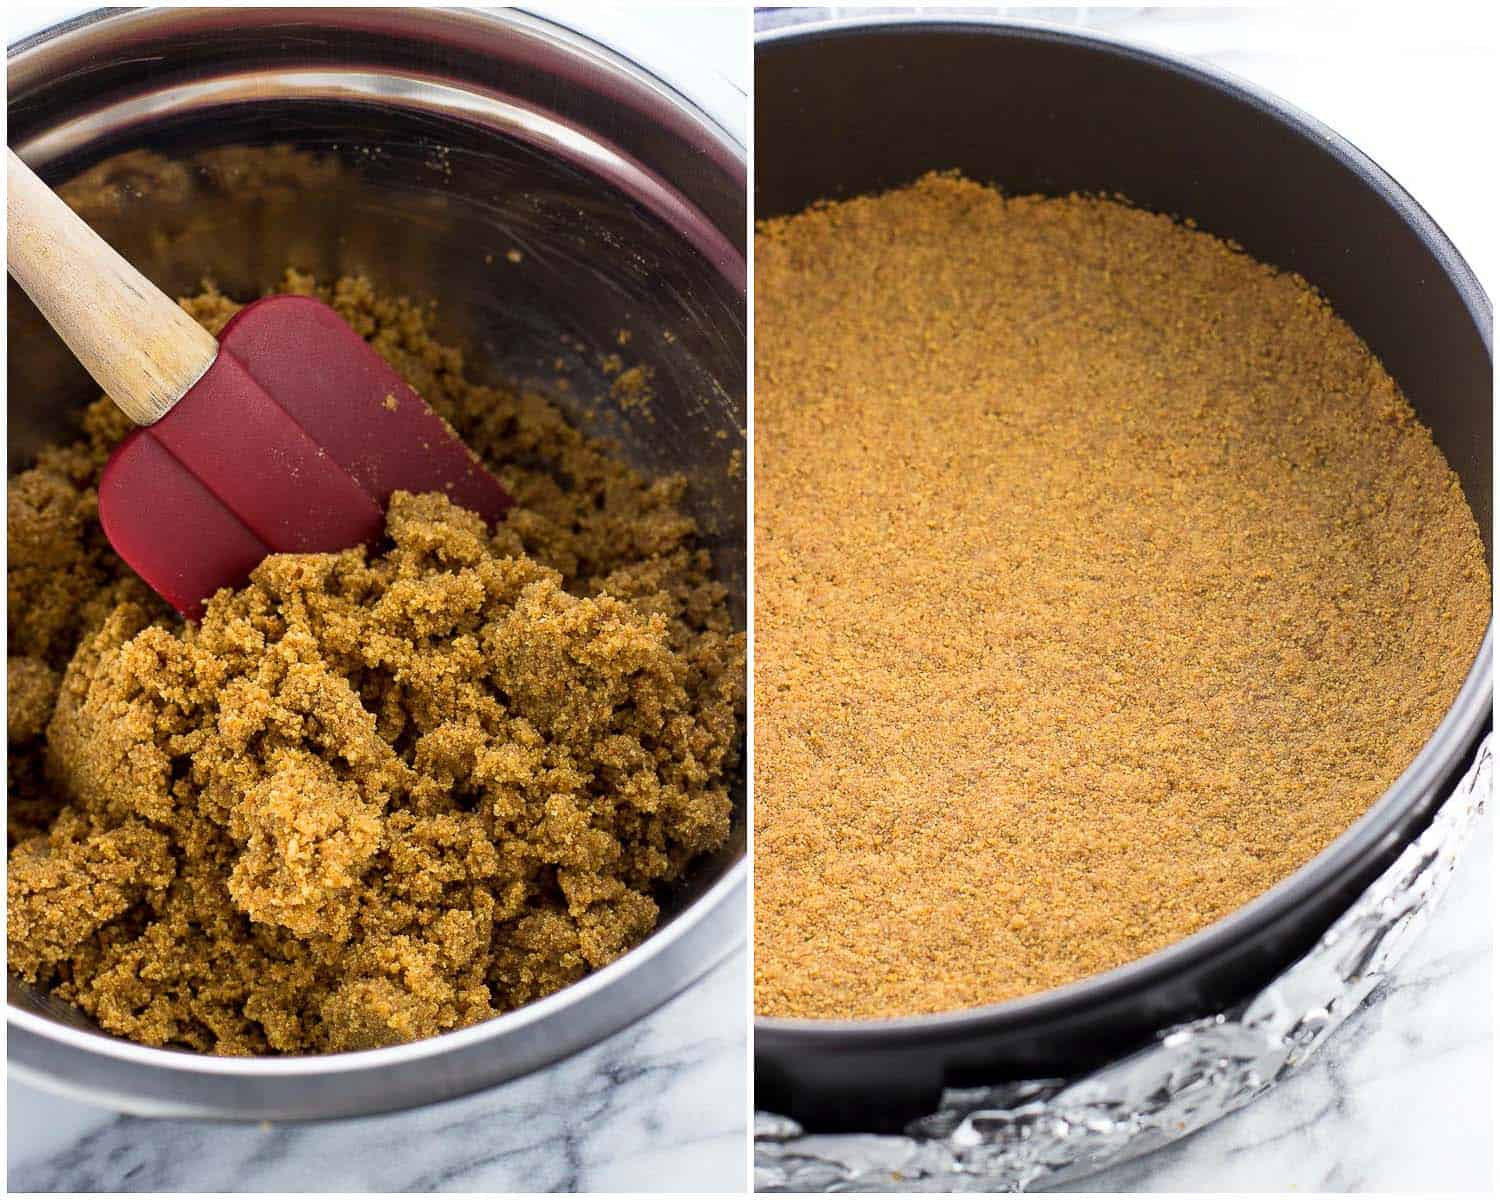
- Combine them in a bowl with melted butter. Press them into the bottom and sides of a springform pan, then bake until set and slightly browned.
Cheesecake Filling
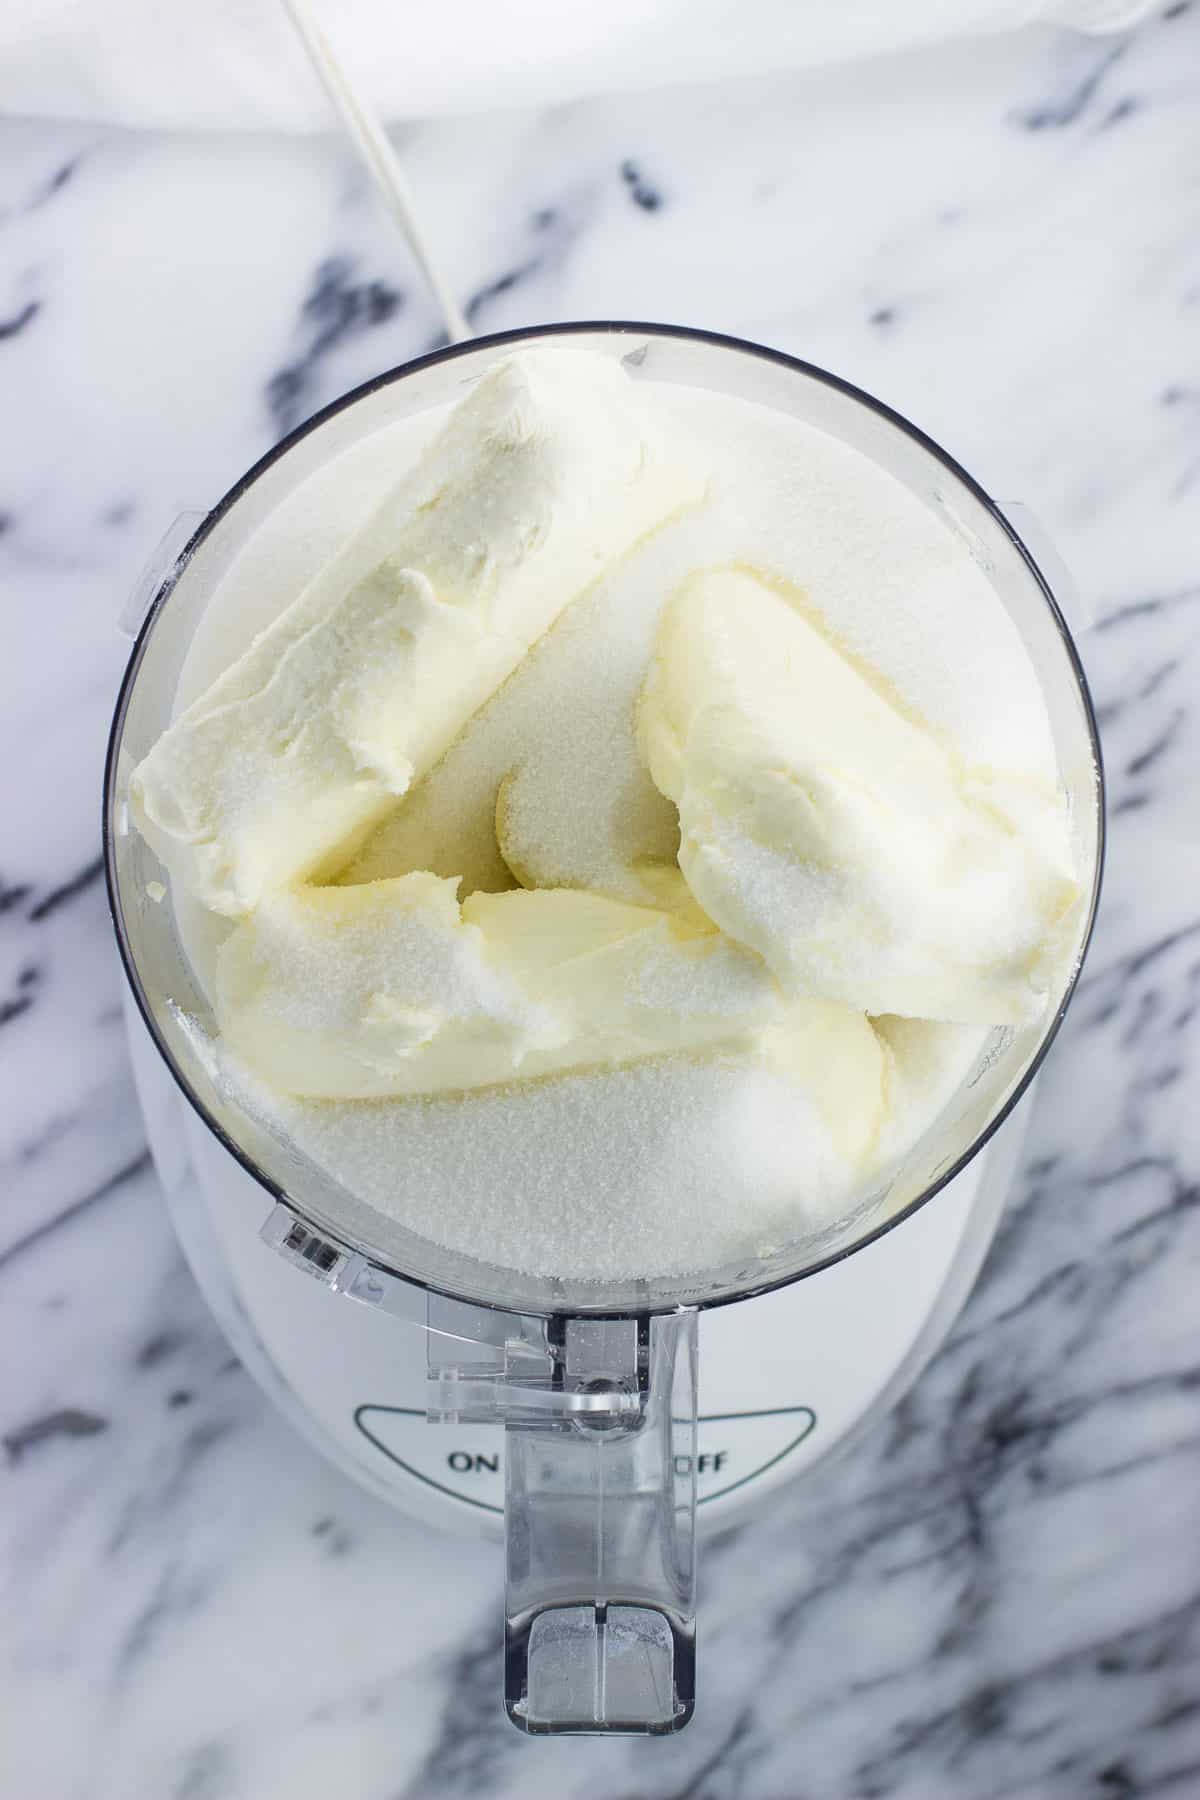
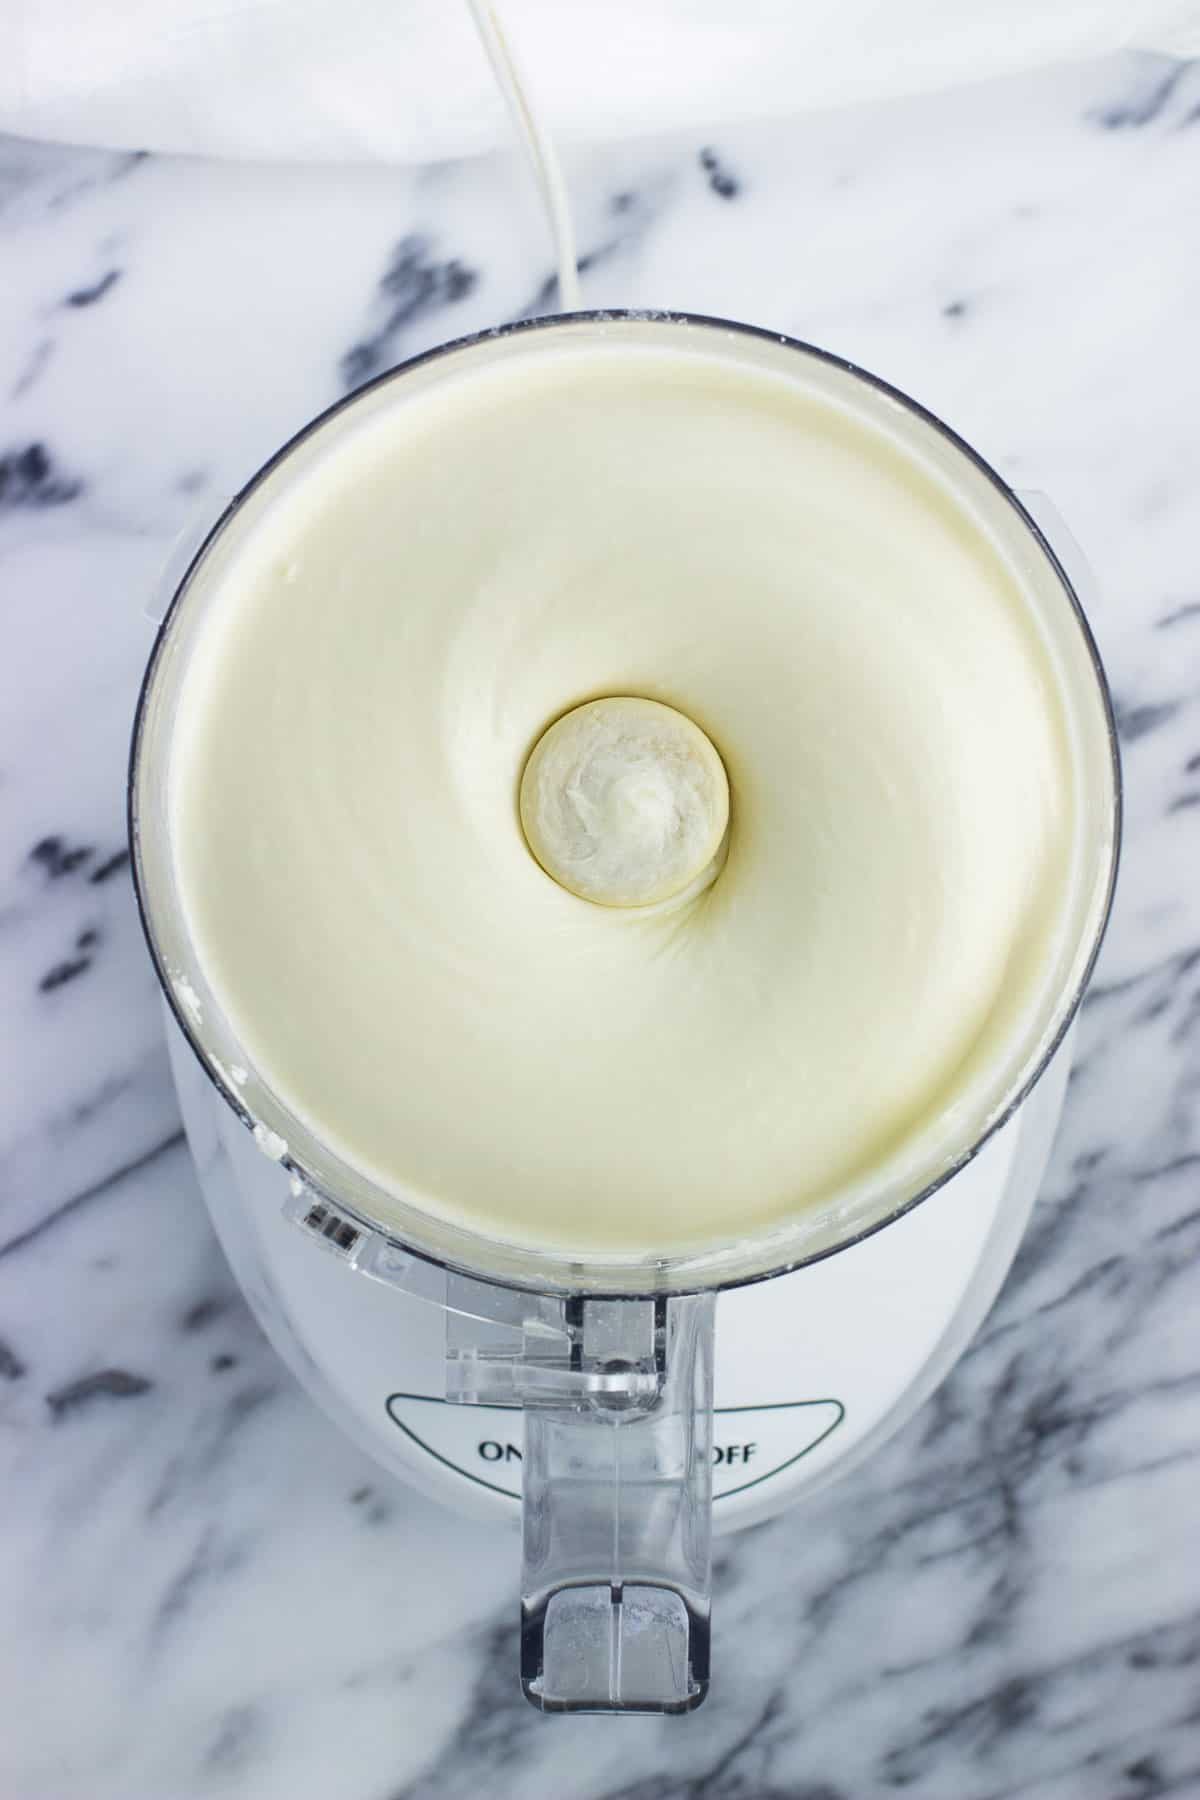
- Add the cream cheese, sugar, and salt to a food processor and whiz until smooth and fully combined. (See tips in the recipe card if using an electric mixer instead).
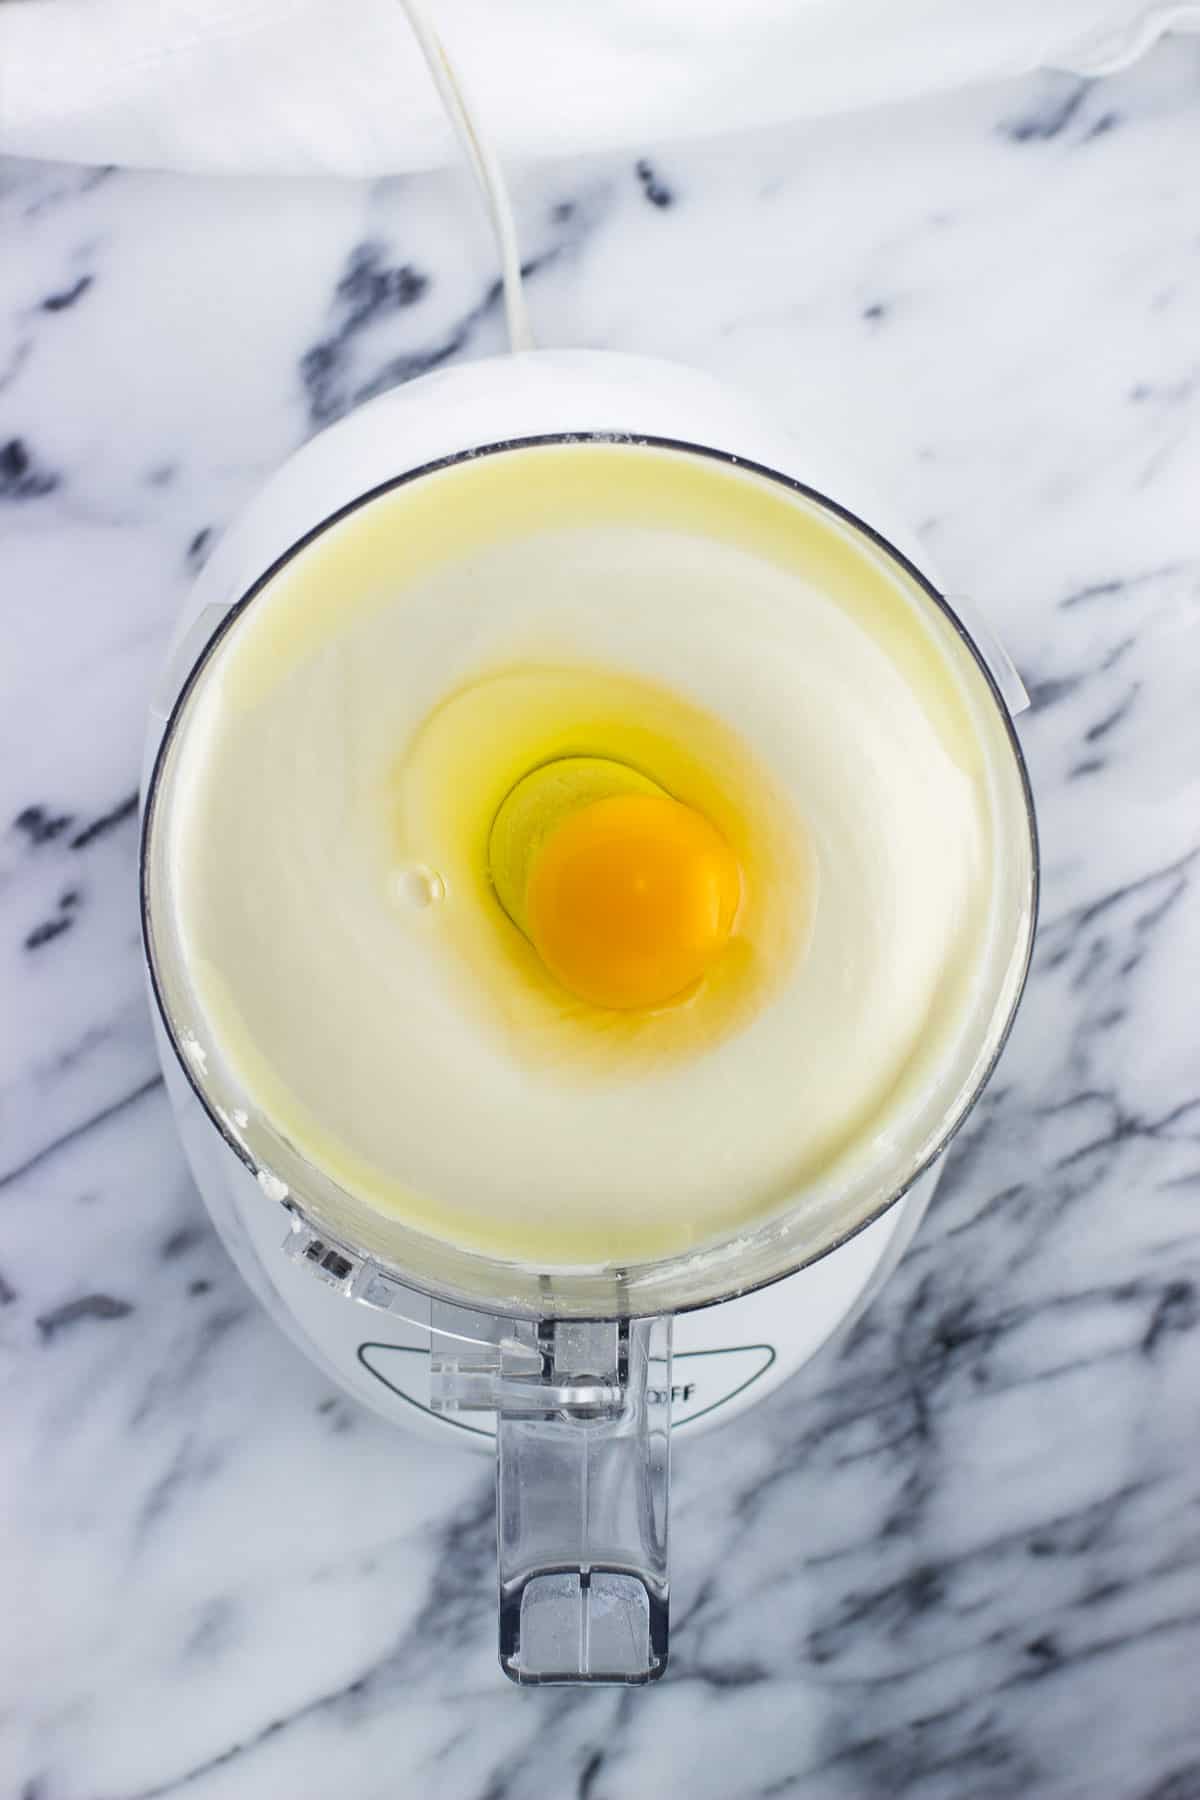
- Add the eggs one at a time until combined.
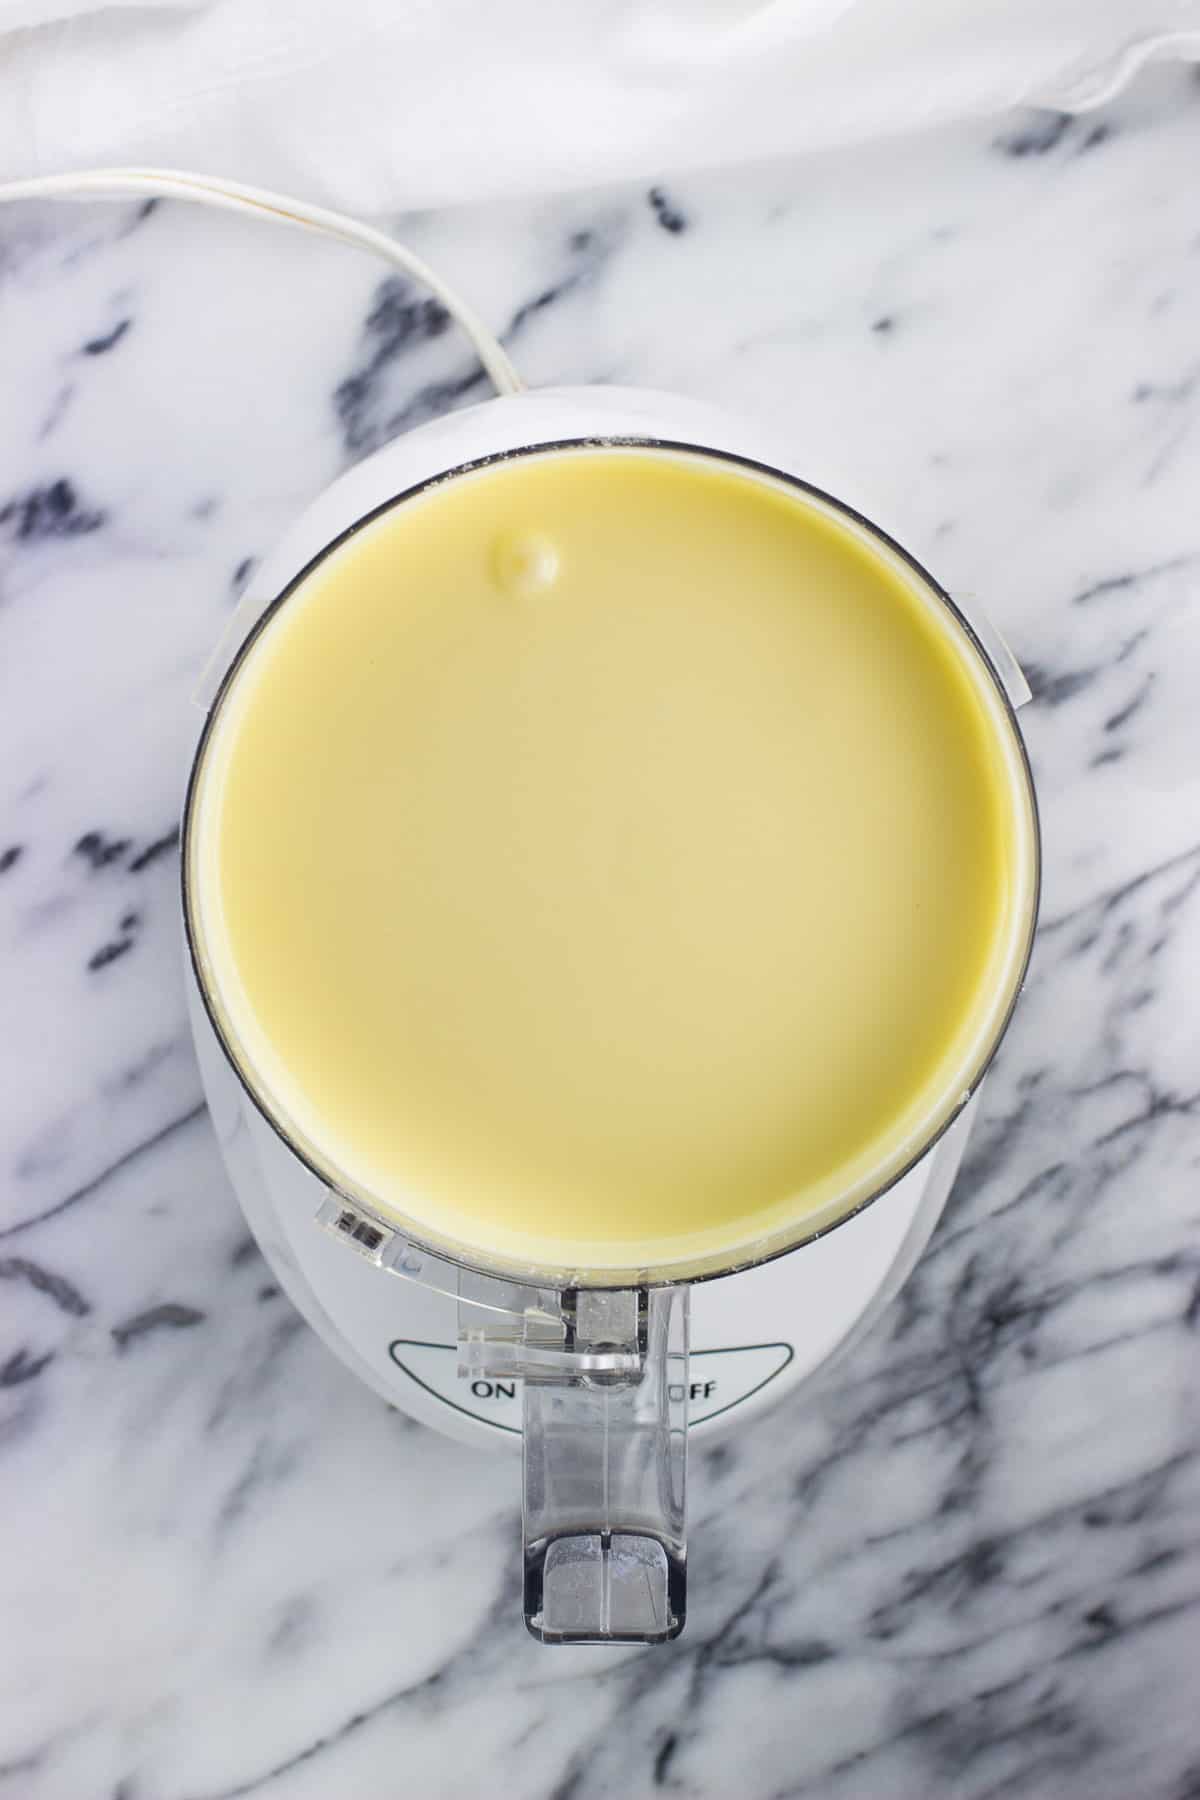
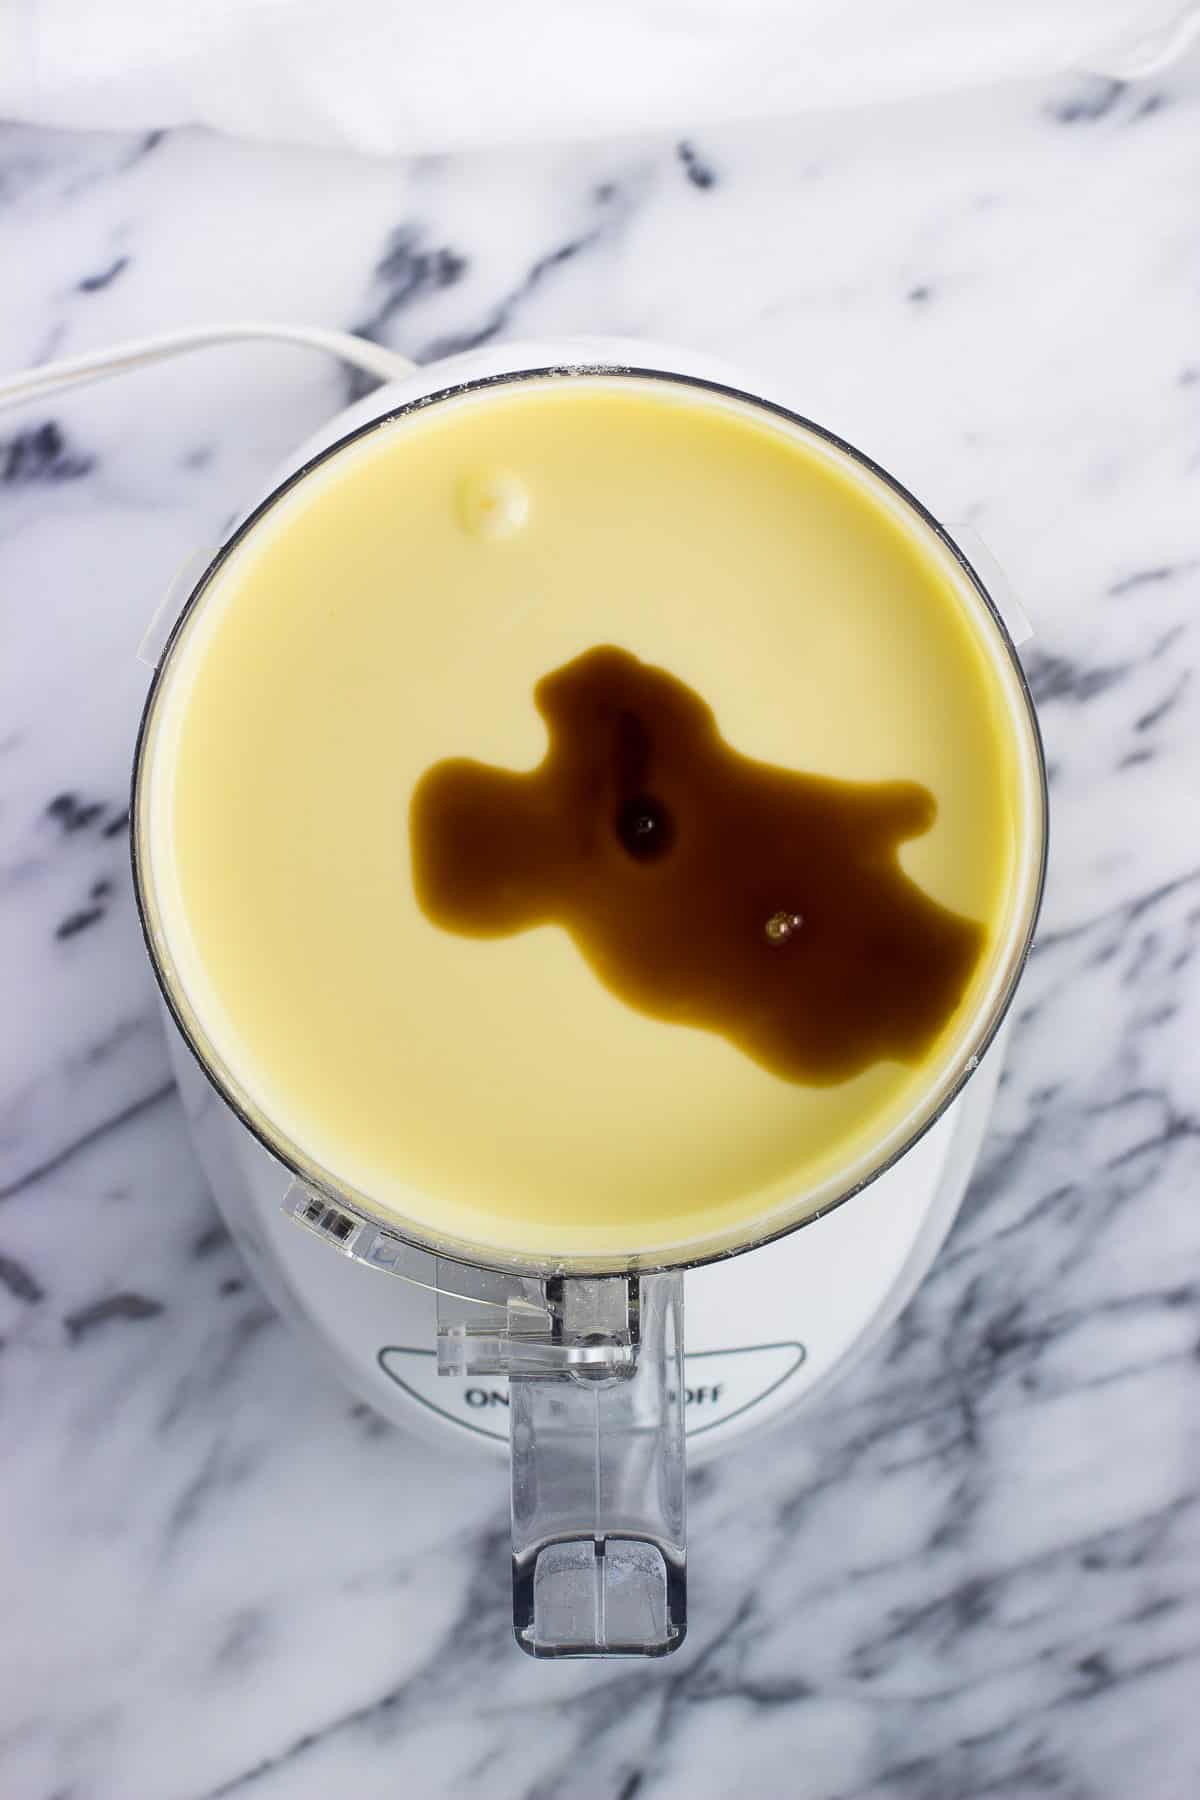
- Process in the vanilla extract, then do the same for the sour cream.
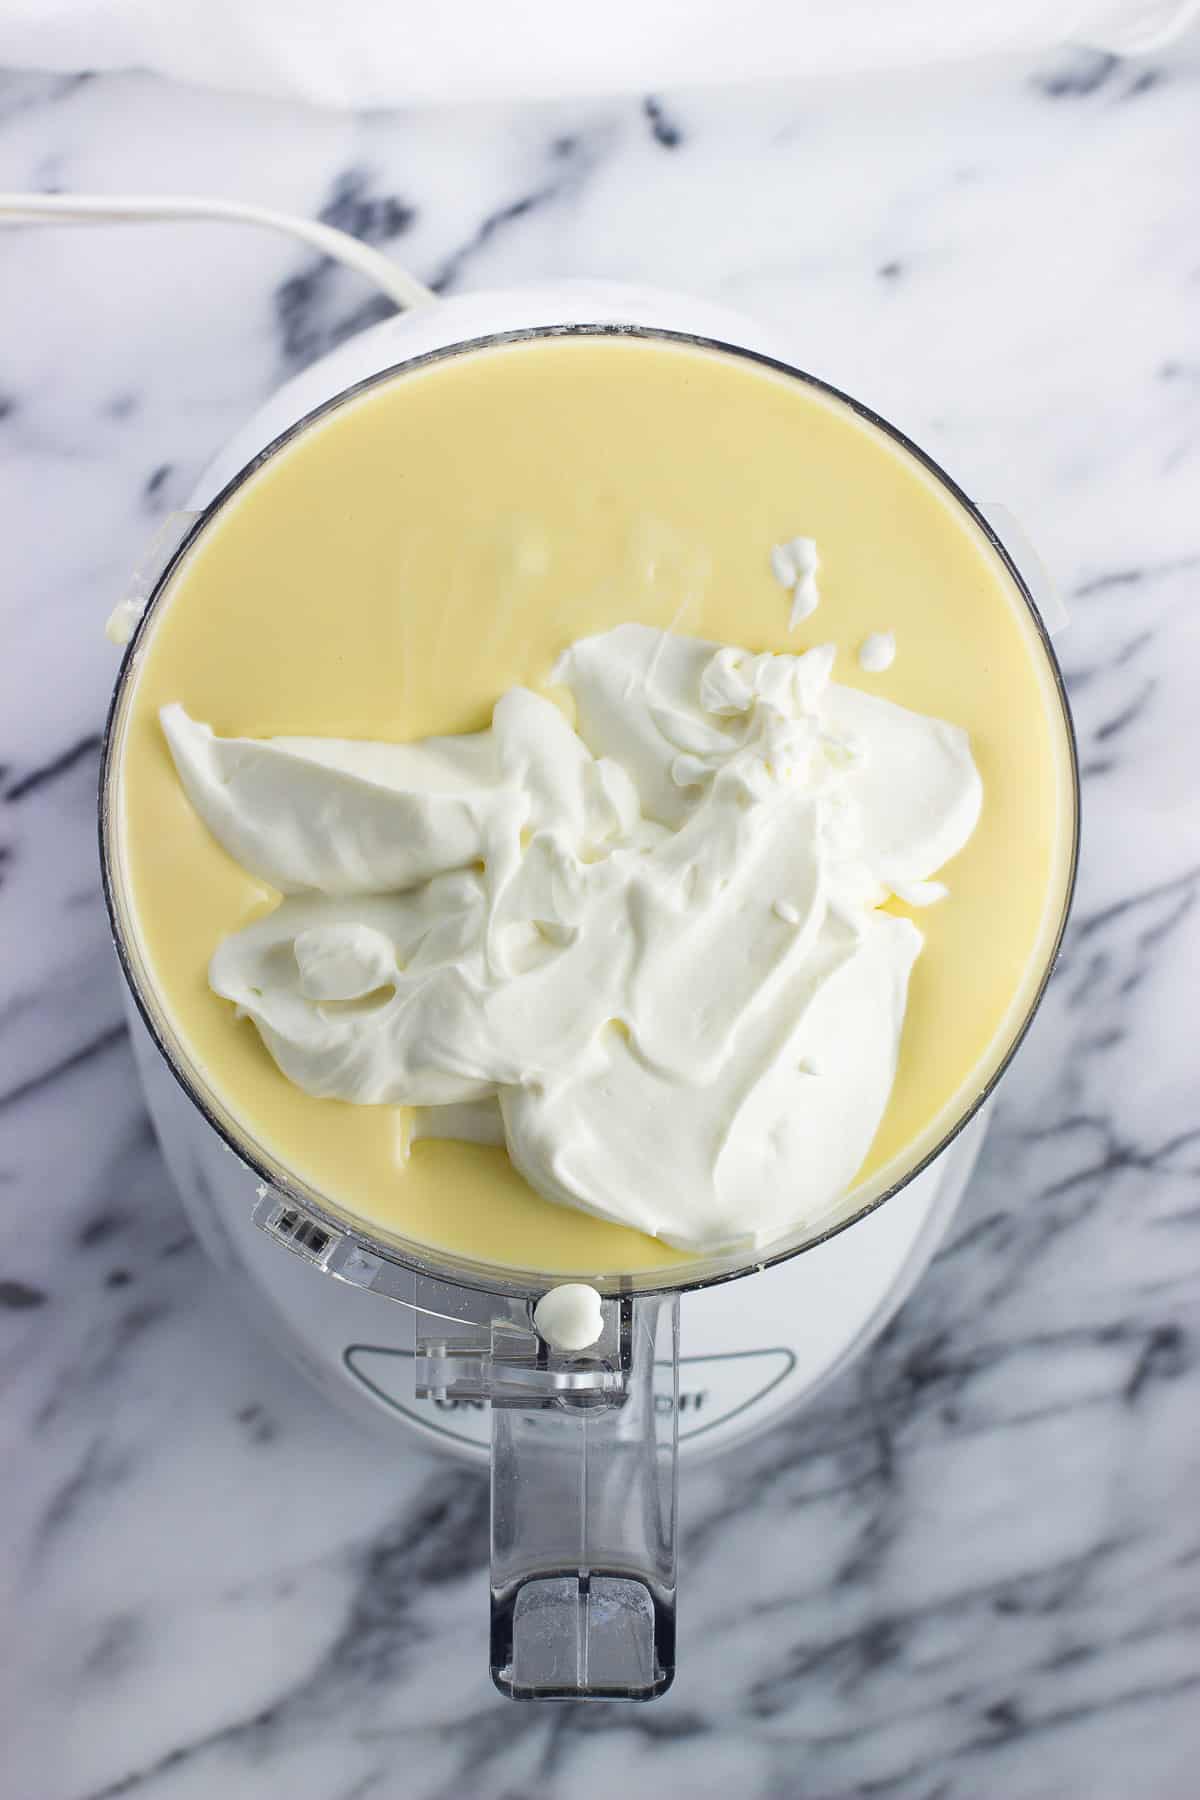
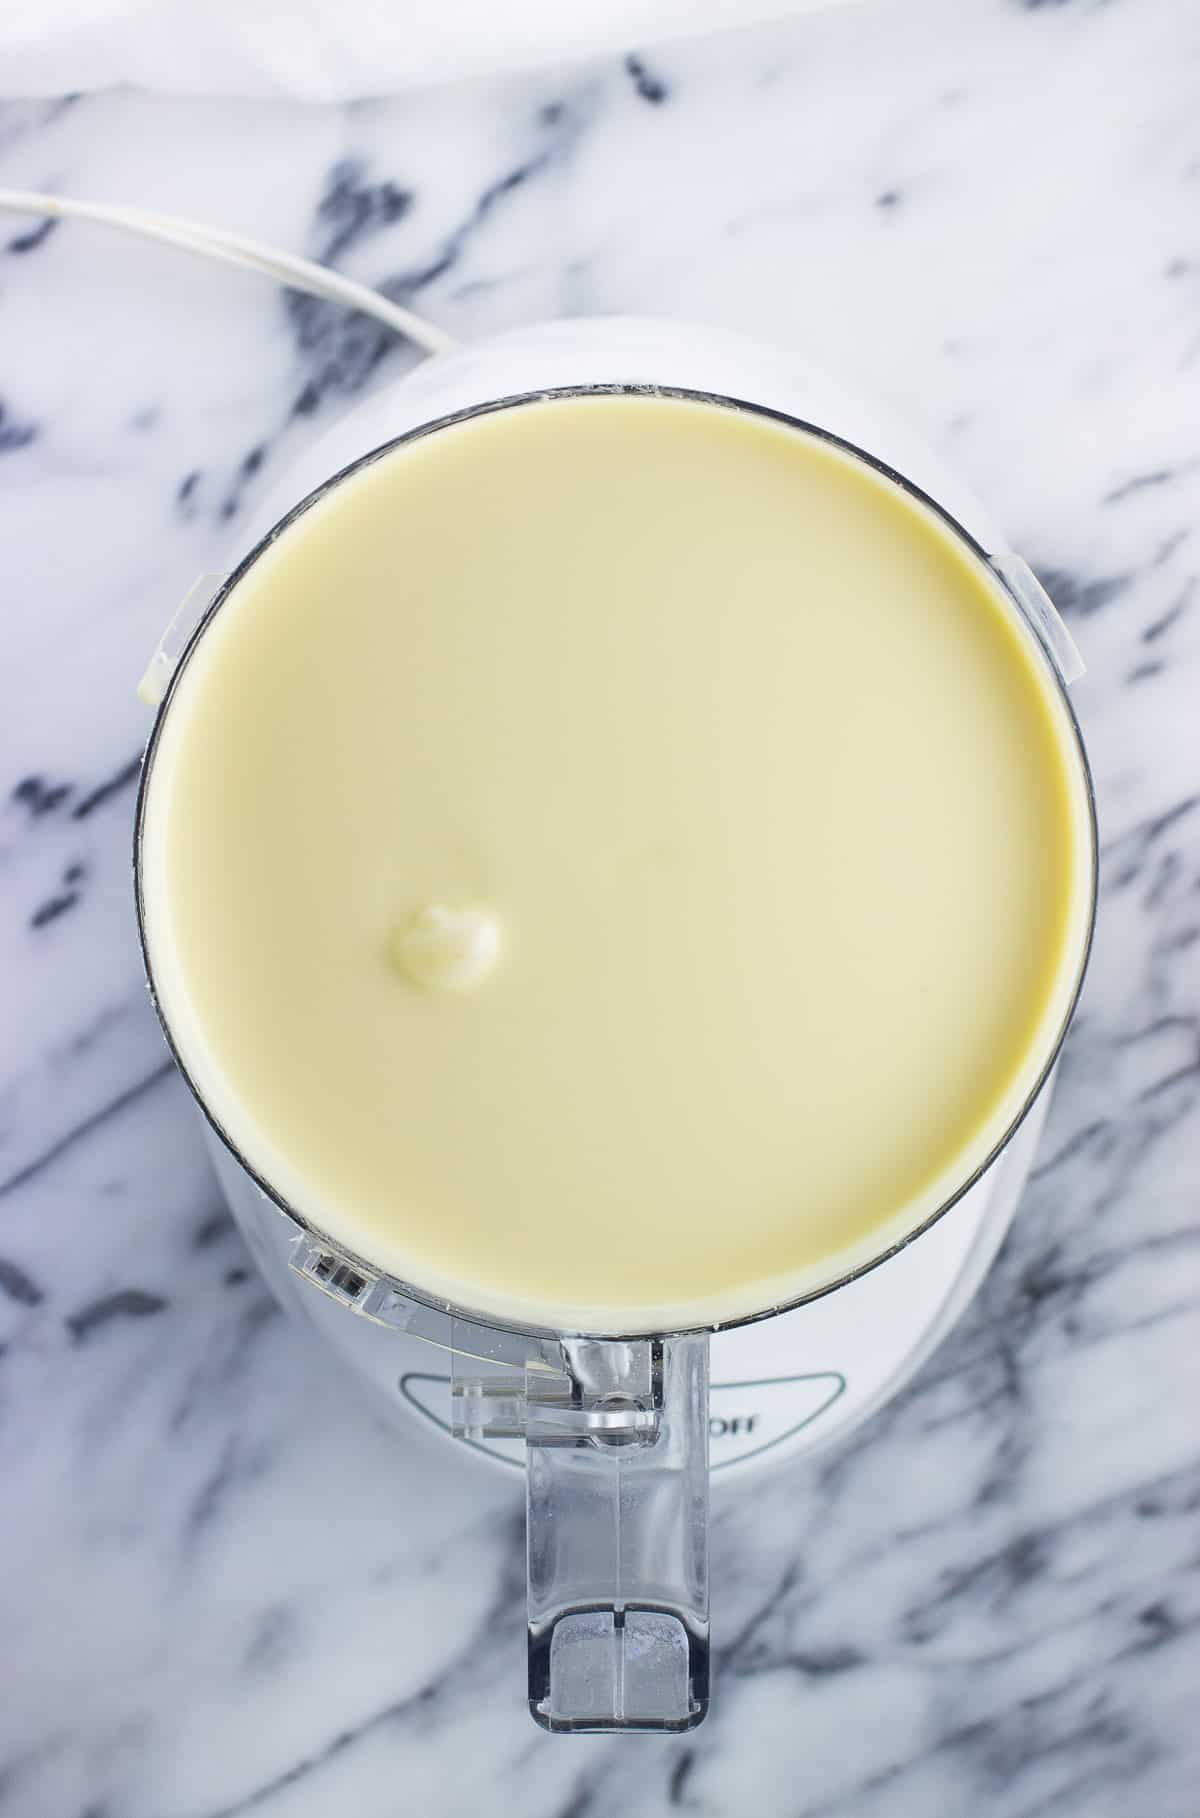
- Your sour cream cheesecake filling should now be creamy and smooth. Pour it out over the crust and bake.
I'm about to wade into dicey waters here by my next statement, but here goes: I reliably make this crack-less cheesecake in the oven - without a water bath.
Not that I think a crack in a cheesecake is the end of the world. Far from it. My mom never uses a water bath and isn't as finicky as I've become with the method, and if a crack develops in the middle? Well, just throw some berries over top to hide it and keep on moving.
That's my cooking style most of the time, but I challenged myself to see if I could have the best of both worlds, producing a crack-less cheesecake without the hassle of a water bath.
The answer is yes.
Tips on Baking Cheesecake Without a Water Bath
There are several important steps to cheesecake baking for best results and to help ward off a crack.
- Bake it at a low temperature. We're going with 325°F here.
- Mix up all the ingredients in a food processor, and/or make sure they're at room temperature and not cold straight from the fridge.
- Don't overbake! It might look a little underdone when it's time to take it out of the oven.
- Immediately loosen the edges from the sides of the pan once it's out of the oven.
- Let the cheesecake sit at room temperature for a few hours before refrigerating.
A lower temperature isn't anything new when it comes to cheesecake, but using a food processor might be. A food processor works less air into the batter when it comes to mixing things up than a hand mixer does.
Less air in the batter = less rising in the oven = less contracting out of the oven = less chance of a crack forming
More Recipe Tips and Tricks
- Power through and ignore your instinct to keep the cheesecake baking until the whole surface is firm. This sour cream cheesecake is done when the very center is still looking a bit liquid-y and jiggles. It will finish cooking with the residual heat as it sits out at room temperature. It will be overcooked if you wait to pull it from oven until it's fully firm.
- Running a very thin spatula or paring knife along the edges of the cheesecake right when it comes out of the oven is important in separating the cake from the pan. This way as the cheesecake cools, it can contract with the surface intact. Otherwise the sides of the cheesecake will stick to the pan, causing a crack to form in the middle.
- Variations and Serving Suggestions: Using chocolate graham crackers is a delicious way to switch up the crust. For topping, fresh berries and/or whipped cream works very well, as do other fruit desserts: blueberry or cherry pie fillings, compotes, stewed rhubarb, sauces, etc.
Recipe FAQs
If you don't have a food processor (or one big enough), you can use a hand or stand electric mixer, but it will be important to use room temperature ingredients. This way they get combined together quicker, with less opportunity for for air to be incorporated into the mixture, which can cause cracking.
Technically you don't have to pre-bake the graham cracker crust, but I prefer to as it crisps it up that much more. Homemade cheesecake isn't exactly an instant gratification type of dessert anyway, so I find this extra step worth it.
I highly recommend making this sour cream cheesecake the day before you intend to serve it. This way you don't have any time pressure with the various steps. It can thoroughly chill in the refrigerator overnight so it fully sets and slices cleanly.
Cover the cheesecake with a layer of plastic wrap and refrigerate for 3-4 days. You can also wrap it well (plastic wrap then foil, placing sections in an air-tight container, etc.) and freeze it for several months. I recommend freezing it without any toppings. Thaw it in the refrigerator.
Related Recipes


Did you enjoy this recipe? I’d love for you to leave a star rating and a comment review in the recipe card below!
Sour Cream Cheesecake
Ingredients
Crust:
- 2 cups (200g) graham cracker crumbs (about 14 ½ full sheets), regular or chocolate
- ½ cup (113g) unsalted butter, melted (8 Tablespoons)
Cheesecake:
- 24 ounces (678g) full-fat cream cheese, ideally room temperature
- 1 ½ cups (300g) granulated sugar
- ⅛ teaspoon salt
- 4 large eggs, ideally room temperature
- 1 teaspoon vanilla extract
- 16 ounces (454g) full-fat sour cream, ideally room temperature
Instructions
For the Graham Cracker Crust:
- Preheat oven to 325°F (163°C). Coat the bottom and sides of a 9"-round springform pan generously with cooking spray.
- Roughly snap 14 ½ sheets of graham crackers into smaller pieces to fit in the bowl of a food processor. See recipe notes if you don't have a food processor.
- Pulse until fine crumbs, scraping down the sides as needed to break up all of the pieces. Wipe out food processor to use later.
- Add graham cracker crumbs to a mixing bowl. Pour in melted butter and stir together until combined.
- Turn out graham cracker crust mixture into the prepared springform pan and evenly press it onto the bottom and sides of the pan very well. You want the crust mixture to be as dense as you can make it. Aim to bring the crust about halfway up the sides of the pan.
- Bake for 16-18 minutes, or until the crust is set and slightly browned. Let the pan cool on a wire rack while you prepare the cheesecake filling.
For the Cheesecake:
- Add cream cheese, sugar, and salt to the bowl of a large (at least 7-cup) food processor. See recipe notes if you don't have a food processor. Process for one minute, scraping down the sides to incorporate all of the ingredients as needed.
- Add the eggs one at a time, pulsing for several seconds after each addition to mix them in. Add the vanilla extract and pulse in, as well.
- Add the sour cream and and process for 20-30 seconds, or until fully incorporated.
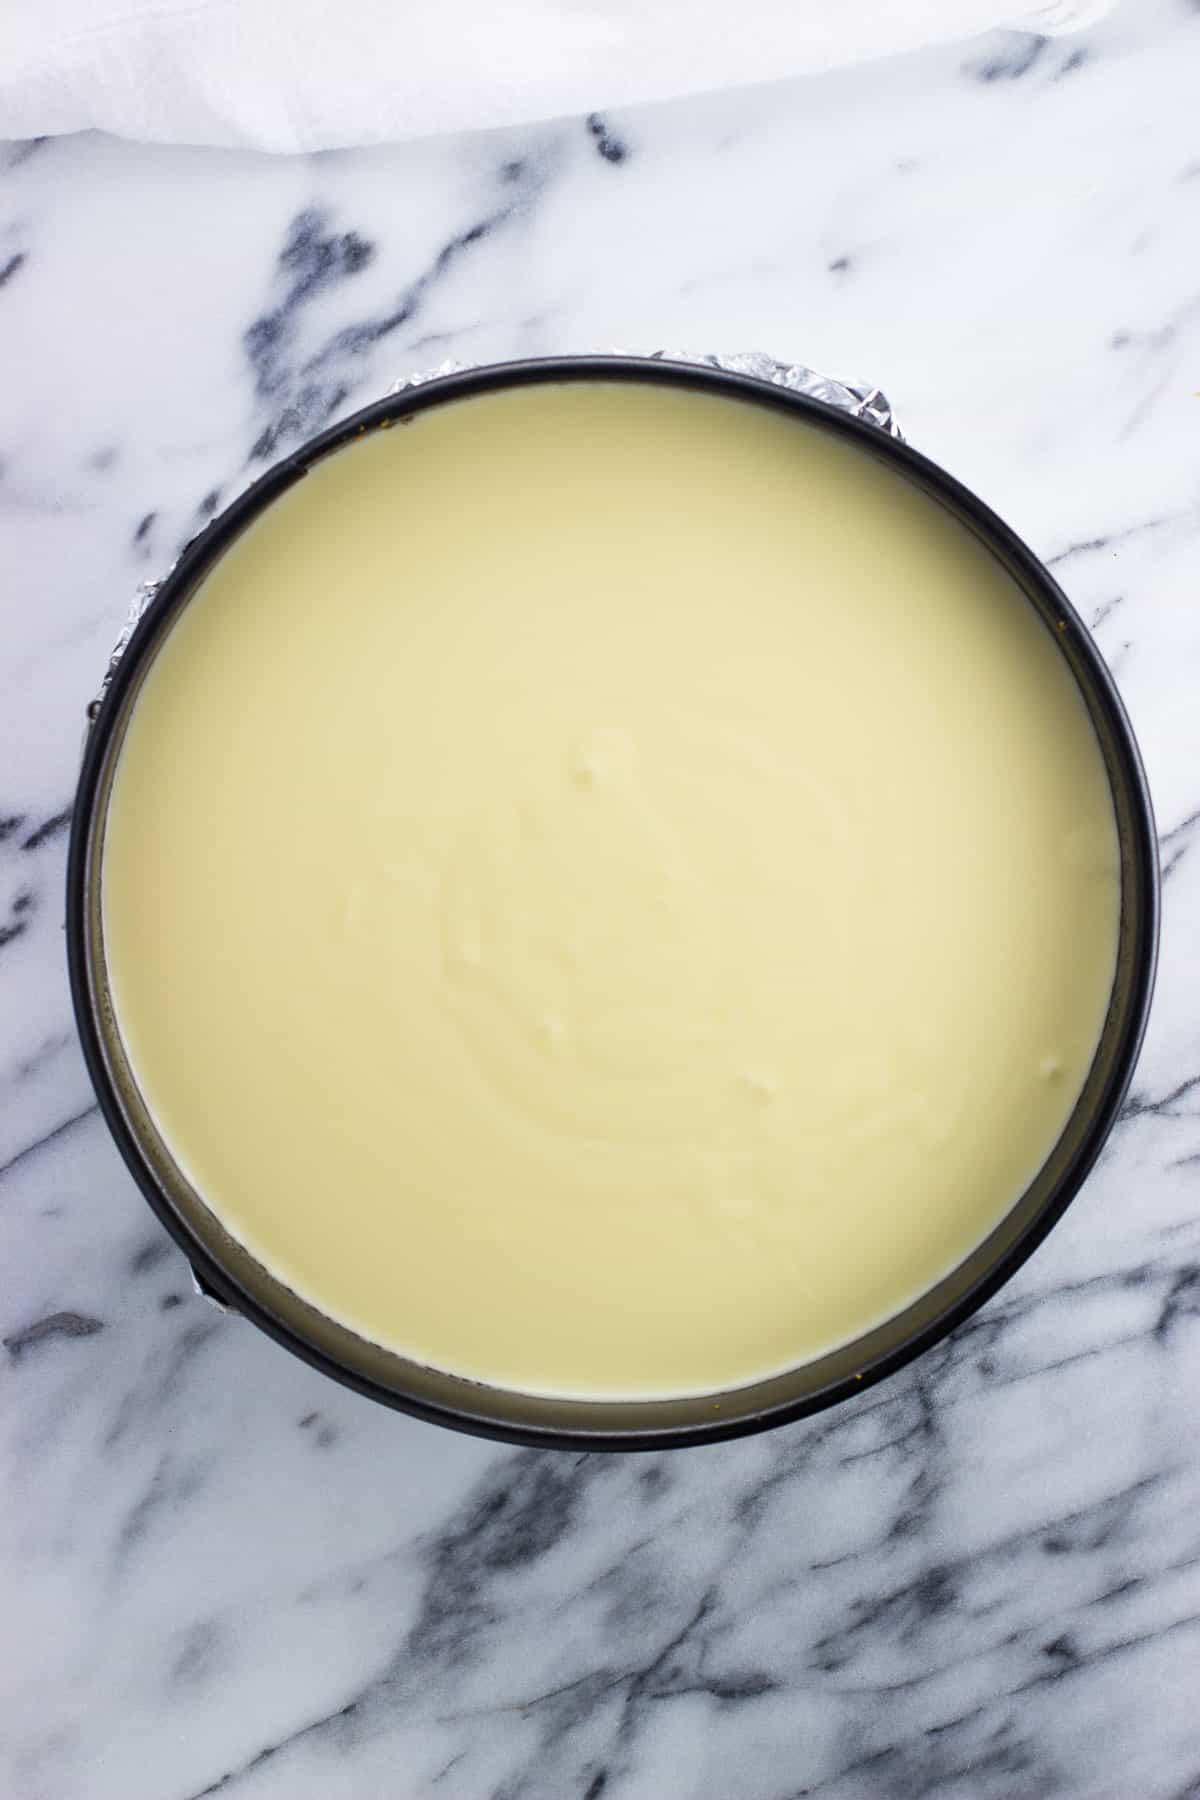
- Pour out the cheesecake mixture into the cooled crust.
- Bake for 65-70 minutes, or until the edges and *most* of the top is set. The very 2-inches or so of the center may appear liquid-y still and jiggle, but will firm up from residual heat as the cheesecake cools and sits out at room temperature.
- Immediately once you remove the cheesecake from the oven, take a thin knife or spatula and carefully run it along the edge to completely loosen the cheesecake from the pan. This helps prevent the cheesecake from cracking when it contracts as it cools.
- Let the cheesecake sit at room temperature for 2 hours (or until close to room temperature), then transfer to the refrigerator to chill very well, for at least 4-5 hours but ideally overnight, before slicing and serving.
Notes
- If you don't have a food processor:
- For the crust: Add graham cracker sheets to a large, sealable bag and crush into fine crumbs using a rolling pin or a meat tenderizer.
- For the cheesecake filling: You can use a hand or stand mixer, but I recommend if going this route that you use room temperature ingredients. This way they don't take as long to mix together, which lessens the amount of air that gets incorporated into the batter (which can lead to cracking).
- Serving Suggestions: fresh berries, whipped cream, blueberry or cherry pie filling, fruit sauces or compotes.
- Storage Instructions: Cover with plastic wrap and refrigerate cheesecake for 3-4 days.
- Freezer Instructions: Cut completely cooled and chilled cheesecake into wedges. Wrap sections in plastic wrap and foil, then place in an air-tight container to freeze for up to several months. Transfer wedges to the refrigerator to thaw before topping and serving.
Would you like to save this?
Plus receive periodic recipe newsletter emails.
Nutrition
Nutritional information is provided as an estimate. As it can vary due to many factors (brands used, quantities, etc.), we cannot guarantee its accuracy.
Food Safety and Nutrition Disclaimer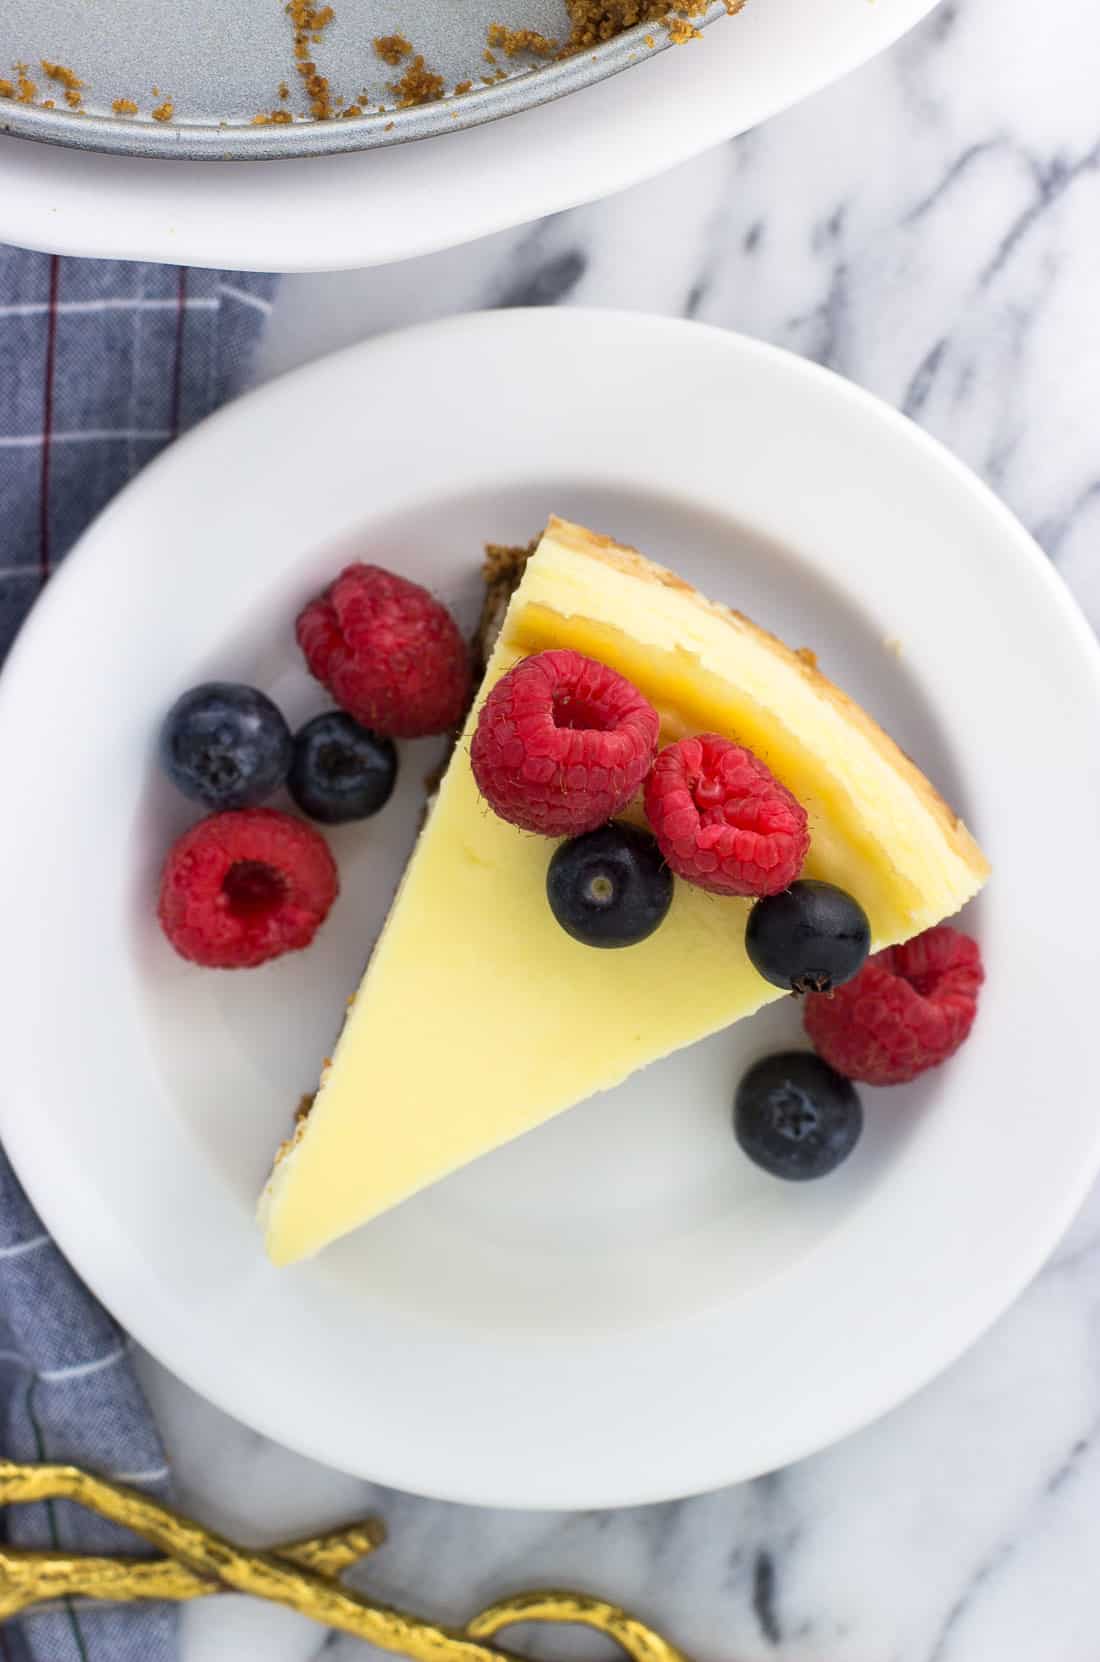
Allynne says
Showstopper indeed!
CherylC says
This is essentially identical to my all time favorite recipe! When looking for my first recipe of cheesecake back in the '60s, I thought a layer of sour cream on top was disgusting so I added it to the main recipe and the rest is history. It has been the favorite of my best friend also. Sometimes I add lemon zest and a little lemon juice and removing the vanilla. Hats off to Alyssa's mom for making a serendipitous recipe mistake!
Alyssa says
I will pass on the compliment, Cheryl! 🙂 It's all but impossible for me to make cheesecake another way now. A lemon twist sounds delicious!