

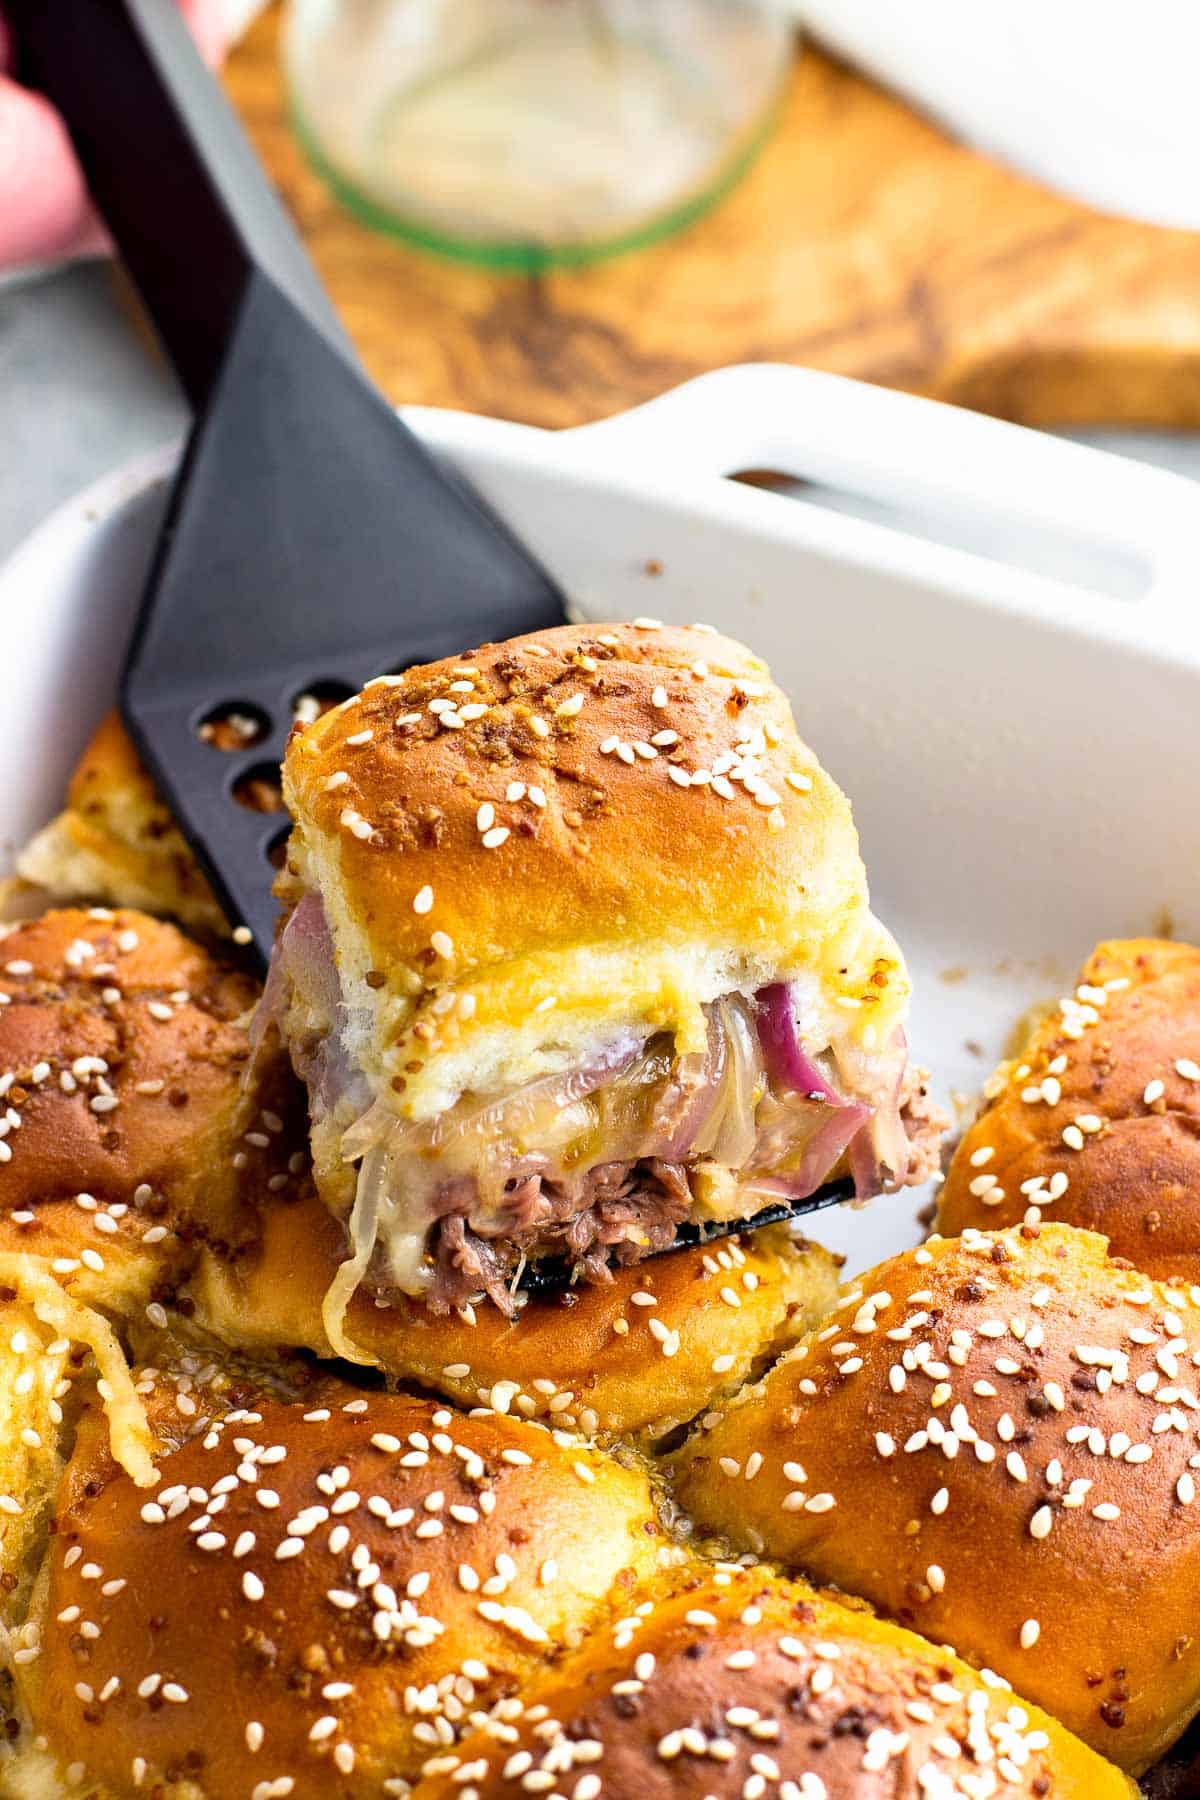
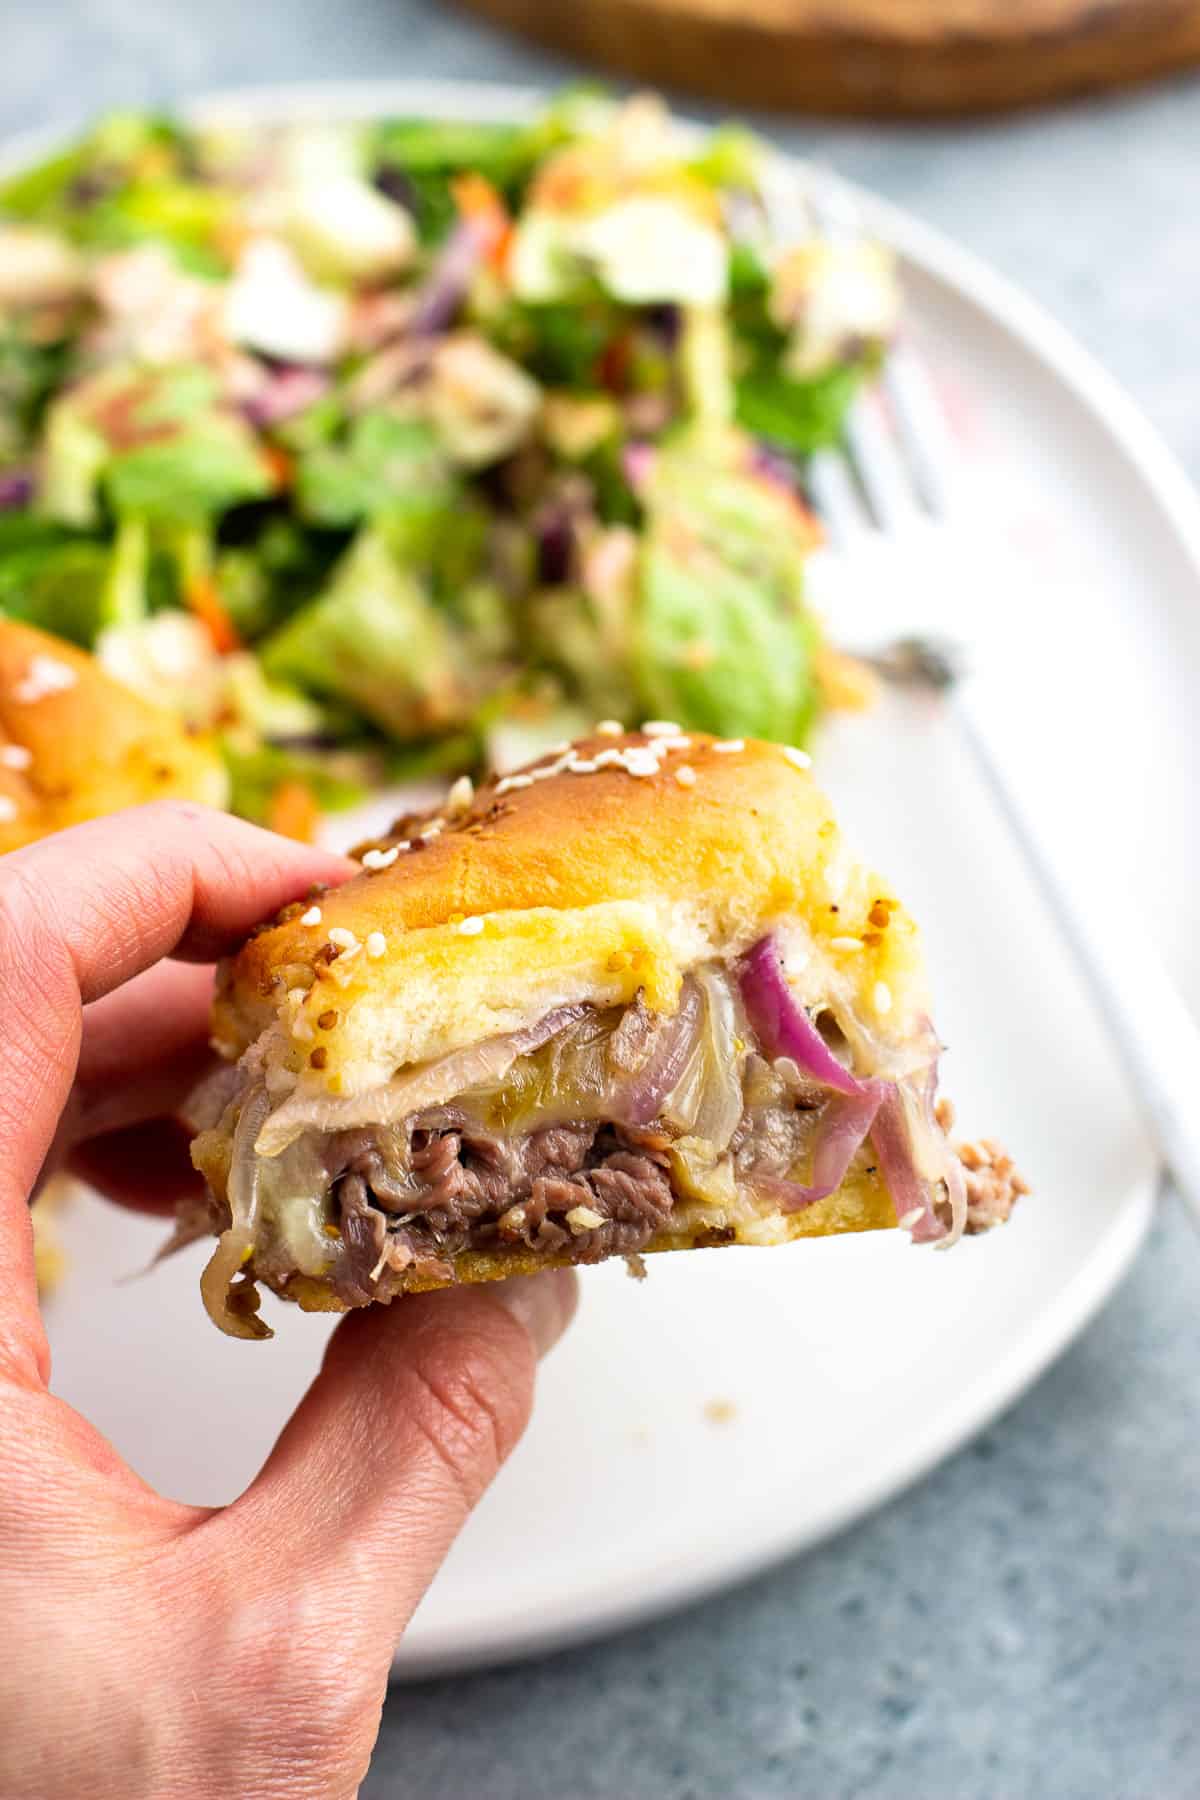
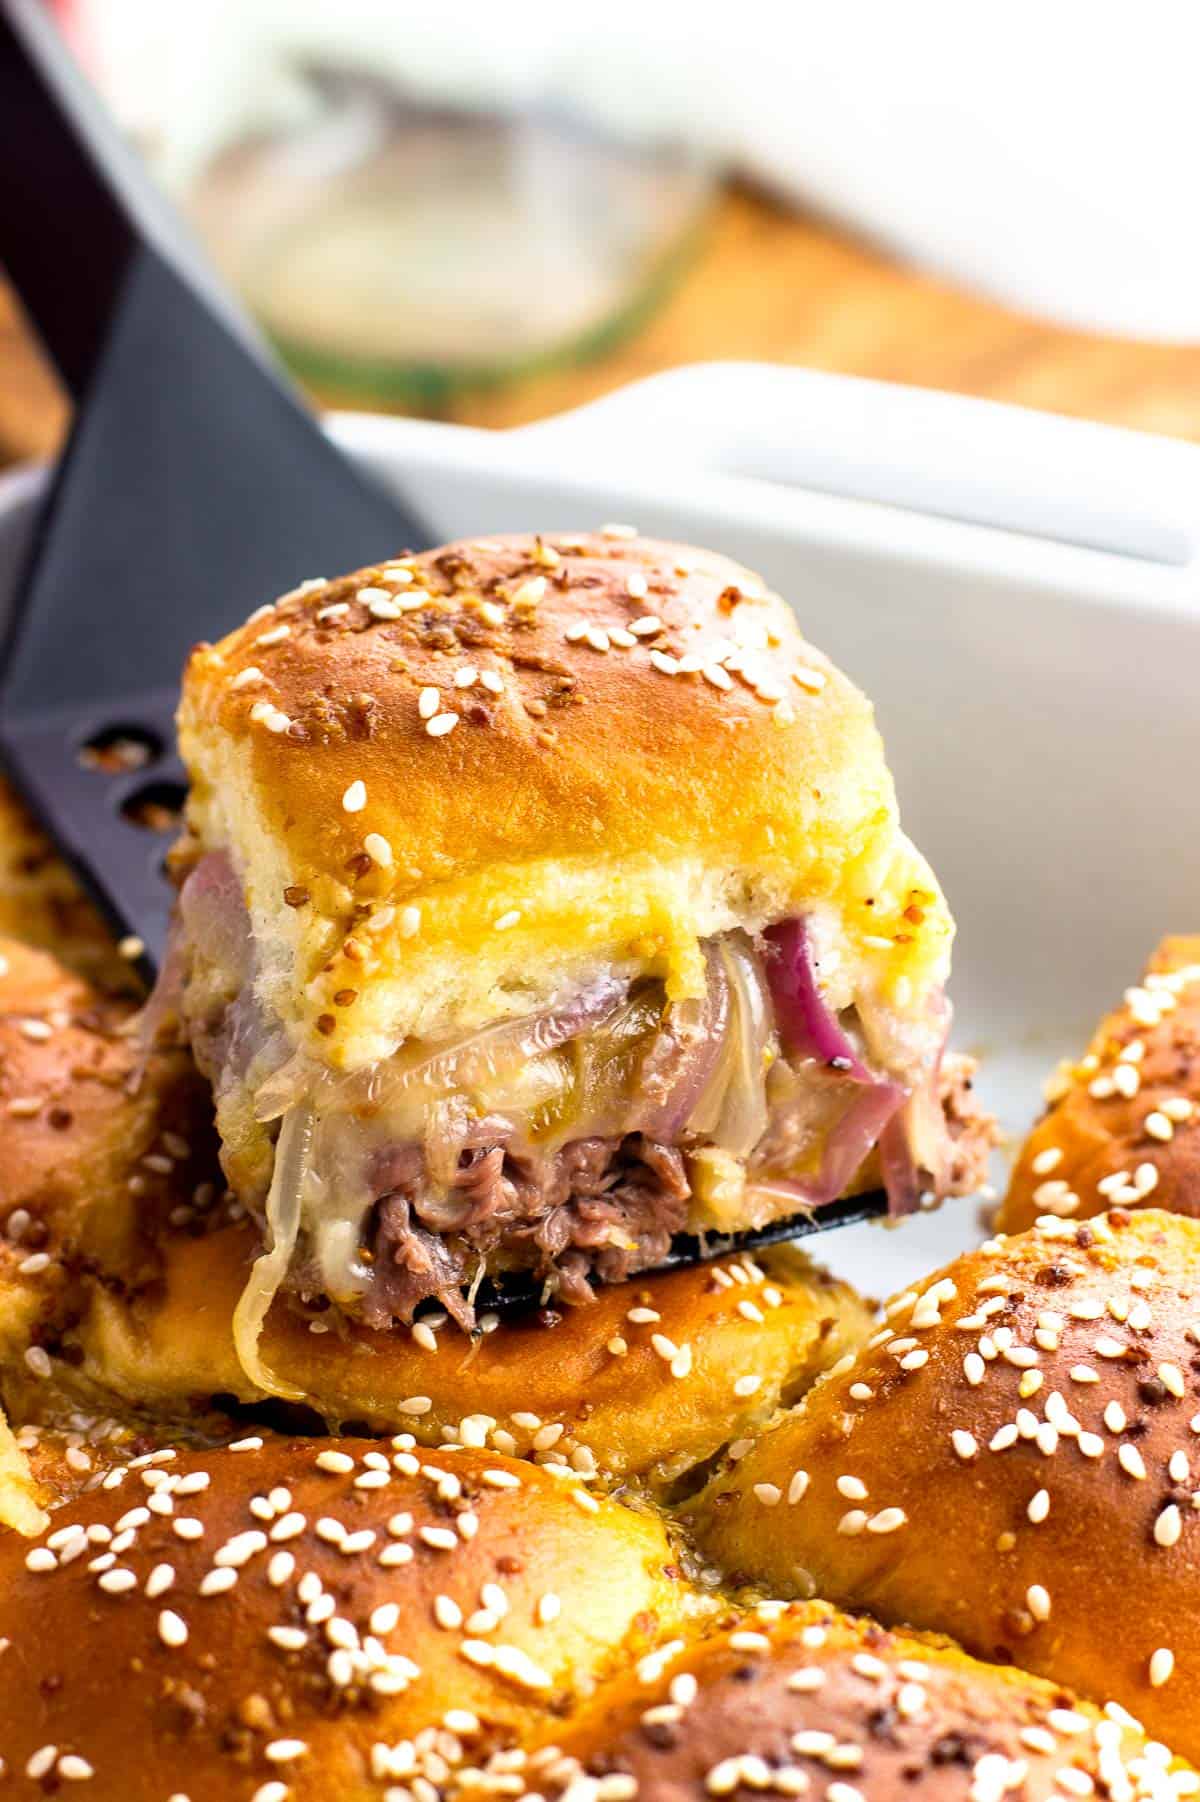
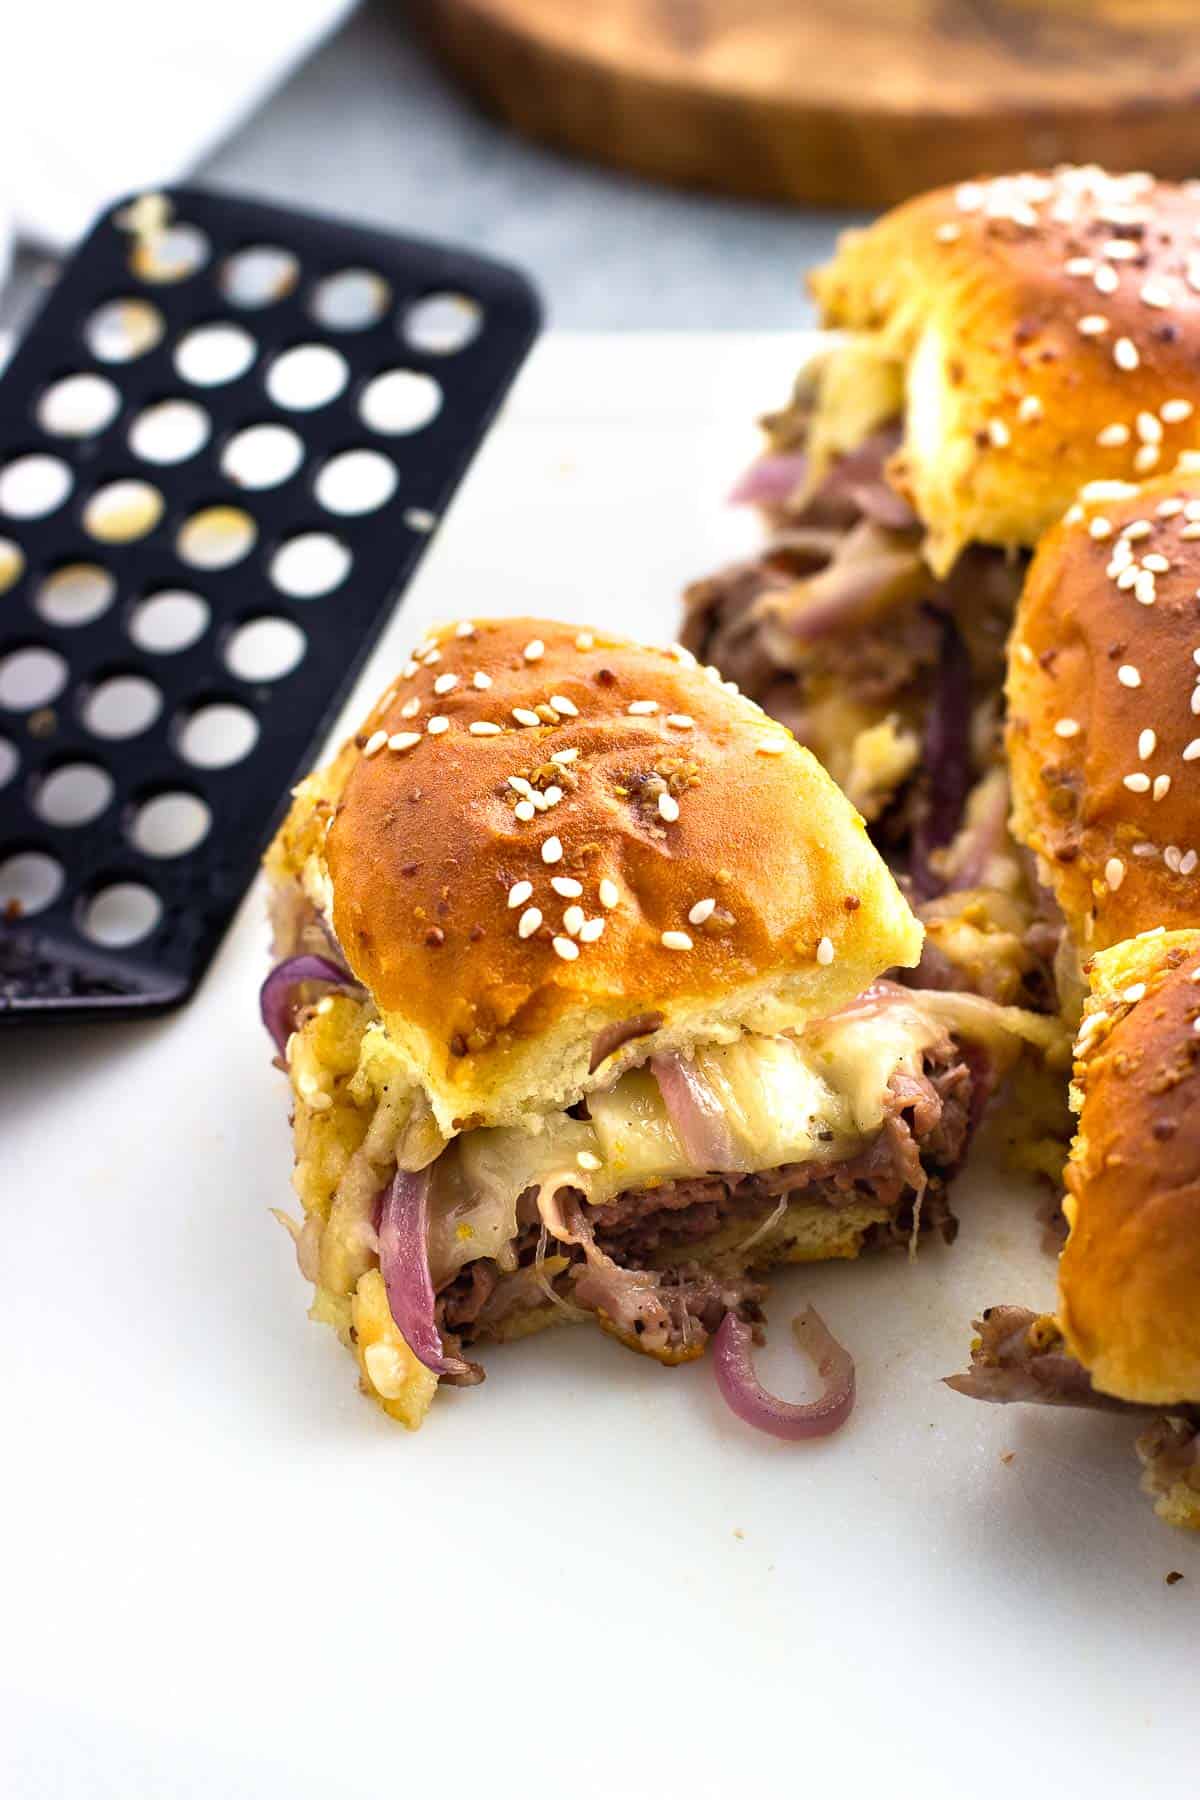
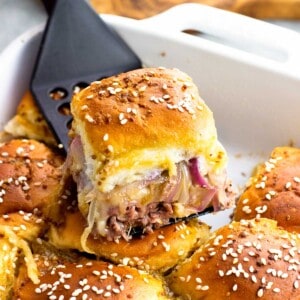
Deli roast beef, melted cheese, sautéed onions, and horseradish sauce come together in a delicious way in these roast beef sliders! Great for a party or crowd, these roast beef sandwiches can easily be prepped ahead of time.
Ham and cheese sliders are a classic - and for good reason. They're forever known as "Carol's sliders" in my house after a relative who brought them to a party where I'd eaten them for the first time. But their simple method - slice rolls, layer with meat and cheese, top with melted butter - can easily be replicated for a whole host of different variations.
Turkey, pesto, and provolone is a frequent flyer around here (check out party ciabatta sandwiches!), but I got to thinking about how good roast beef would be paired with easy horseradish aioli. Throw in sautéed onions and sharp cheddar cheese and these tasty roast beef sliders were born.
Reasons to Love This Recipe
- This is a seriously good twist on the more common ham-and-cheese variety, featuring beef, cheddar, onions, and horseradish.
- Extending the bake time yields a firmer, more crisp bottom. This prevents the sandwiches from becoming soggy and makes them less messy to pick up and eat.
- Many Hawaiian roll slider recipes call for a fairly hefty portion of melted butter to be poured on top. This recipe uses just three tablespoons for this purpose but doesn't skimp on flavor.
- Roast beef sliders are perfect to prepare ahead of time for a party. They can even be frozen.
Recipe Ingredients
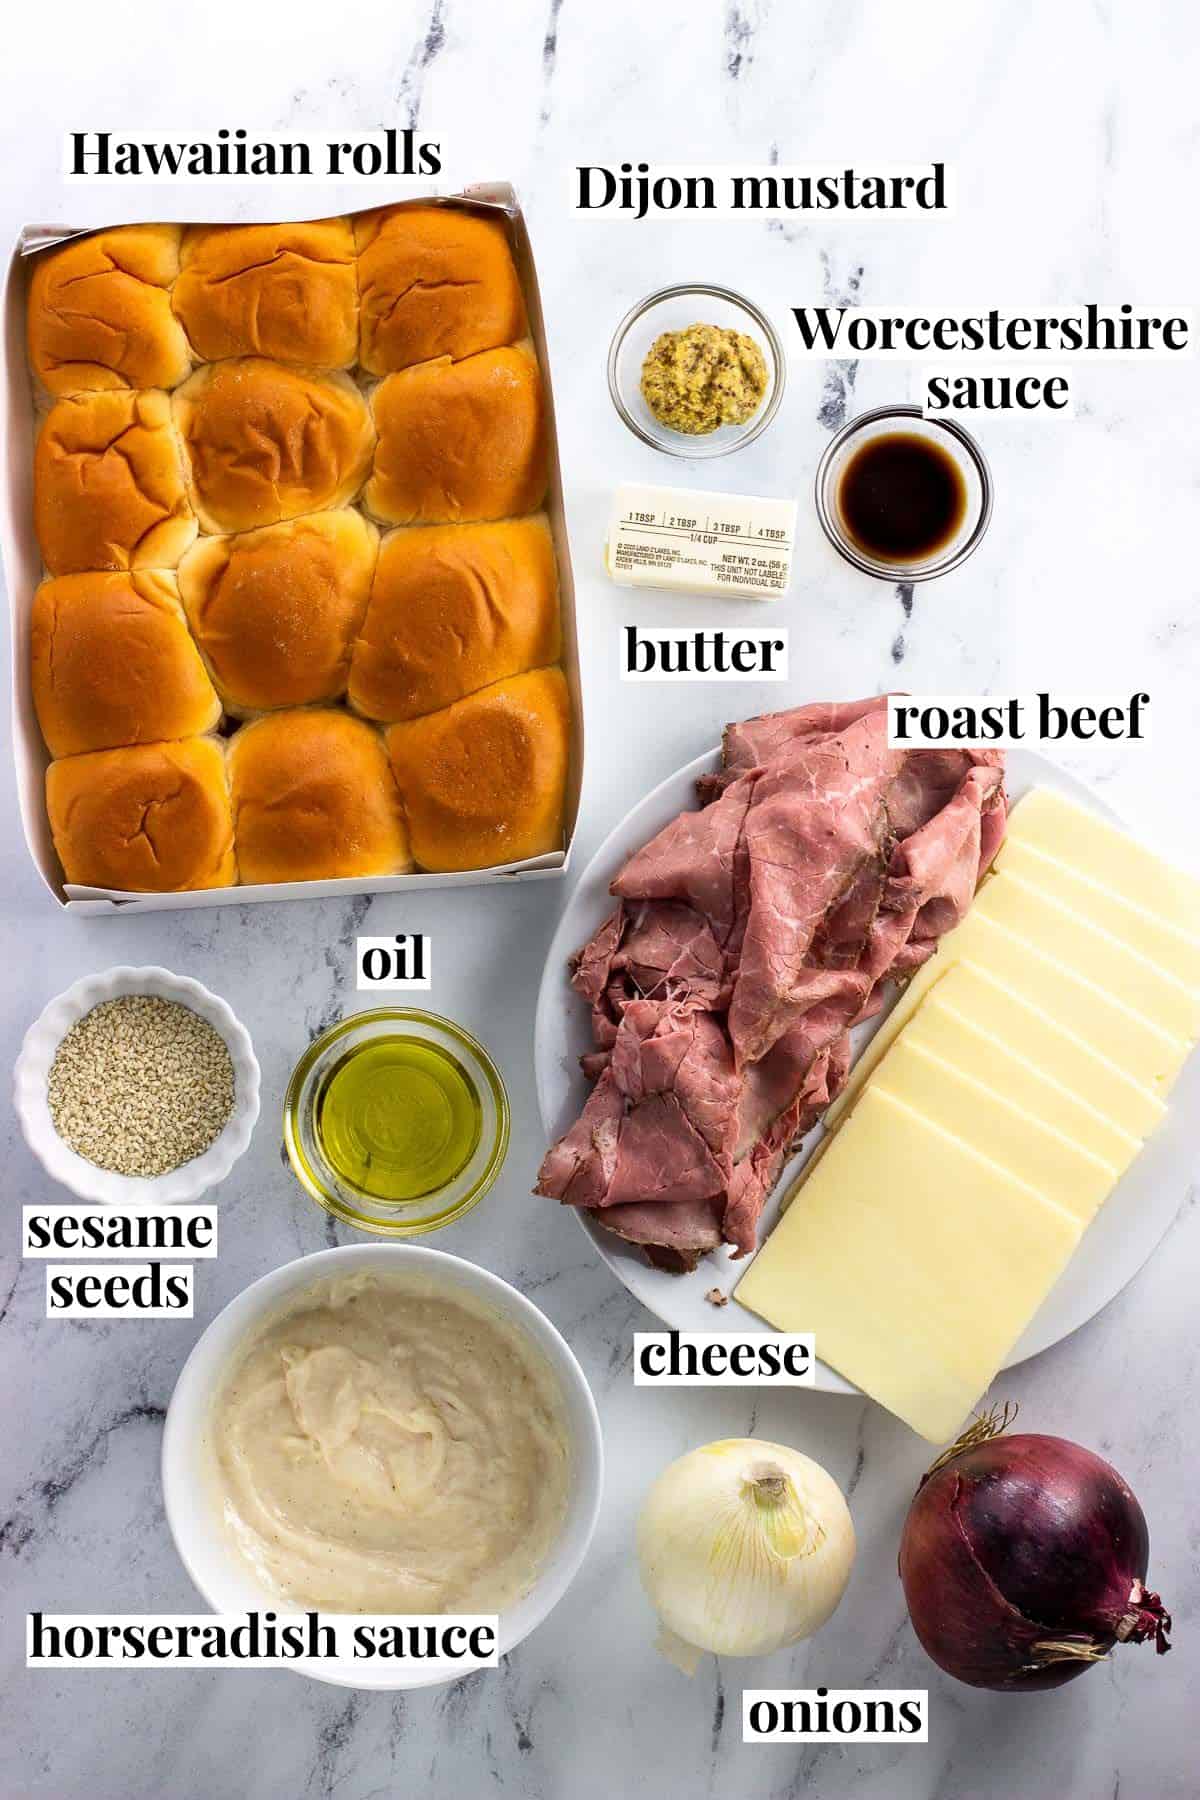
- Deli Roast Beef: Ask for the deli to slice the roast beef thinly, as thicker slices can lean chewy.
- Hawaiian Sweet Rolls: One pack of twelve rolls in any flavor (I go with original). In my store these are often found in display cases near the deli.
- Cheese: Thinly-sliced sharp cheddar, provolone, Swiss, or gouda are all good options.
- Horseradish Sauce: With mayonnaise at its base, this easy sauce provides delicious complementary flavor and can be pepped up with as much horseradish as you like.
- Onions: I tested these roast beef sliders with real deal caramelized onions and found the effort and time not to be worth it here. Their subtler flavor got lost. A quick sauté saves a good 45 minutes and provides a bolder flavor.
- Butter: This is melted and poured over top of the rolls for tenderness and flavor.
- Worcestershire Sauce: Adds that umami note to the butter sauce.
- Sesame Seeds: For topping, though you can use poppy seeds if you want.
Step-by-Step Instructions
Prep the Ingredients
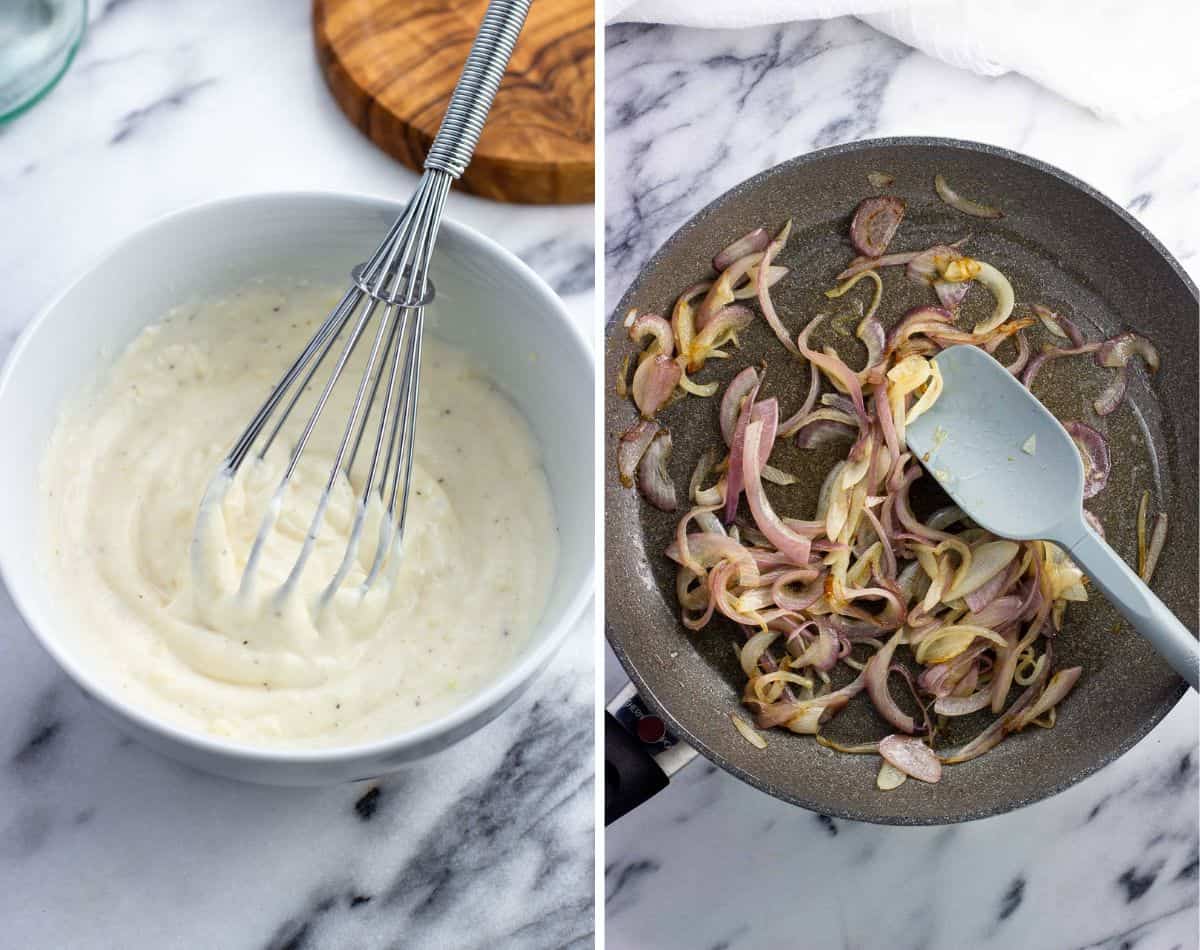
- Make the horseradish sauce. Whisk mayonnaise, horseradish, garlic, lemon juice, salt, and pepper together in a bowl. Cover and refrigerate until ready to use.
- Sauté the onions. Cook onions in equal portions of butter and olive oil until softened, roughly 7-8 minutes.
Assemble the Sliders
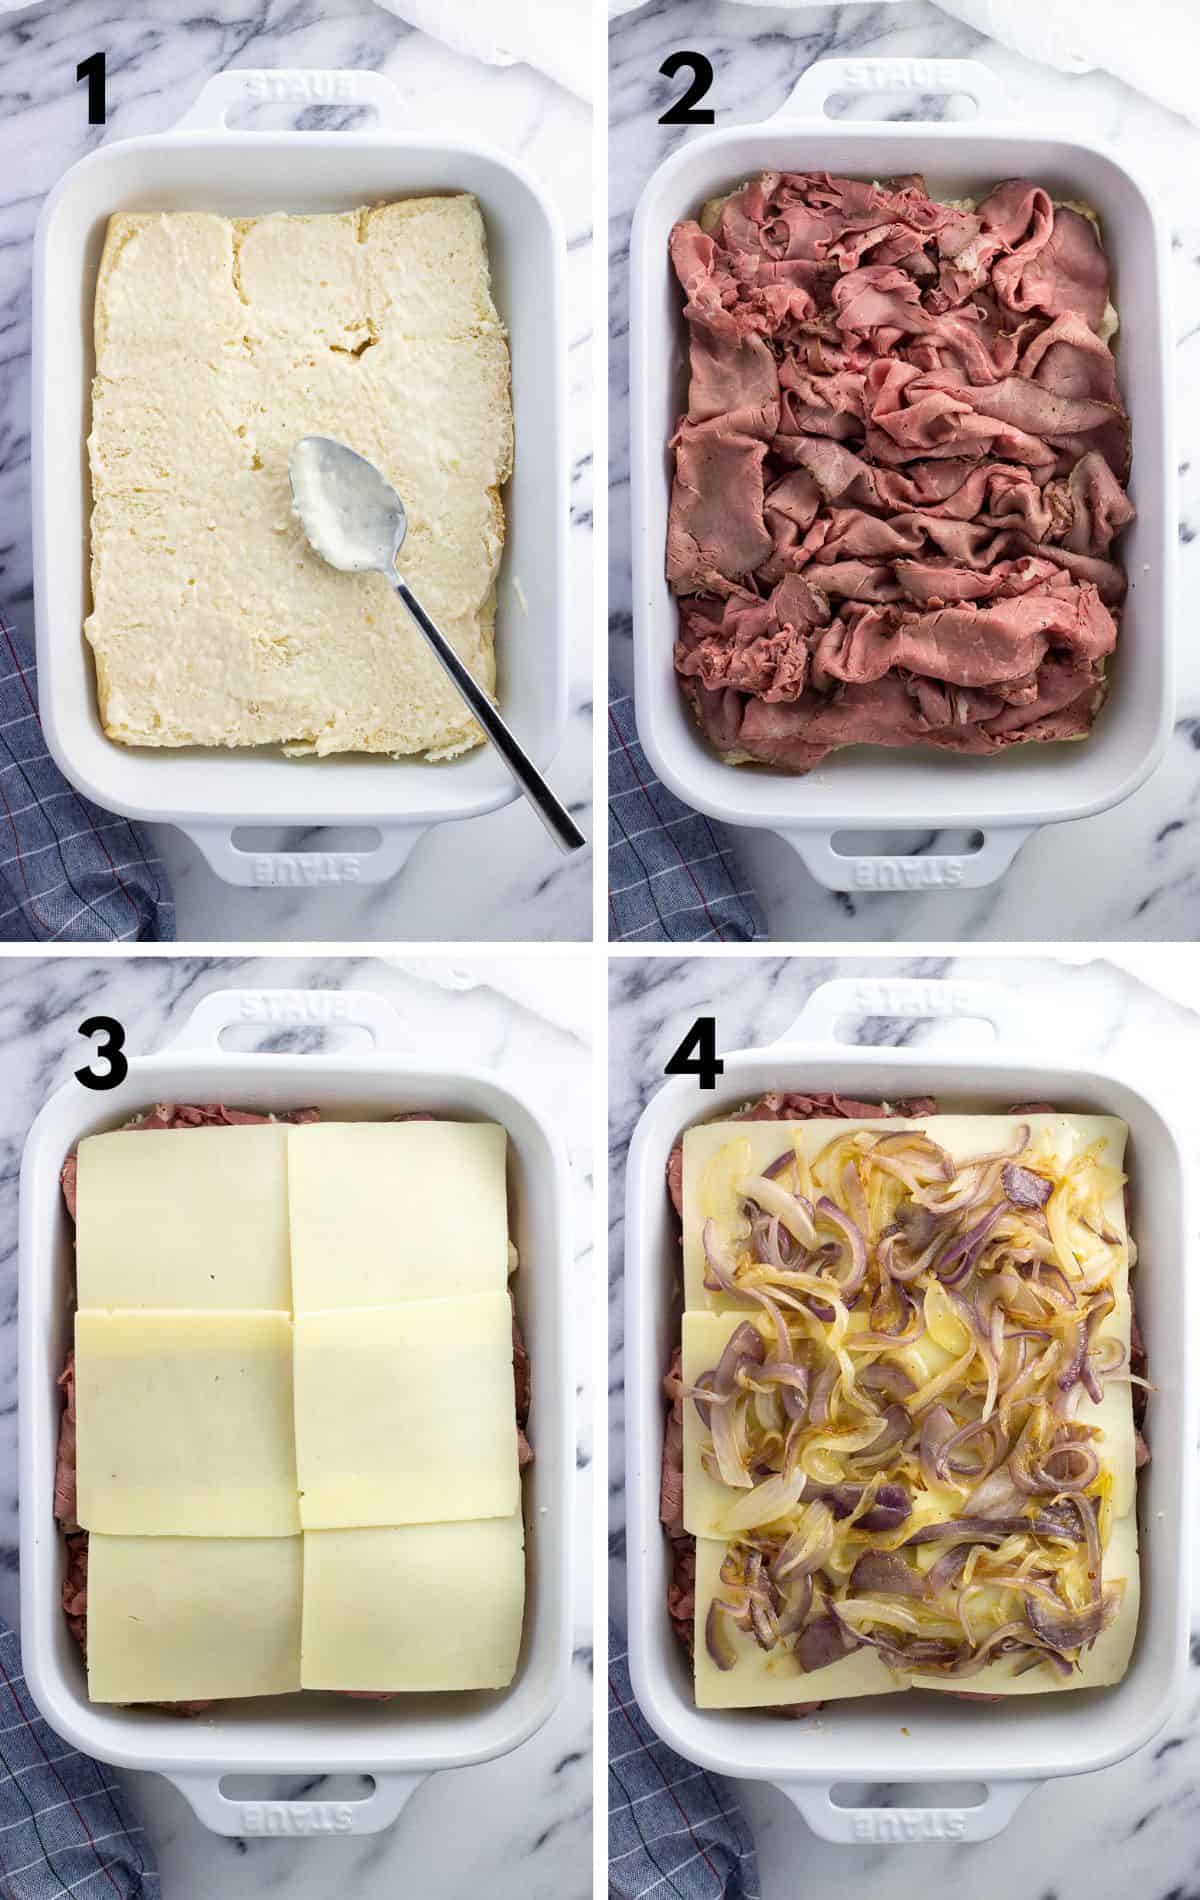
- Horseradish Sauce. Slice the roll in and half and spread the horseradish sauce evenly on both cut sides of the top and bottom. Place the bottom slab into a greased baking dish.
- Roast Beef. Scrunch up the roast beef slices and place them evenly over the rolls. Arranging them this way (instead of flat) gives these roast beef sliders more height.
- Cheese. Cover the roast beef with a layer of cheese.
- Onions. Arrange the sautéed onions in an even layer over the cheese, then cap off the sliders by adding the top half of the rolls.
Make the Butter Sauce
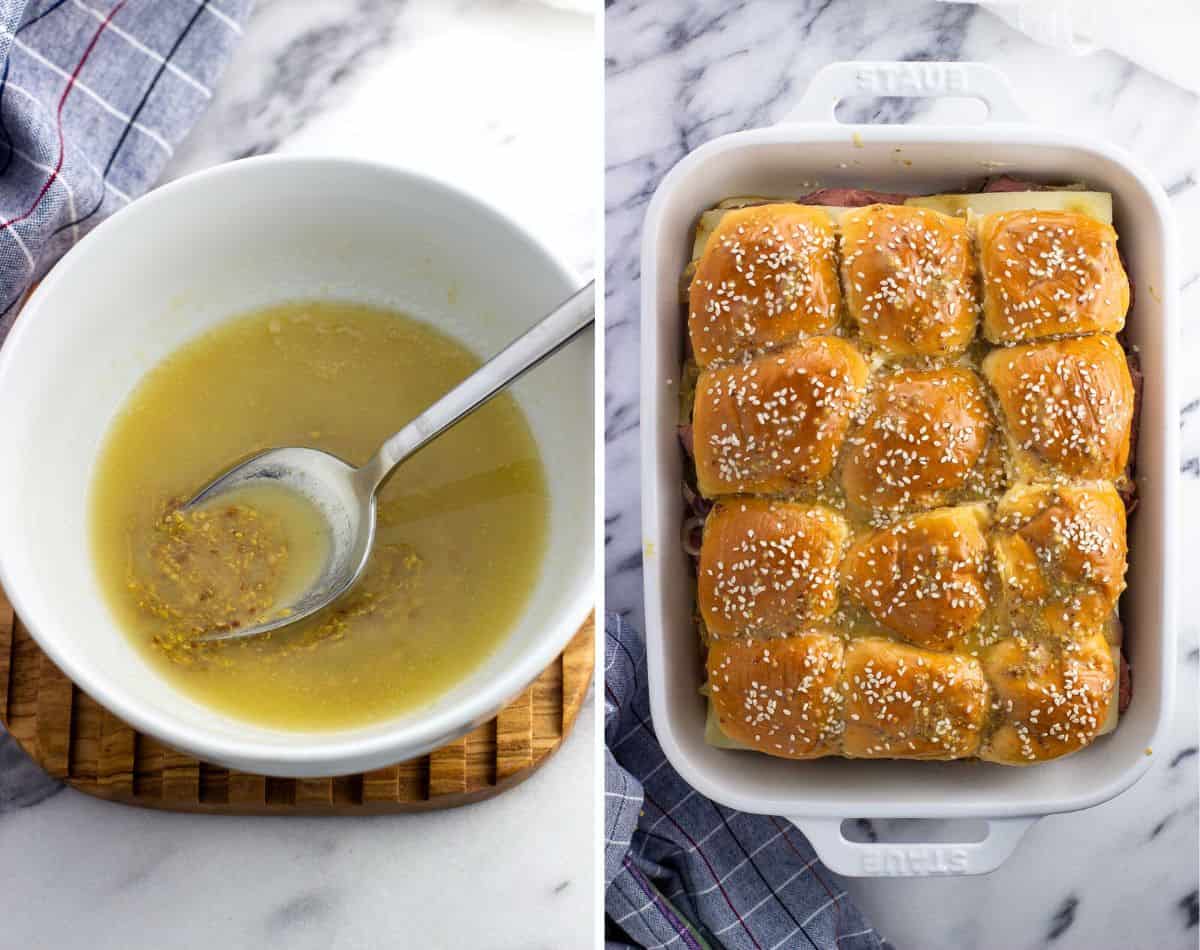
- Stir together melted butter, Worcestershire sauce and Dijon mustard.
- Drizzle it over top of the rolls, making sure it covers the whole surface and gets into all of the nooks and crannies. Sprinkle with sesame seeds.
Bake the Sliders
Cover the sliders with aluminum foil and bake at 350°F for 20 minutes. At this point remove the foil and bake uncovered for another 10 minutes, or until the tops are golden brown.
Recipe Tips and Tricks
- Choosing roast beef. Roast beef sliced from the deli is the best choice for roast beef sliders, versus the pre-packaged options in the cold cut case. It can be sliced thinner, is rarer, and is generally of a higher-quality, which is important when it's the star of the show. I go for a "deluxe" version that is lower-sodium and features a spice coating.
- Bread options. Packaged dinner rolls or smaller slider-specific buns from the bakery section can also work here, though they lack the soft, spring-y texture and slight sweetness of the Hawaiian rolls.
- Pan sizes. Either an appropriately-sized baking dish (minimum 10.5 by 7.5 inches) or a sheet pan can be used to cook these sliders. Spray the baking dish with cooking spray to prevent sticking, or line the sheet pan with aluminum foil before building the sandwiches. A dark metal sheet pan will produce an even firmer bottom to the rolls.
- Don't skip the foil. Covering these roast beef sliders for the first 20 minutes of bake time is crucial to prevent them from browning too much.
Recipe FAQs
Not using too much butter sauce is important in preventing the rolls from sogging up. Then cooking your roast beef sliders for sufficient time (30 minutes, mostly covered) allows the bottom to turn crisp.
Loosely cover the cooked sliders with aluminum foil and keep them in a baking dish (or on a sheet pan) in a low oven, around 200°F or so, until ready to serve. Be sure to cover them with foil as otherwise they can dry out.
Yes. Assemble the sandwiches through the step of placing on the top half of the rolls (don't add the butter sauce). Wrap the assembled sliders in heavy-duty aluminum foil, then place in a large freezer bag or freezer-safe dish/container. Freeze for up to 2 months (longer risks stale bread/freezer burn), thawing in the refrigerator before adding the butter sauce and baking.
More Sandwich Recipes


Did you enjoy this recipe? I’d love for you to leave a star rating and a comment review in the recipe card below!
Roast Beef Sliders
Ingredients
Horseradish Sauce
- 6 Tablespoons (90g) lite mayonnaise or regular
- 1 Tablespoon (15g) cream-style horseradish more to taste
- 1 large clove of garlic pressed
- ¾ teaspoon lemon juice
- Salt and pepper to taste
Sautéed Onions
- ½ large white or yellow onion thinly-sliced
- ½ large red onion thinly-sliced
- 1 Tablespoon (14g) unsalted butter
- 1 Tablespoon (15 ml) olive oil
- Salt and pepper to taste
Sandwiches
- 1 12-ounce (340g) package Hawaiian rolls
- 12 ounces (340g) thinly-sliced deli roast beef
- 3 ounces (85g) thinly-sliced sharp cheddar
Butter Sauce
- 3 Tablespoons (42g) unsalted butter melted
- 2 teaspoons (10 ml) Worcestershire sauce
- 1 teaspoon (5g) Dijon mustard
- Sesame seeds for topping
Instructions
- Prepare: Heat oven to 350°F. Spray a rectangular baking dish (minimum size 7.5-inch by 10.5-inch) or sheet pan with cooking spray and set aside for now.
- Make the Horseradish Sauce: Add mayonnaise, horseradish, garlic, lemon juice, and salt and pepper to a bowl and stir well to combine. Refrigerate until ready to use.
- Sauté the Onions: Add 1 Tablespoon unsalted butter and olive oil to a large saucepan set over medium heat. Once heated, add the sliced onions. Stir occasionally and cook until they have softened and are turning golden, about 8 minutes or so. Remove the pan from the heat once done.
- Assemble Sandwiches: Keeping the rolls connected, cut through them horizontally so you have one slab of roll bottoms and one slab of roll tops. Place the bottom half in the prepared pan cut-side up.
- Spread half of the horseradish sauce on the bottom cut-side of the rolls. Arrange the roast beef evenly over the whole surface, "bunching up" the slices and not laying them flat. Add a layer of cheddar cheese, then evenly scatter the sautéed onions over top.
- Spread the remaining half of the horseradish sauce on the cut-side of the top half of rolls, then place them on top of the rest to complete the sandwiches.
- Make the Butter Sauce: Stir together the melted butter, Worcestershire sauce, and Dijon mustard in a bowl until well combined. Slowly drizzle this sauce over top of the sandwiches, using a brush if needed to ensure the top and sides of the buns are moistened. Sprinkle with sesame seeds.
- Bake: Cover the baking dish or slab of sandwiches on a sheet pan with aluminum foil and bake for 20 minutes. At this time remove the foil and bake for an additional 10 minutes, or until golden on top.
Notes
- Horseradish: Prepared horseradish can also be used in place of cream-style. Start by adding a smaller amount to the sauce as it's more potent (hotter).
- Hawaiian Rolls: If not available packaged dinner rolls or smaller slider-specific buns can be used instead.
- Cheese: Provolone, Swiss, or gouda can be used instead.
- It's not a big deal if some rolls separate from one another when slicing. Just put them back into place.
- If you want an extra crisped slider bottom, use a dark metal sheet pan. It absorbs heat quicker than stoneware or lighter metal pans and promotes more browning.
- To keep cooked sliders warm for a party, wrap them in foil and place in a 200°F oven until ready to serve.
Would you like to save this?
Plus receive periodic recipe newsletter emails.
Nutrition
Nutritional information is provided as an estimate. As it can vary due to many factors (brands used, quantities, etc.), we cannot guarantee its accuracy.
Food Safety and Nutrition Disclaimer
Allynne says
These sliders were perfect for our luncheon. The combination of flavors were great. Make sure you use a sharp knife when separating the rolls. I used a serrated knife at first and it was a little messy.
Alyssa says
Great tip, Allynne! Glad you liked them.