

You can easily make crisp panini at home with a cast iron panini press. This inexpensive tool is space-efficient and only requires simple prep for perfectly pressed sandwiches every time.
Forever enamored with fun kitchen tools but resistant to filling up my countertops and cabinets with stuff, I was pumped when my husband gifted me a cast iron panini press for Christmas.
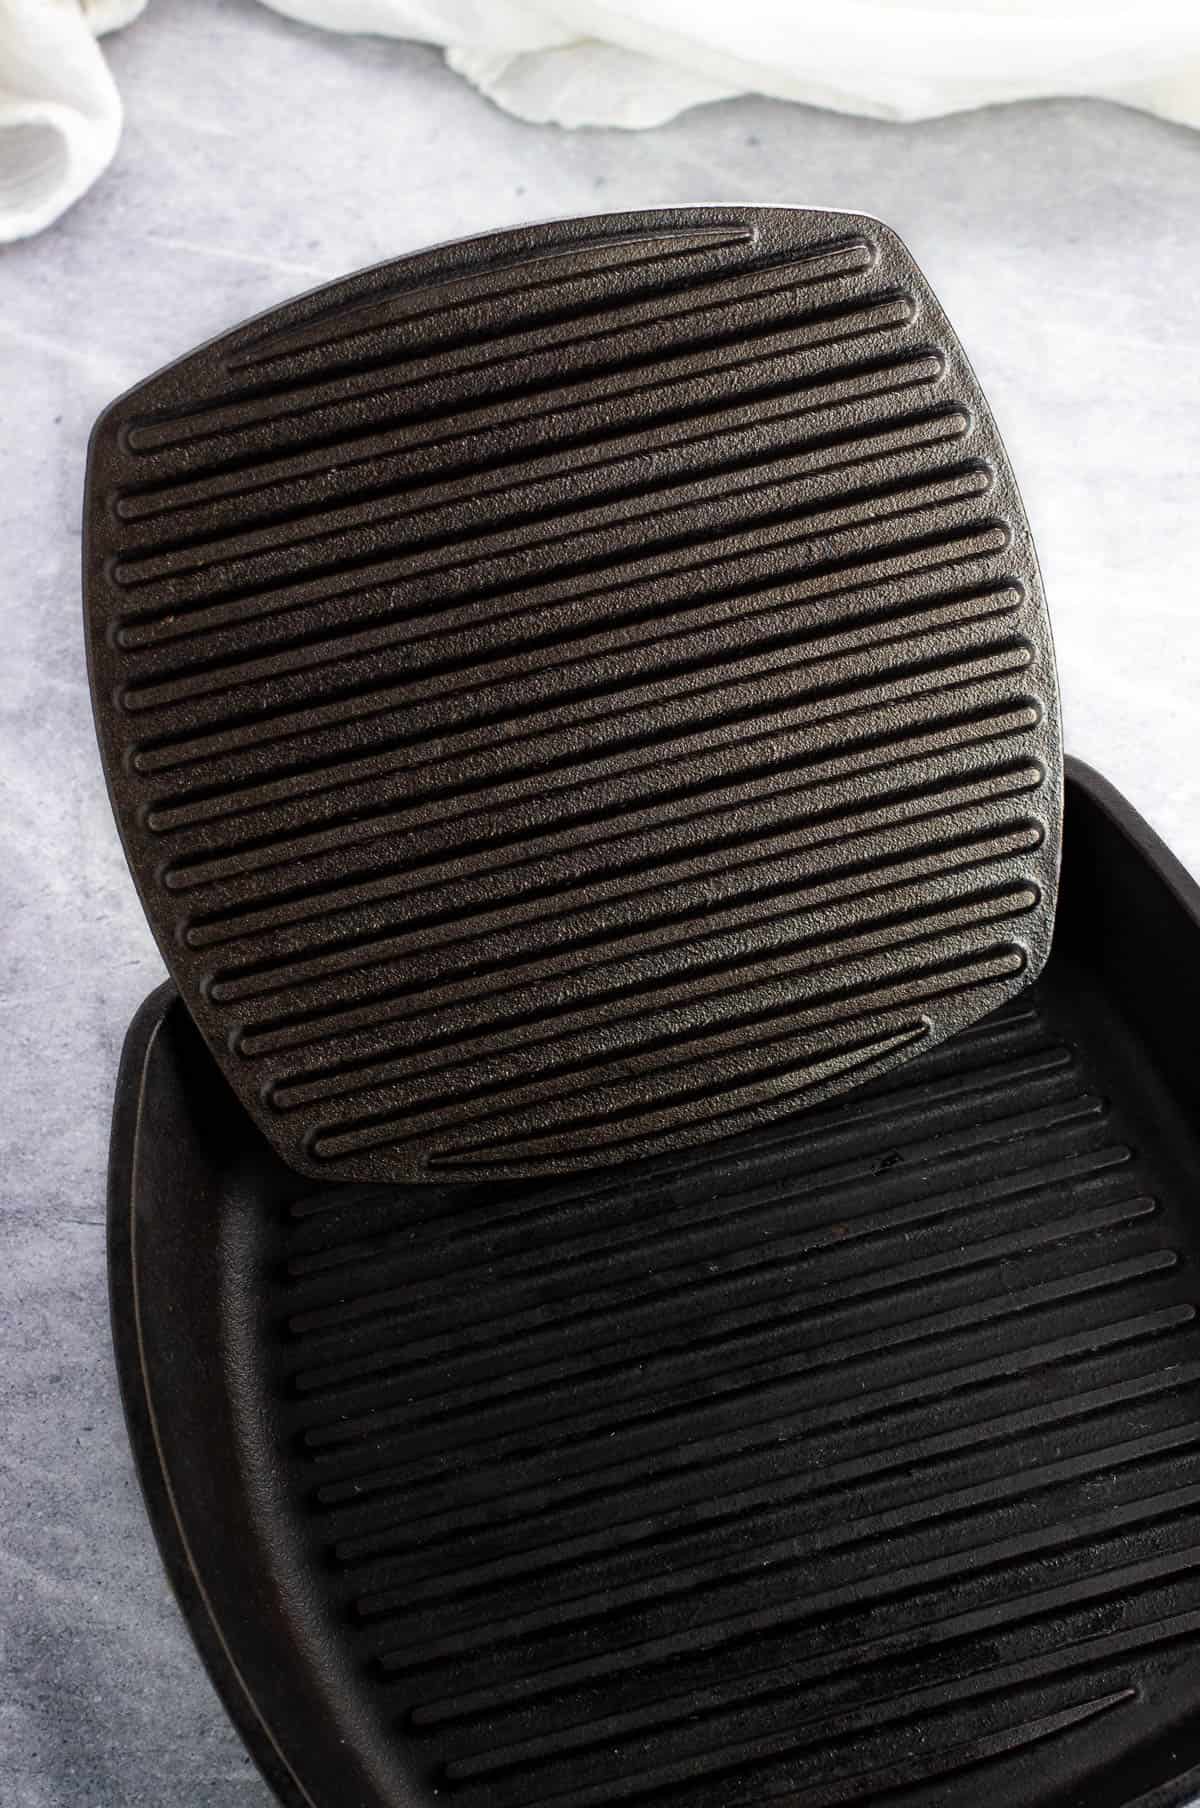
It's the Lodge panini press - check the price on Amazon (paid link), which nestles perfectly into the 10.5 inch square cast iron grill pan I already have. It works SO well to produce crispy pressed panini, is affordable, and basically takes up no kitchen space. I'm in love!
What You'll Need
- A cast iron panini press - This is oven-safe, weighted, and features ridges along the bottom surface to sizzle grill marks into your pressed sandwich.
- A cast iron pan - Ideally this will be a grill pan so it has corresponding ridges. Also oven-safe, choose one in which your panini press will fully fit inside.
- A sandwich - It's best not to overstuff panini with fillings as this makes them tall and prevents the panini press from weighing everything down effectively. Other than that, the sky's the limit for your favorite ingredients.

Step-by-Step Instructions
- Preheat - Both the cast iron pan and panini press need to be well-heated to work efficiently. Place both in a cold oven, heat it to 450°F, then set the timer for 30 minutes.
- Assemble Sandwich(es) - Do this while the cast iron pans are preheating so they're ready to go immediately.
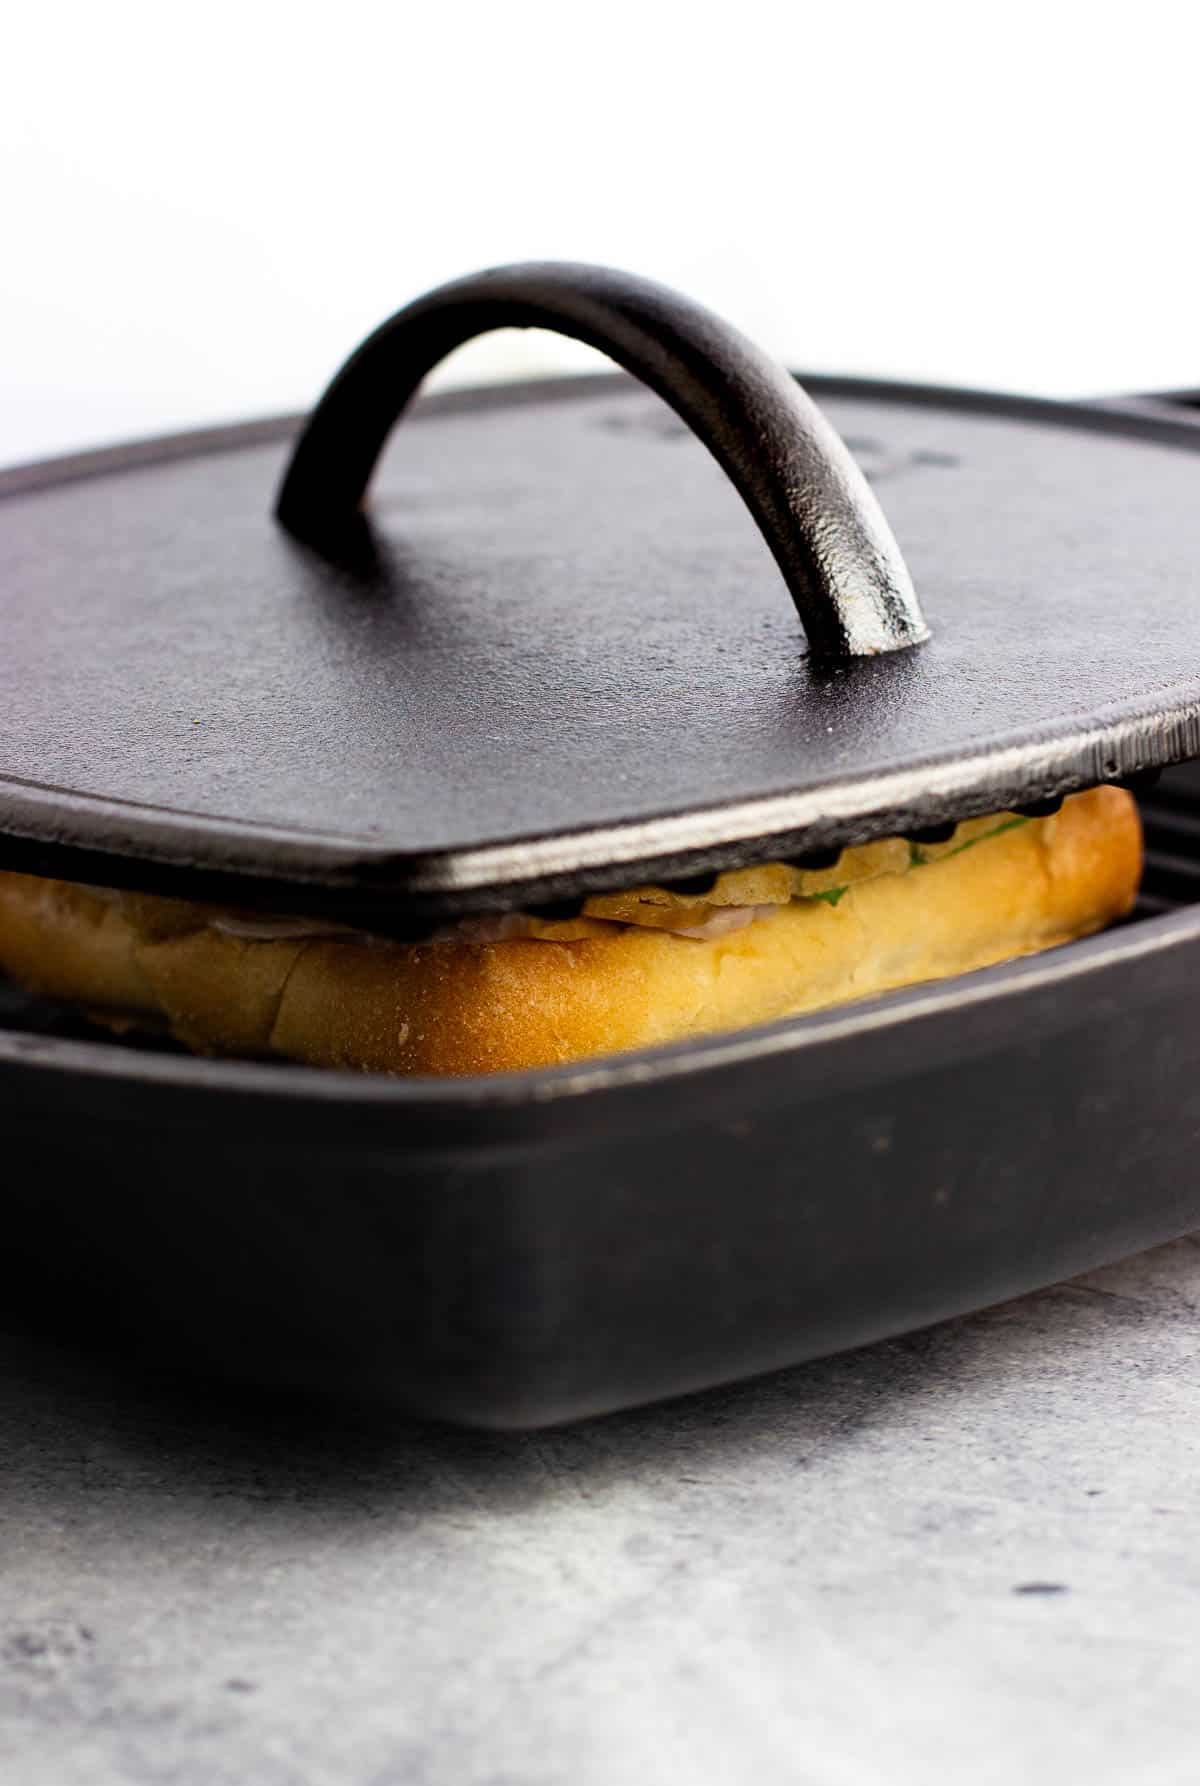
- Cook - Carefully place the pan and press on a stovetop burner over medium heat. Place the sandwich(es) in the pan underneath the panini press, then cook for 5-7 minutes or until the bread is crisp, the cheese has melted, etc.
Tips and Tricks
- Cast iron gets hot! Use oven mitts at all times when moving the cast iron pan between the oven and stovetop, as well as when touching the handles of the pan or the press. I like to keep a handle mitt (paid link) on a cast iron pan on the stovetop in case I instinctively grab the handle. Only use them when the pan is on the stovetop - never use mitts in the oven.
- Cast iron is heavy. The panini press alone weighs four pounds, which added to a pan's weight results in a hefty load. Be careful when hoisting both together, especially when they're hot.
- Follow all manufacturer's instructions. Different brands of kitchen gear may have different dos and don'ts for use. Be sure to follow the guidelines for your specific stuff.
- Cooking in batches. If cooking panini in batches, the second panini (and beyond) will have crispier bottoms as the pan will be sitting on the stovetop longer.
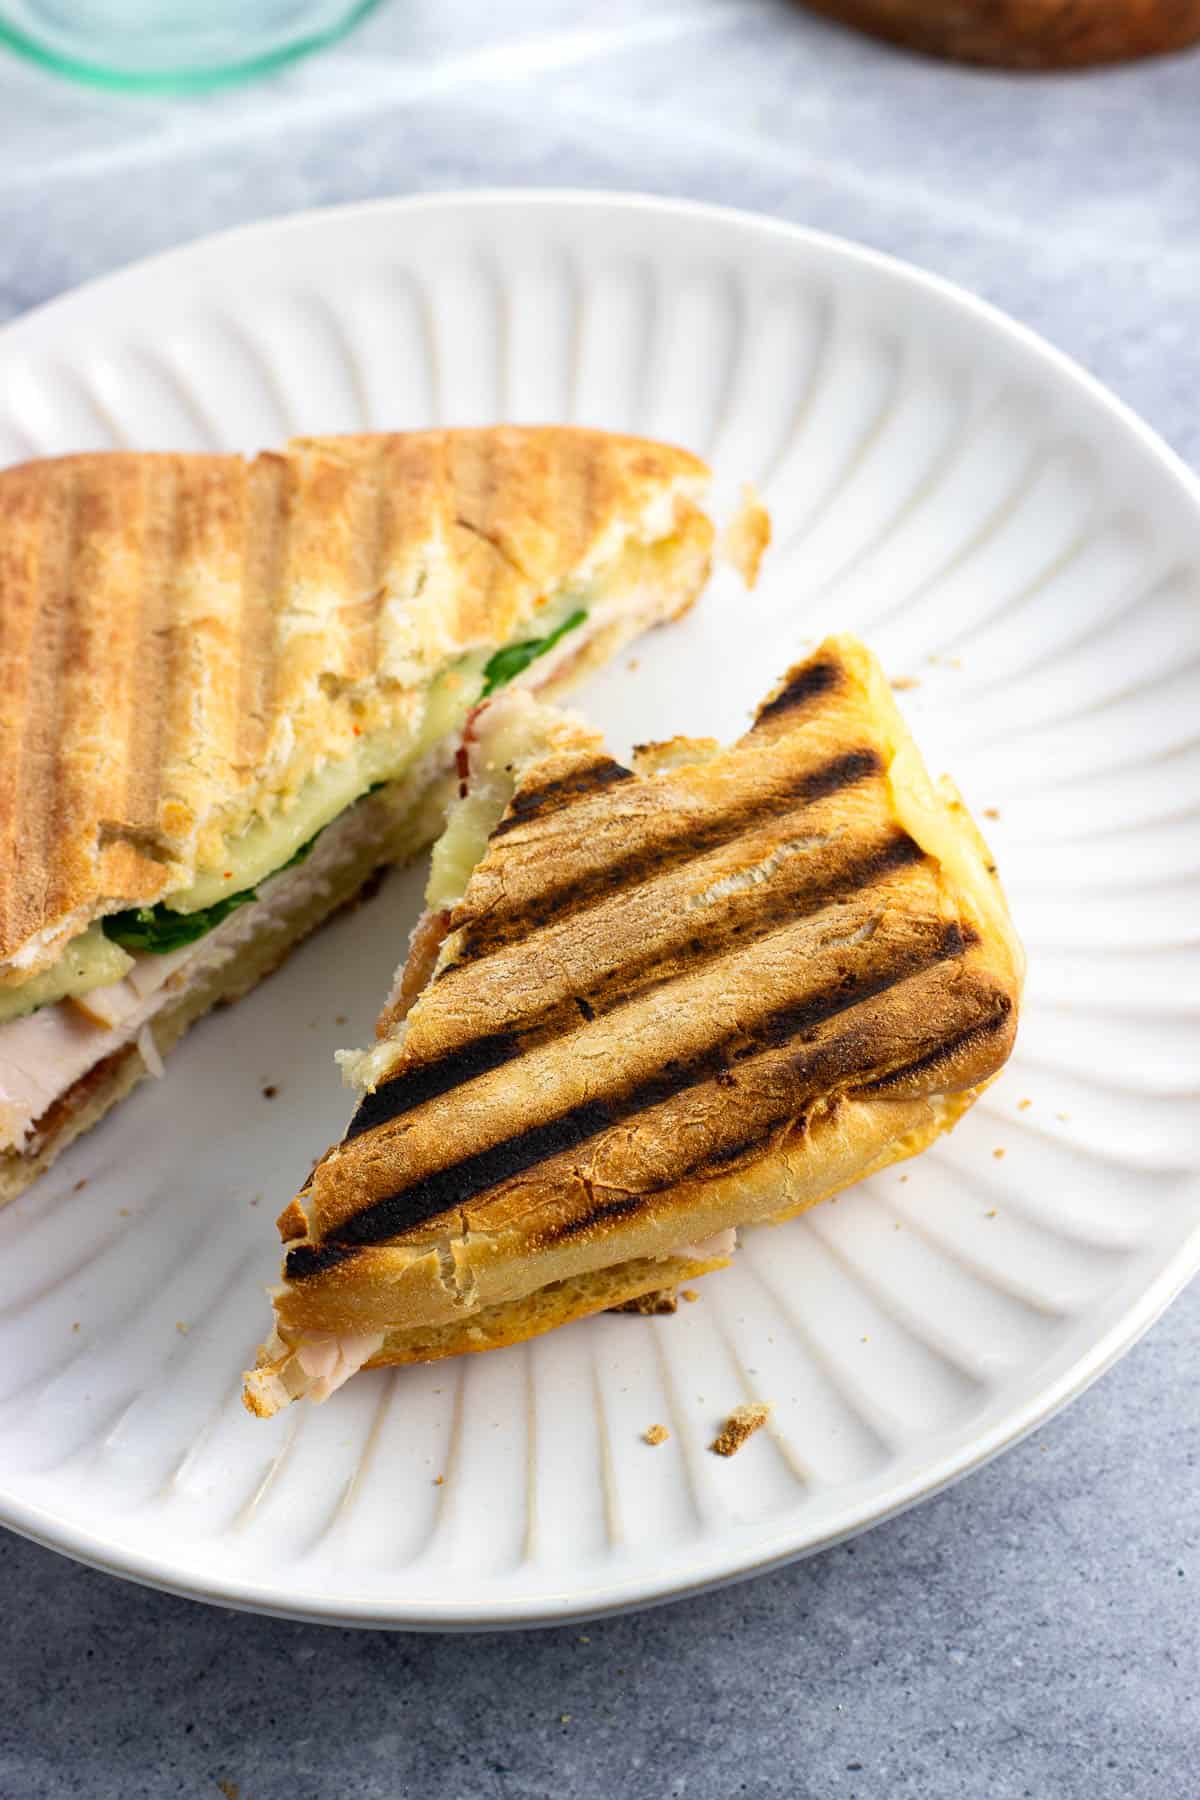
- Multiple panini. Two sandwiches will fit under one press, though be mindful that the press doesn't lay unevenly across them.
Flavor Ideas
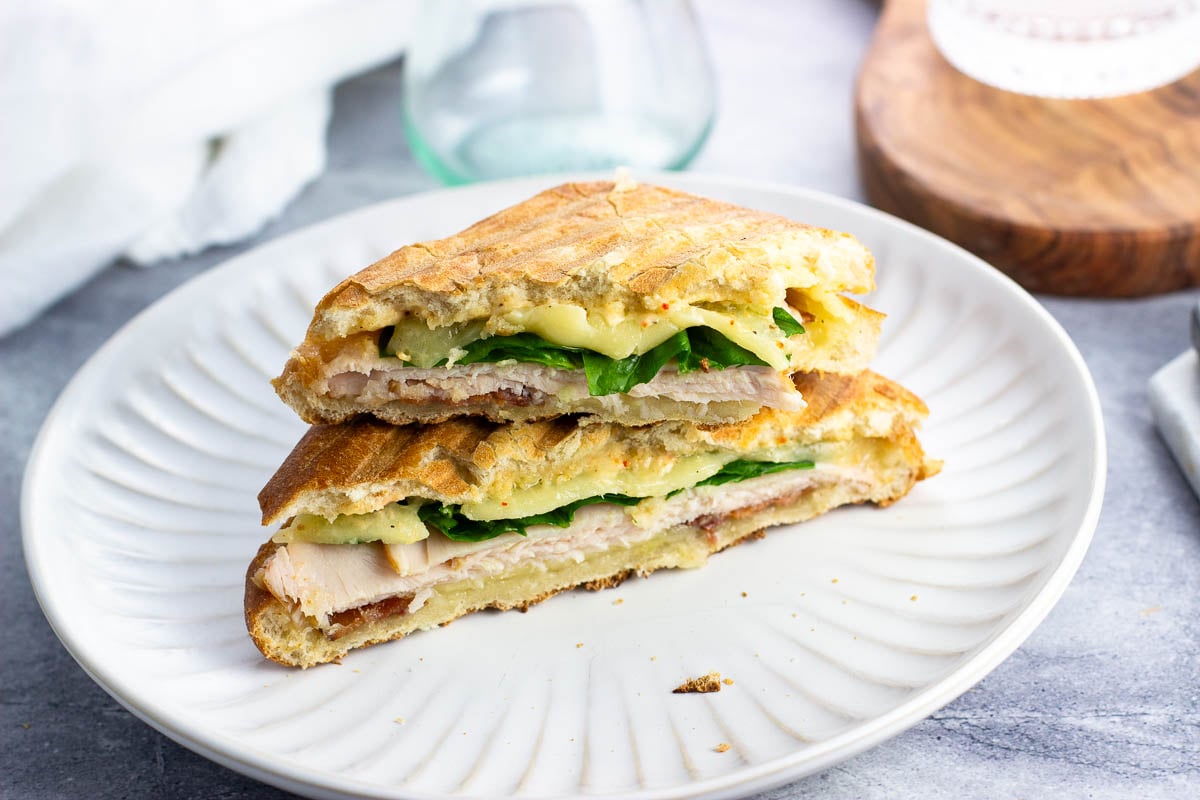
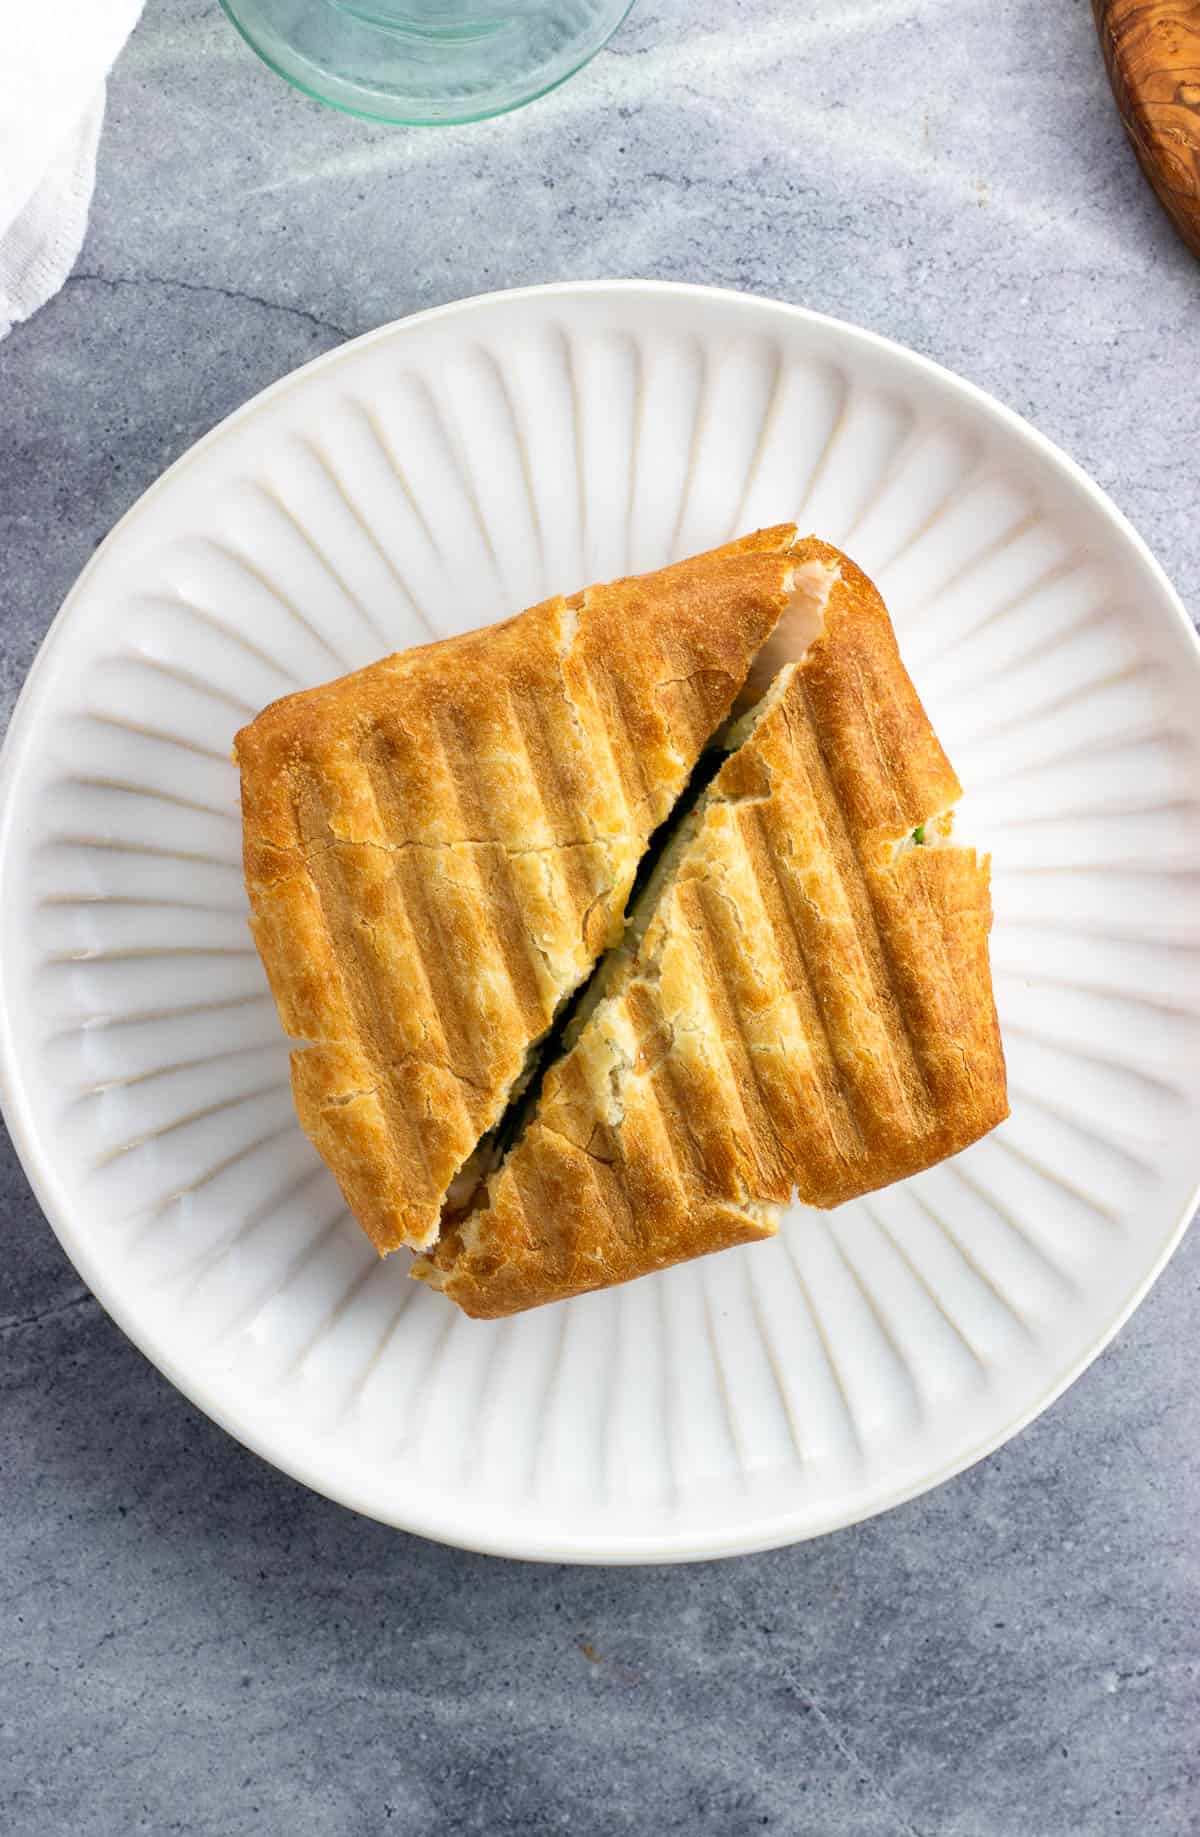
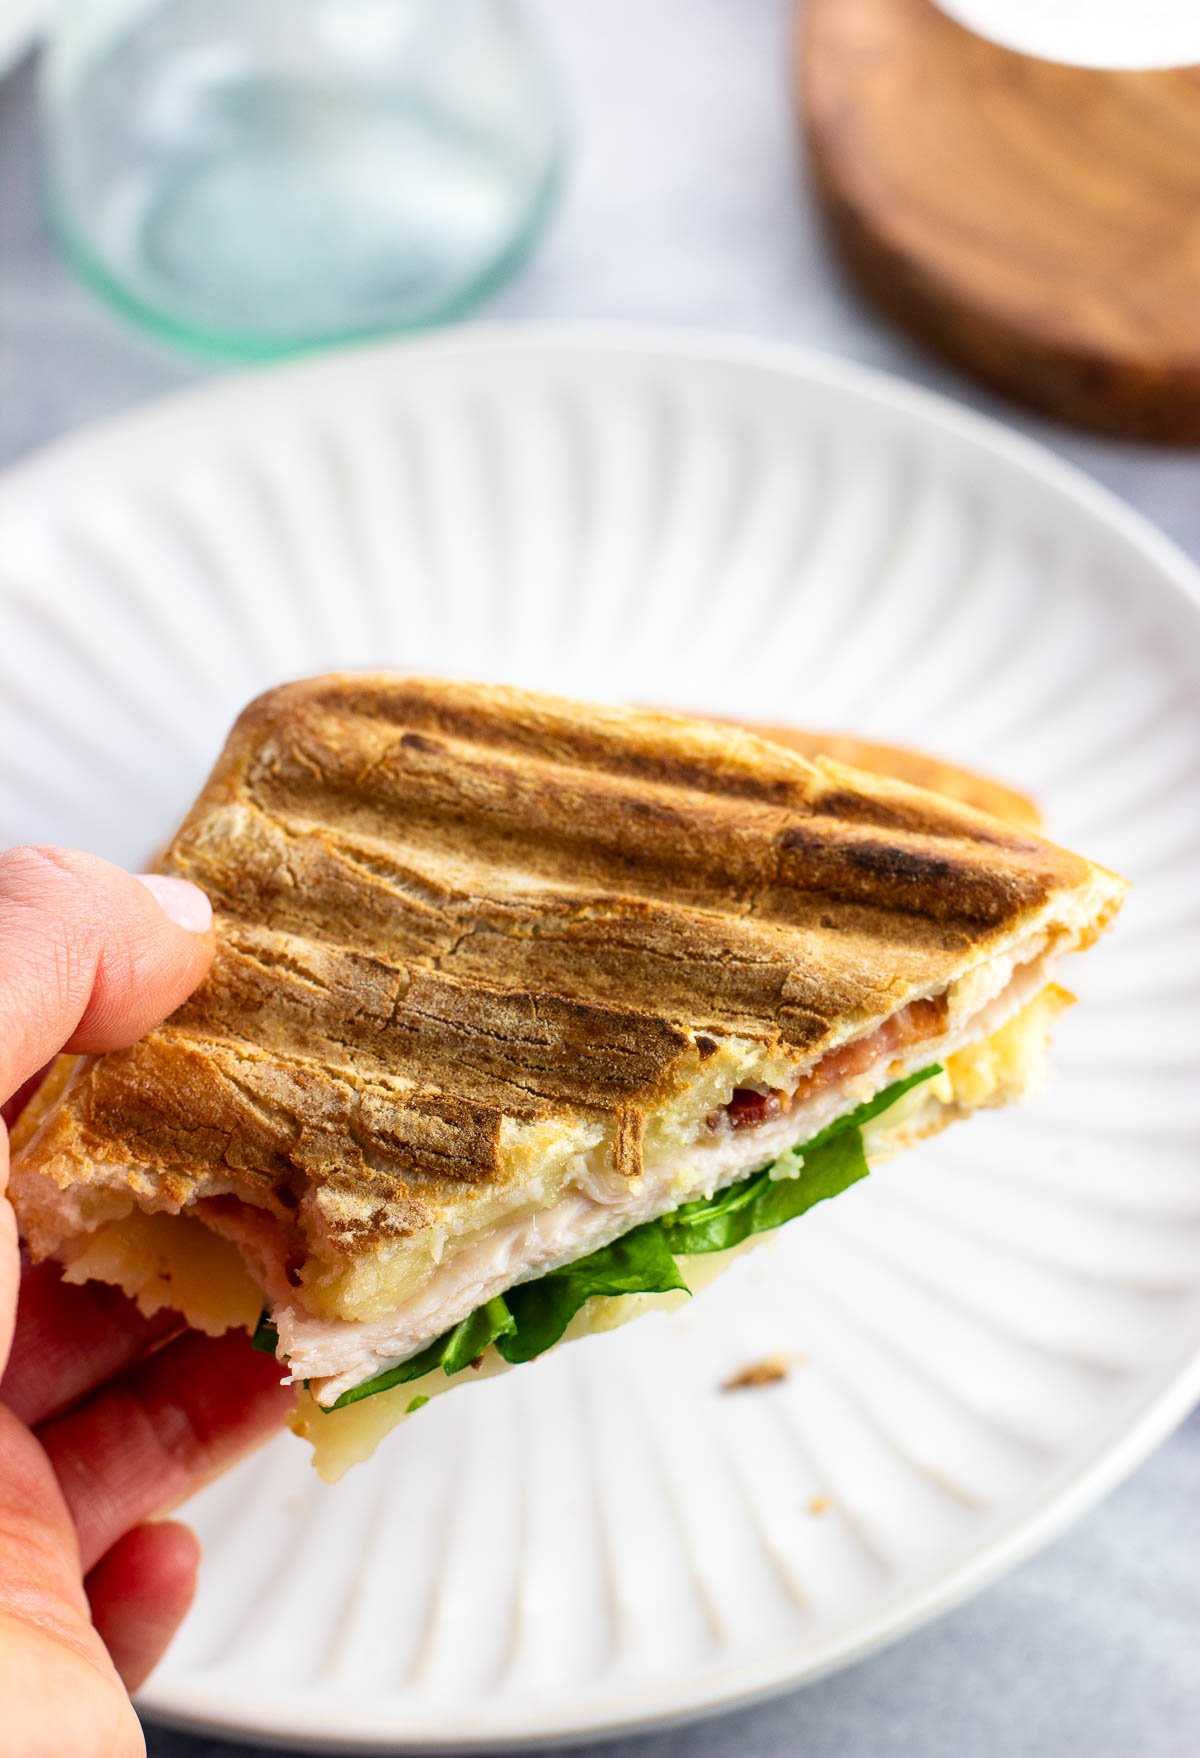
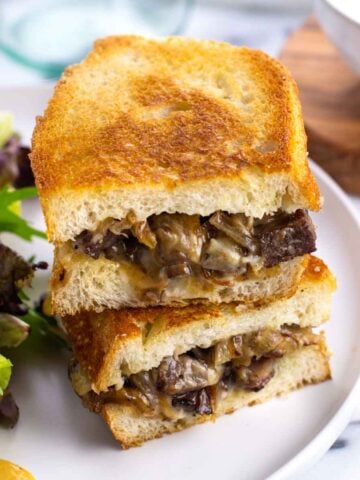
For crisp panini, choose bread that's hearty and will hold its own when pressed. My favorite to use is ciabatta bread, either a larger loaf sliced or smaller rolls (pictured here). While lots of options will work, soft breads like a pre-sliced sandwich loaf, challah, or brioche won't produce that satisfying crispness we know and love.
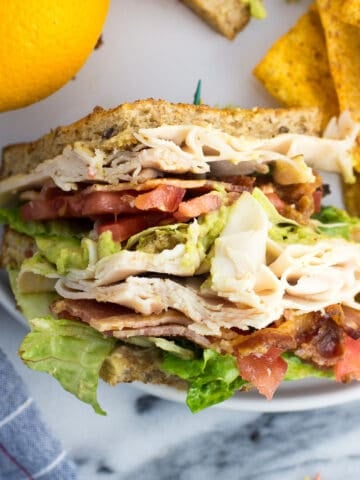
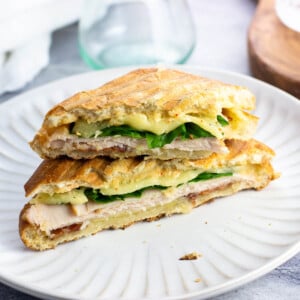
- Turkey + bacon + cheddar + arugula/spinach + roasted garlic butter
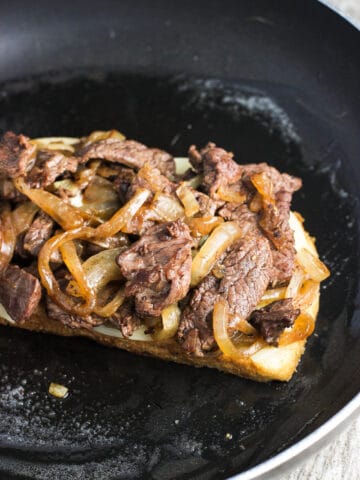
- Thinly-sliced steak + cheddar + caramelized onions + cheater's horseradish aioli
- Ham + Swiss + Dijon/honey mustard
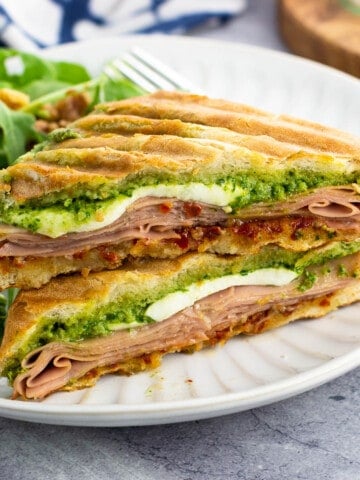
- Turkey + provolone + Calabrian hot honey butter
- Thinly-sliced fresh mozzarella + tomato + basil pesto + balsamic vinegar
- Salami + capicola + pepperoni + Provolone + lettuce + onion + banana peppers (like the flavors in these party-perfect Italian pinwheels)
Sandwich and Panini Recipes

Did you enjoy this recipe? I’d love for you to leave a star rating and a comment review in the recipe card below!
How to Use a Cast Iron Panini Press
Equipment
- Cast iron panini press
- Cast iron pan (ideally a grill pan)
Ingredients
- 1 assembled sandwich
Instructions
- If you are using a corresponding cast iron grill pan, place the cast iron panini press inside the pan with interlocking grates. Otherwise just place it right inside a regular cast iron pan. Place pan with the press inside on the middle rack of a cold oven. Set the oven to 450°F.
- Once the oven comes up to temperature, set the timer for 30 minutes to allow the panini press and pan to preheat.
- Use the preheating time to assemble your sandwich to be ready right as the timer goes off.
- After 30 minutes, carefully (using oven mitts!) remove the pan and panini press from the oven and place the pan with the press inside it on a stovetop burner set to medium heat.
- Using oven mitts, lift up the panini press by the handle and place your sandwich on the ungreased cast iron pan. Place the press on top of the sandwich and press down for several seconds.
- Cook for 5-7 minutes, or until your sandwich is well-heated: cheese is melted, the bread is crisp and grill marks have formed, etc. If your sandwich is particularly tall or requires more heat, you can transfer the whole cast iron pan/sandwich/panini press situation right into the oven for a few minutes after it cooks on the stovetop.
Notes
- Always use oven mitts when touching hot cast iron. Only use handle oven mitts when the pan is on the stovetop, never in the oven.
- Two sandwiches can be cooked at the same time. Make sure the press lays evenly across them both.
- Follow all manufacturer's directions regarding cooking and cleaning your cast iron equipment.
Would you like to save this?
Plus receive periodic recipe newsletter emails.
Nutrition
Nutritional information is provided as an estimate. As it can vary due to many factors (brands used, quantities, etc.), we cannot guarantee its accuracy.
Food Safety and Nutrition Disclaimer
Comments
No Comments