
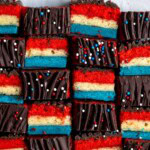
Make a traditional Italian cookie even more festive for your Fourth of July or Memorial Day celebrations with these red white and blue rainbow cookies. These cake-like layers are adorned with raspberry jam and topped with chocolate and fun sprinkles. Makes a large yield!
If you've been reading My Sequined Life for a little while, a) thank you! and b) you might have caught on that I have a thing for rainbow cookies.
They've been my hands-down favorite cookie for as long as I can remember. Something about their dense, spongy layers bursting with almond flavor, held together with raspberry preserves and covered in chocolate speaks to me big time.
When I was younger I'd request a rainbow cookie cake (a.k.a. one batch of rainbow cookies not cut into slices) for my birthdays, and would have an eagle eye for those precious rainbow cookies in an Italian bakery white-with-red-twine box of the BEST variety of cookies.
Rainbow cookies are not the quickest or easiest batch of cookies to make, but I find the end result worth the effort.
It also helps that a lot of the recipe time is inactive, and that each batch makes a ton of cookies. I seem to have fallen into the routine of making them for holidays (or, at least that's my excuse!), so I stick some in the freezer to nibble on in the months in between.
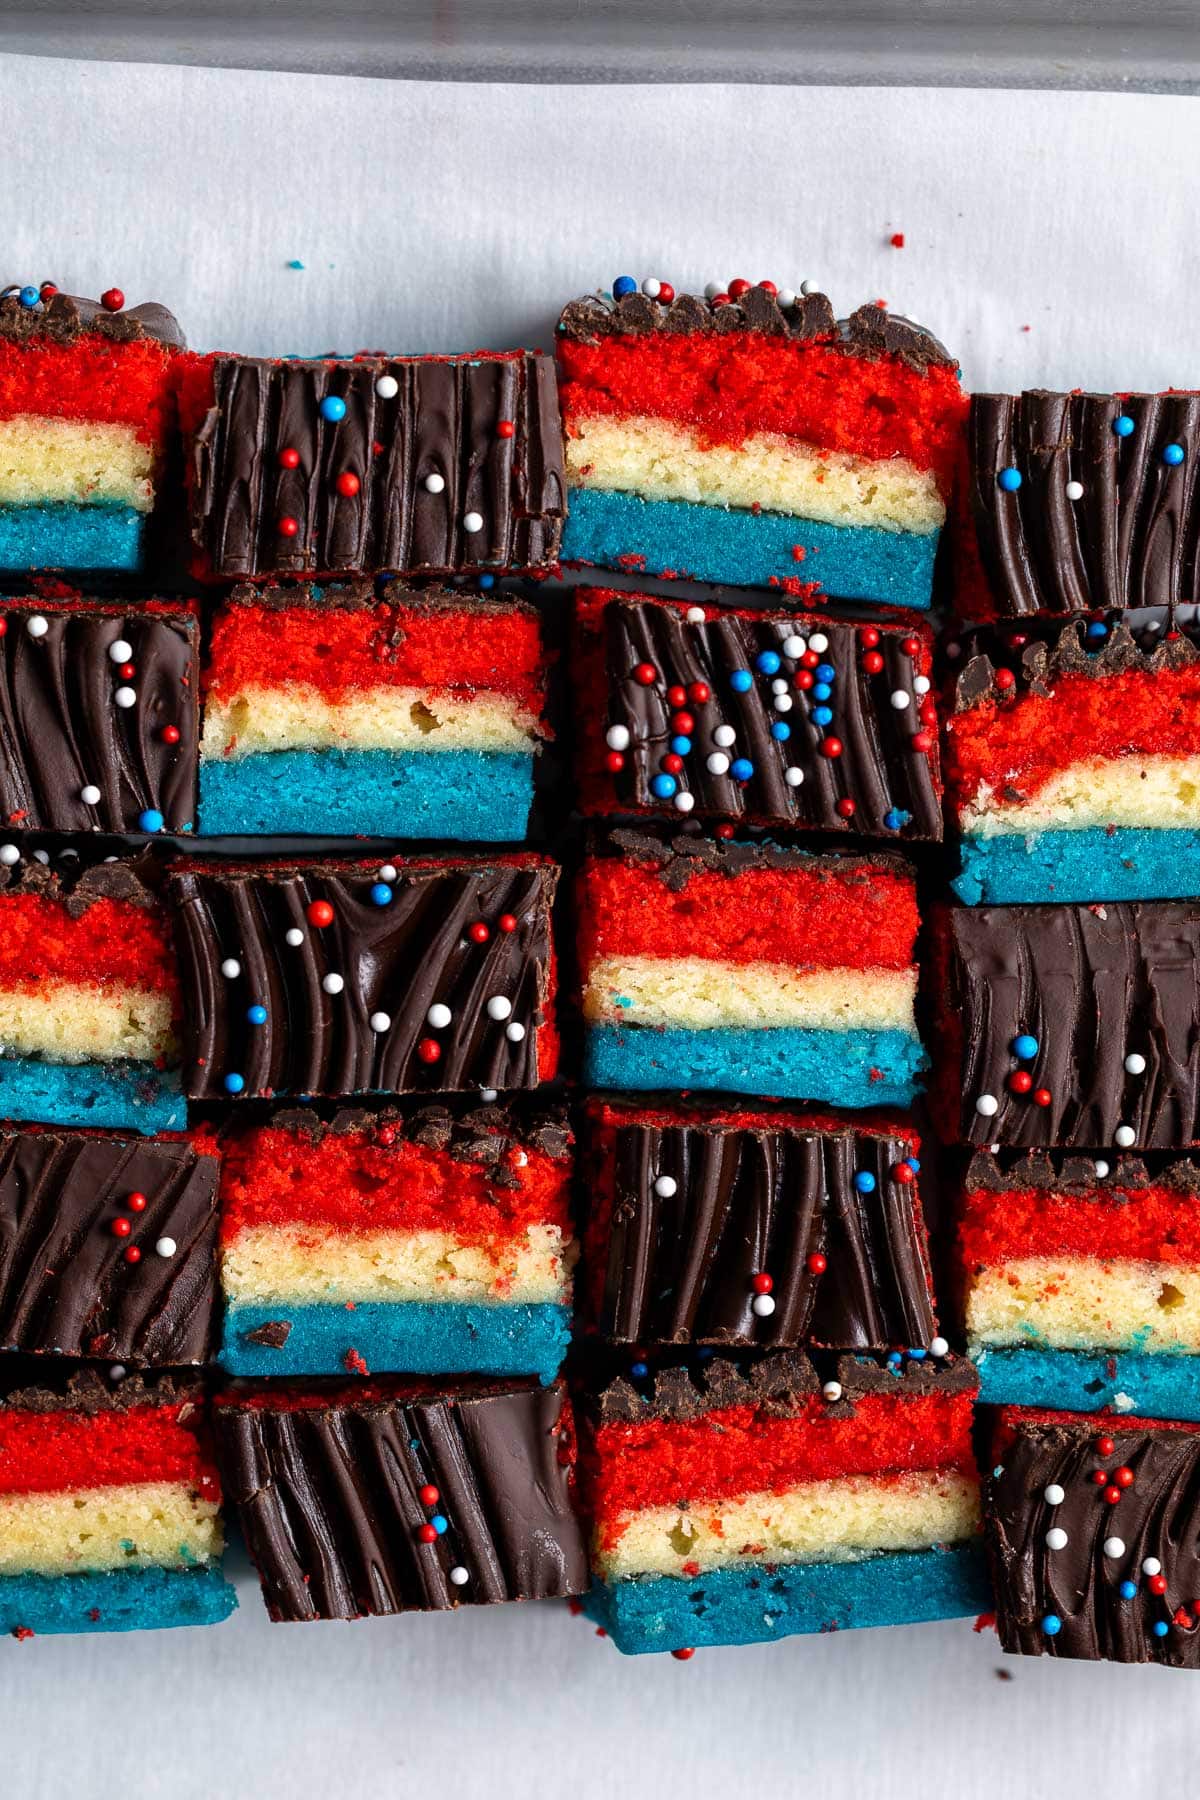
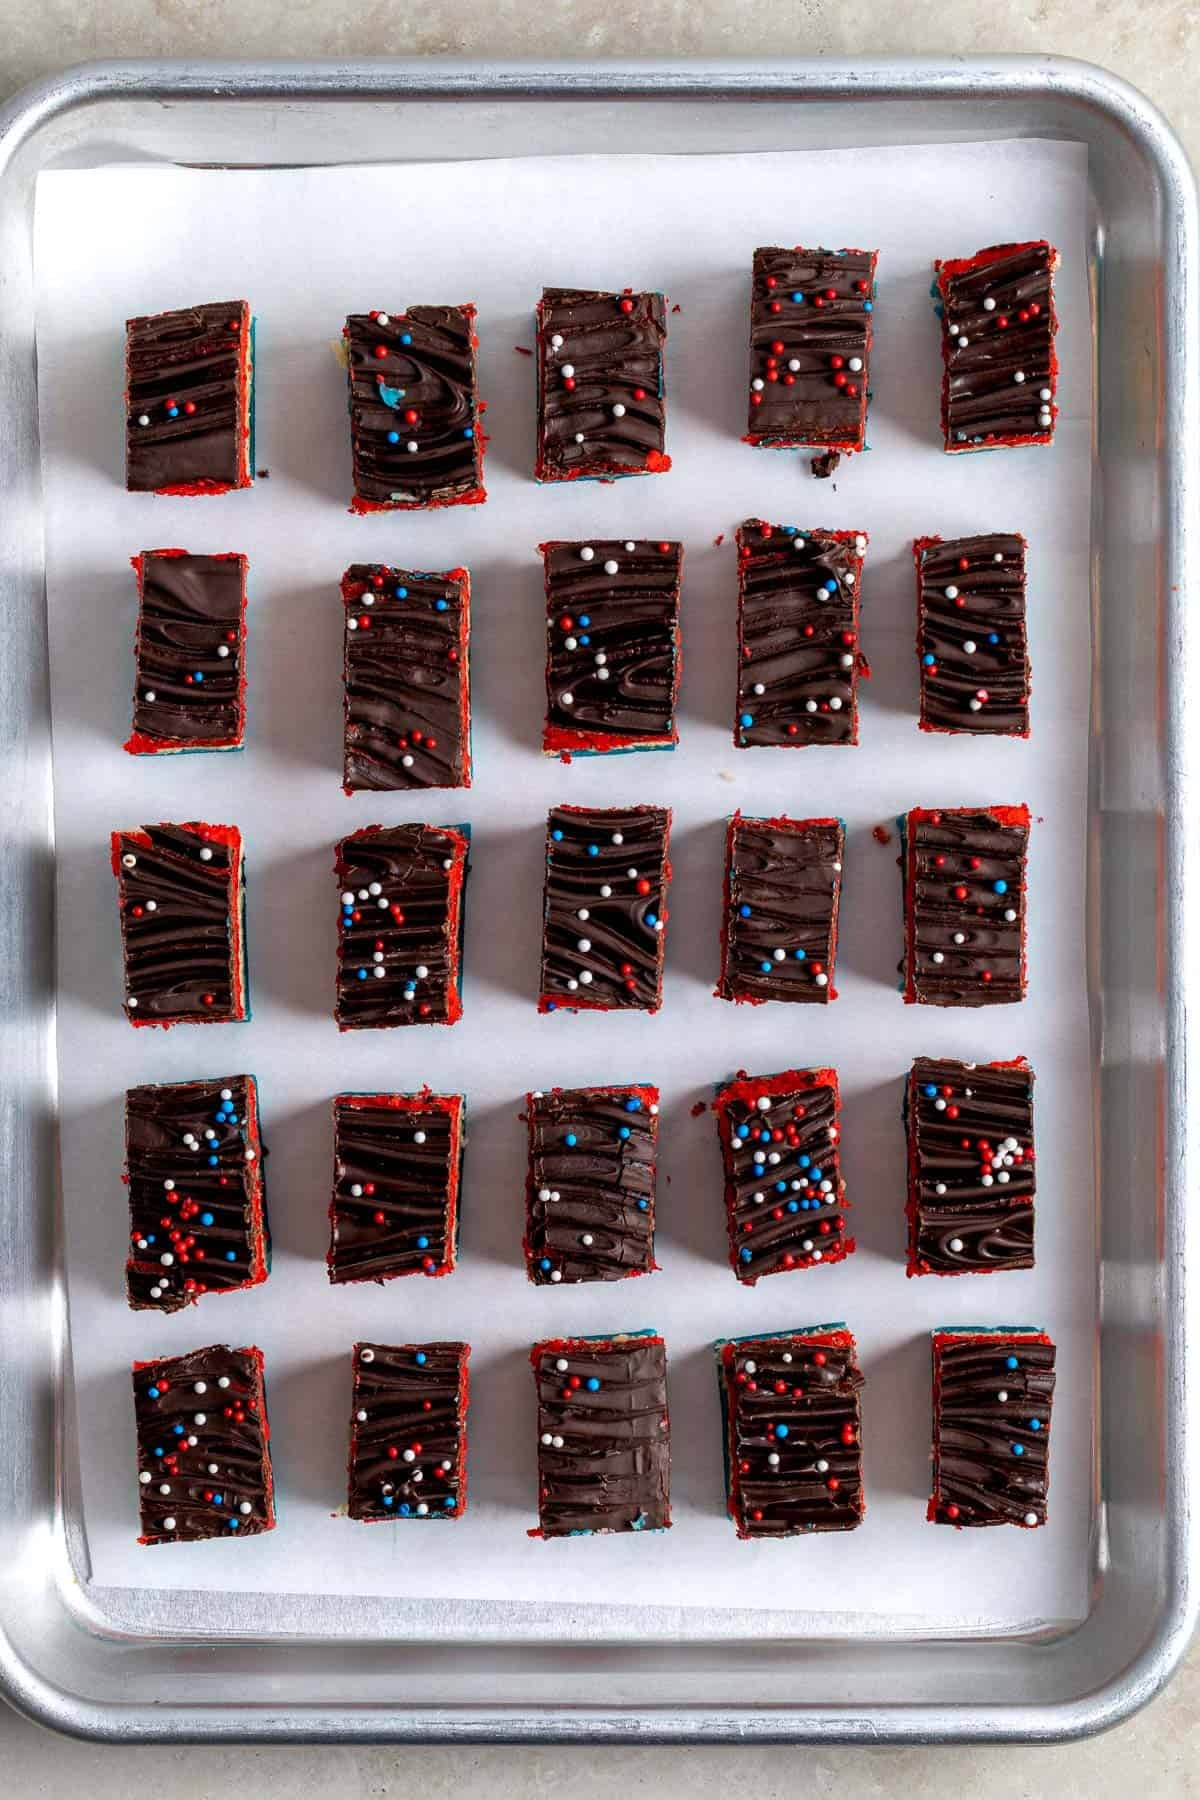
To date for the blog, I've made pastel Easter egg rainbow cookies, a Christmas-tree shaped rainbow cookie cake, and now these. Perfectly red, white, and blue for the July 4th festivities with themed nonpareils to boot, but their horizontal stripe formation also mirrors the Dutch flag. Versatile!
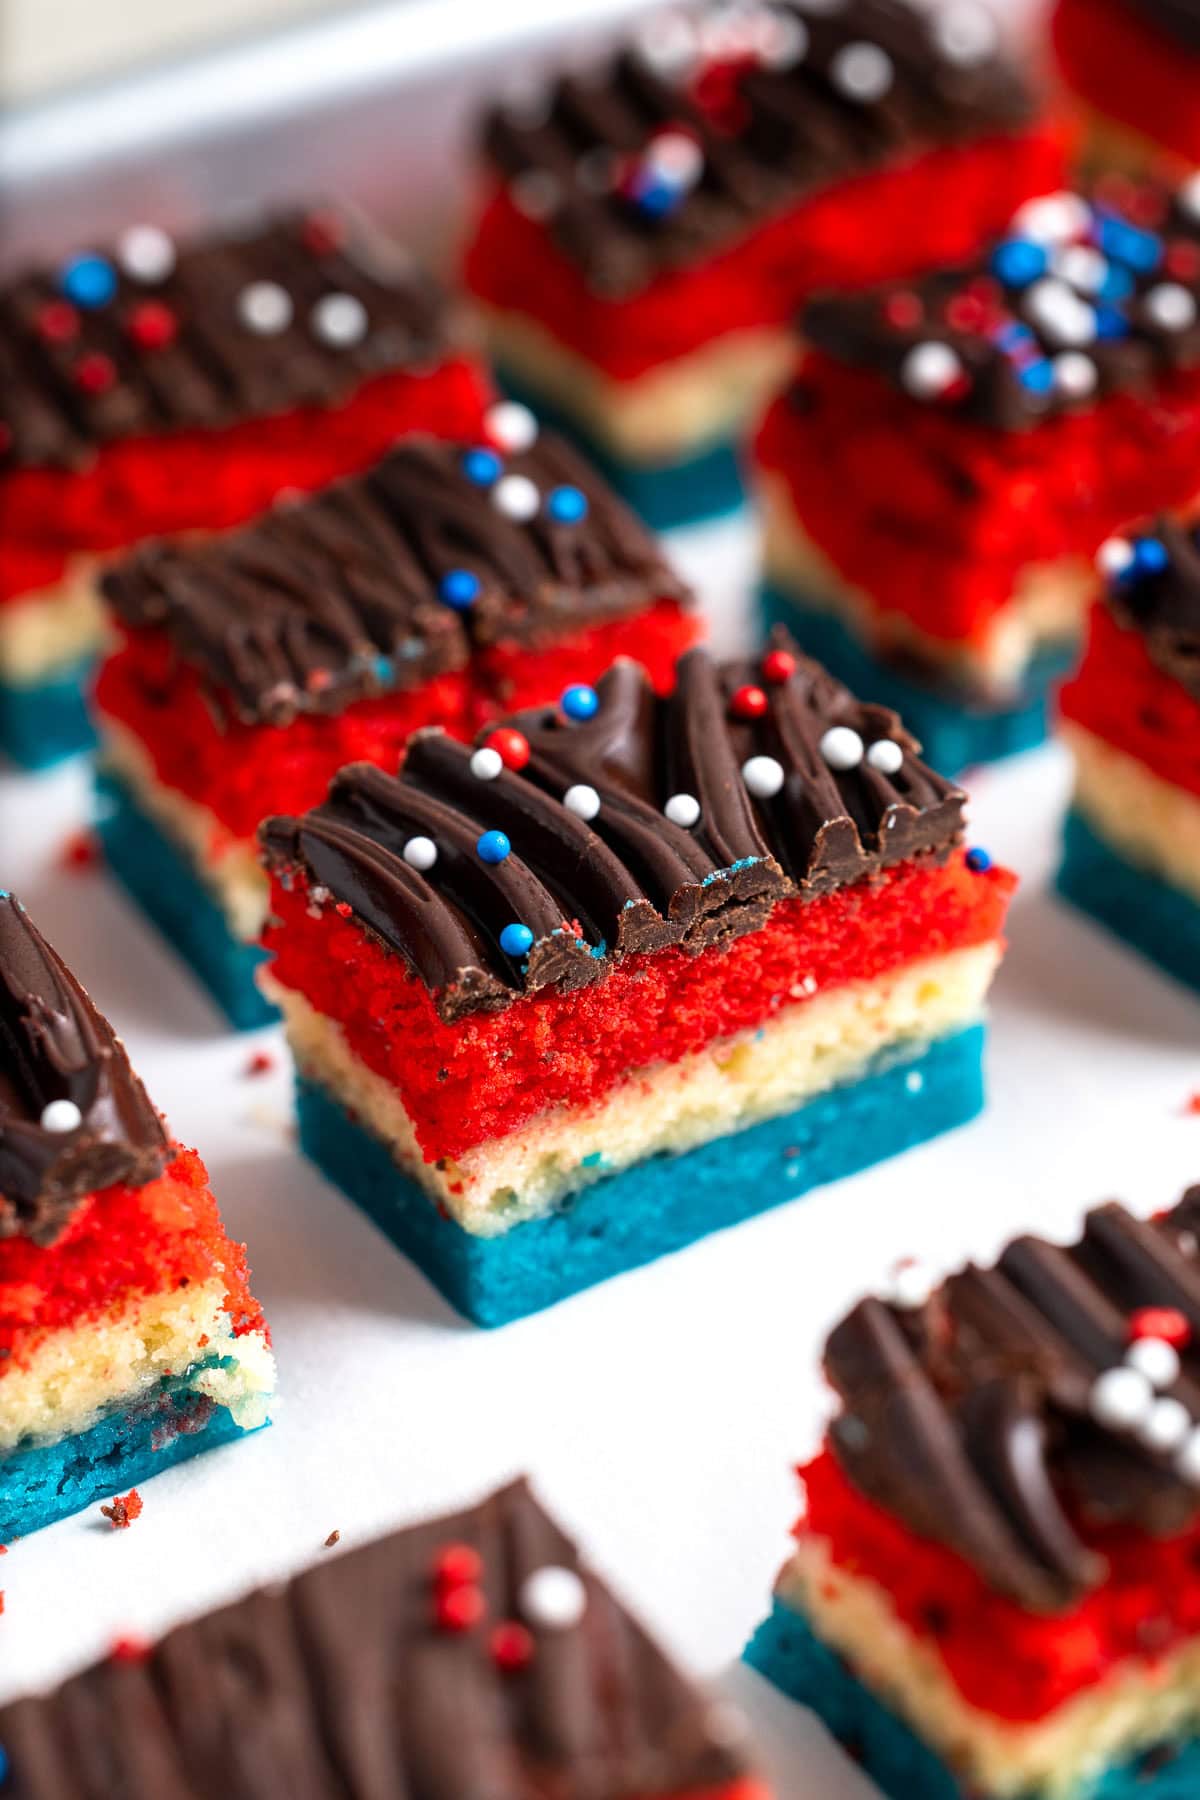
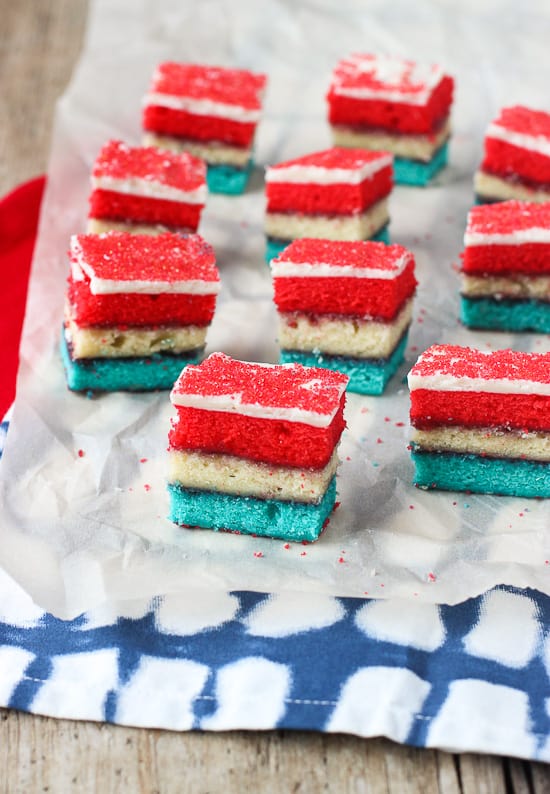
Update note: It's 2026 and I'm back 11 years after publishing to add new photos (I've been wanting a deeper blue color on that layer for nearly all that time!). The recipe is the same, except that I went with a semisweet chocolate topping and not white chocolate - the choice is yours, really. Near the bottom of this post is one of the original photos in case you're returning from a saved link or pin and don't recognize the new ones.
P.S. See also flag ice cream cake for another fun summer holiday dessert.
Recipe Ingredients
These Fourth of July cookies are simply classic rainbow cookies (also known as tricolor cookies), with blue coloring replacing the traditional green layer and fun holiday nonpareils on top.
I'm currently writing a very detailed recipe post where all of the ingredients and steps are discussed at length, which I'll link to here just as soon as it's done.
For the meantime, I want to call out some special ingredients you'll need for these:
- Almond paste: Found in the baking aisle. They often come in 7- and 8-ounce containers. I like to use 8-ounce size here.
- Almond extract: Boosts the almond flavor beautifully.
- Gel food dye: I prefer this to liquid as you'll need less of it in order to impart the vibrant colors needed. Too much of the liquid kind can introduce too much moisture to the batter and impact the texture.
- Chocolate: Your preference! In my 2026 version I melted a semisweet bar chopped into chunks, but my 2015 version used white chocolate chips.
- Raspberry jam: It's easiest if it's seedless!
*NOTE: There is no leavening agent (baking powder/soda) in this recipe.
Recipe Steps
The procedure for these red white and blue rainbow cookies is relatively straight-forward, though tedious.
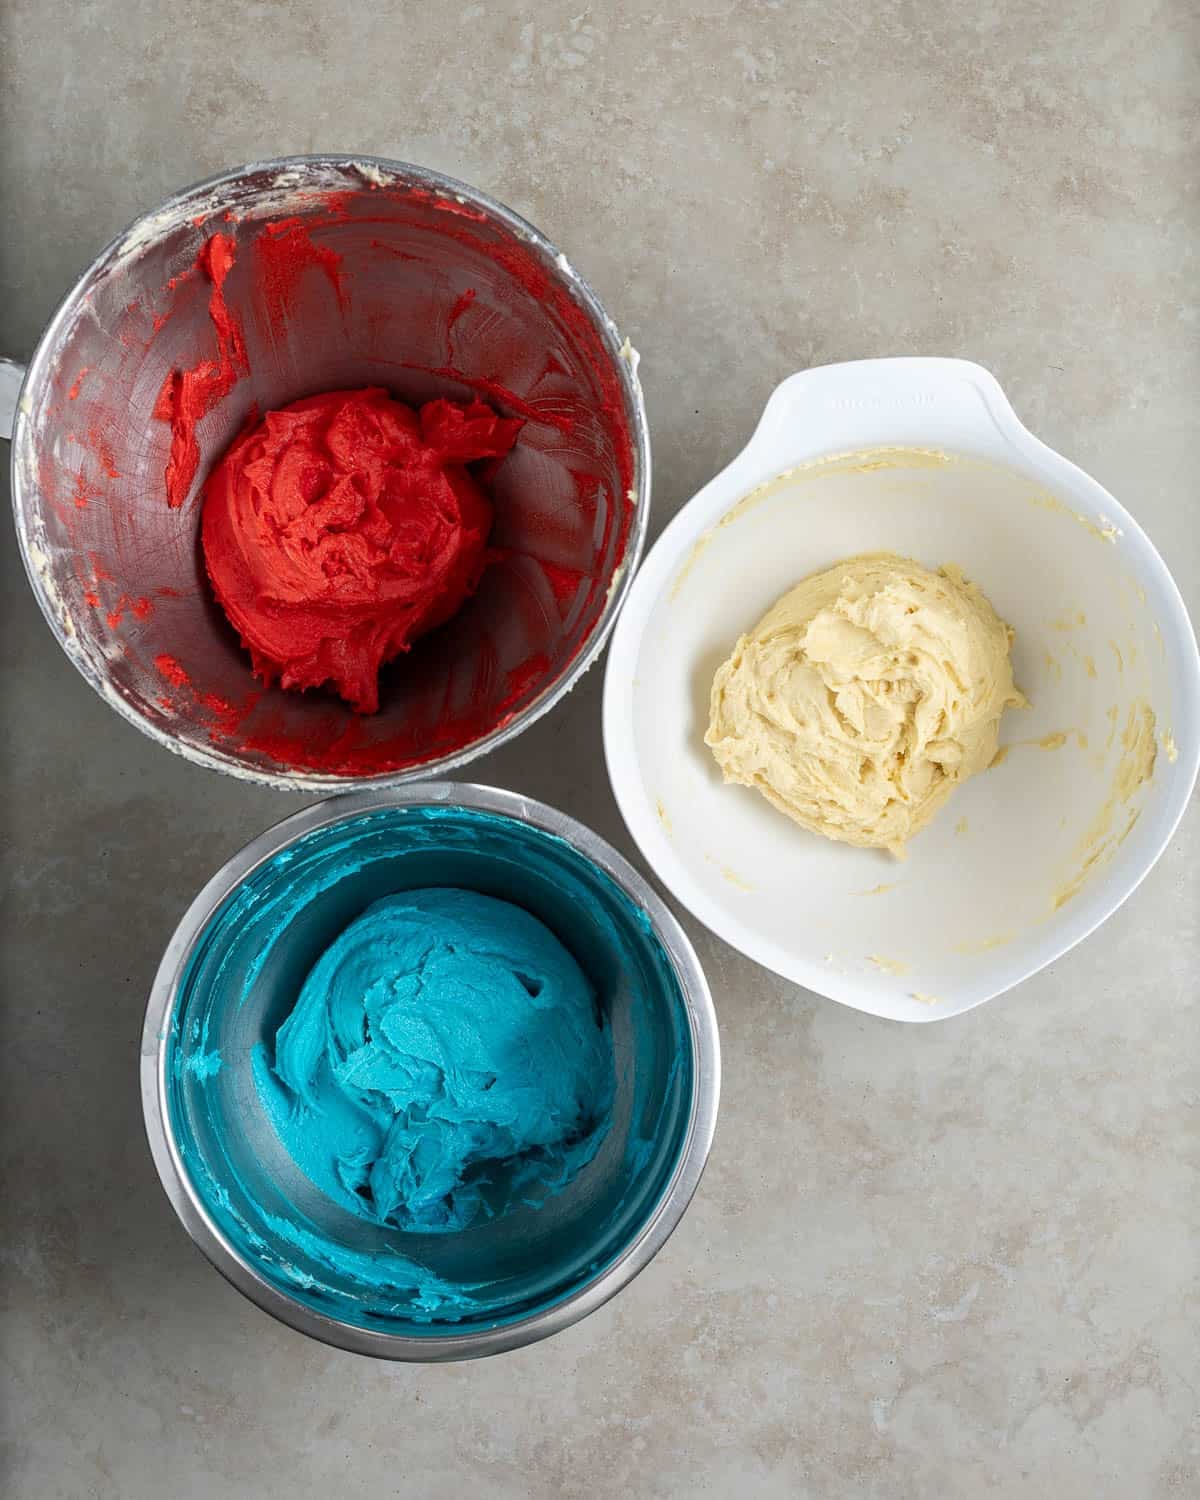
You'll mix up the cookie batter and separate it into three bowls, two of which will be colored (with red and blue, respectively).
Each layer is baked and cooled, and then assembly begins.
You'll invert the bottom layer (blue) onto a parchment-lined baking sheet or cutting board, and then spread half of the preserves over top. Next invert the uncolored layer over top, then add the remaining preserves. Top with the inverted red layer.
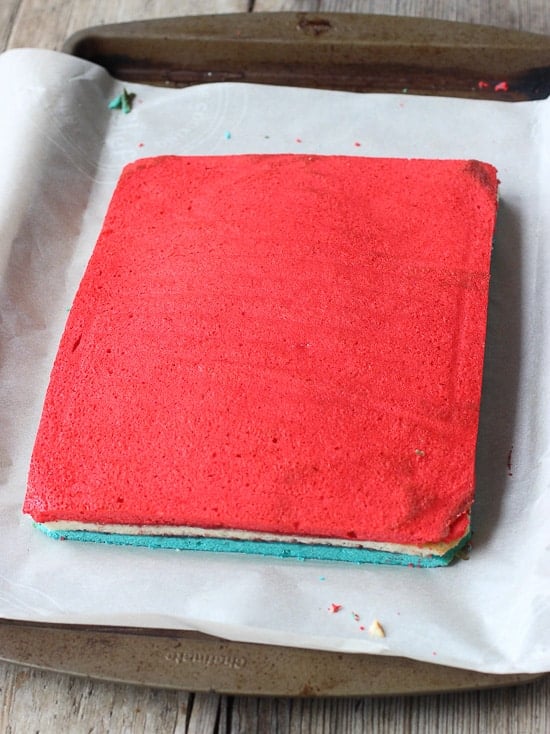
Lay a flat surface (sheet pan, cutting board) over top, place heavy objects on it, such as cans, to weigh it down, then refrigerate the whole thing ideally overnight. This helps the cake layers stick to one another.
What remains the following day is to spread melted chocolate over top of the red layer, slice, and devour.
Tips and Tricks
- Use a kitchen scale to accurately divide the batter into three equal parts.
- For the easiest time slicing individual cookies, wait until the chocolate has mostly hardened but isn't fully solidified. This can help keep a neat appearance.
- If reusing the same pans, let them cool off a bit before baking the next layer. You can also use a lined sheet pan and approximate the same size. The cake batter is fairly thick and stiff so it holds its shape.
- Don't skip weighing down the slab overnight (or for at least eight hours) as you want the layers to compress some so they stick together.
P.S. If you're reading this recipe, you may be a big fan of almond-flavored cookies like I am. If so, do check out my classic pignoli cookies, which also uses almond paste. They're much less complicated to make!

Did you enjoy this recipe? I’d love for you to leave a star rating and a comment review in the recipe card below!
Red White and Blue Rainbow Cookies
Ingredients
- 4 large eggs separated
- 1 cup granulated sugar divided
- 1 8-ounce container almond paste
- 1 ¼ cups (10 ounces) unsalted butter, softened
- 1 teaspoon almond extract
- 2 cups all-purpose flour
- ¼ teaspoon salt
- Red and blue gel food coloring
- ¾ cup seedless raspberry jam
- 1 cup semisweet chocolate chips or chunks
- Festive nonpareils optional
Instructions
- Preheat oven to 350°F. Spray the bottom of a 9-by-13-inch rectangular baking pan with cooking spray, then press parchment paper to bottom of pan, leaving enough excess paper sticking up along the long sides so that you can lift out the cookie layer by them after baking.
- In a mixing bowl, break almond paste into crumbles and add ¾ cup of the sugar. Mix on medium speed until almond paste is broken up into small bits and the ingredients are well combined. Add the softened butter and mix for a few minutes until light and creamy.
- Crack eggs, adding the egg whites to a bowl of a stand mixer (or separate mixing bowl) and add egg yolks as well as the almond extract to the bowl with the almond paste batter. Mix for another few minutes. Lower mixer speed to low and add flour and salt. Beat until dry ingredients are just mixed in. Set this bowl of batter aside for now.
- Beat egg whites on medium-high speed using a stand or electric mixer for several minutes until soft peaks form. While mixing, gradually add the remaining ¼ cup of the sugar to the egg whites until the mixture holds stiff peaks, approximately 2-3 minutes.
- Scoop half of the egg white mixture into the bowl of batter and fold in by hand. Repeat with remaining half of egg white mixture until entirely mixed in.
- Divide the batter equally among three bowls. Add red coloring to one bowl, blue coloring to another, and leave one bowl as-is. Stir in the coloring and add more, as needed, until both the red and blue are vibrant.
- Spread dough from one of the bowls into the parchment-lined baking pan and smooth the top into an even layer. The batter will be very thinly-spread. Bake for 8-12 minutes, or until batter has just set and a toothpick comes out clean. Let cool in the pan for 10 minutes, then carefully lift the layer out of the pan using the excess parchment paper sticking out from the long sides of the cookie layer and transfer to a wire rack to cool.
- Repeat with the next two layers if you have additional pans available. If you do not, you can let the pan cool off some before repeating with new parchment paper and baking the next layer, or you can line a larger sheet pan and freehand spread the next layer into the same sized shape. Repeat until all three layers are baked and cooled completely.
- Once the layers have cooled, lay out a sheet of parchment paper onto a flat cutting board or baking sheet large enough to hold the slab. Carefully invert the blue layer onto the parchment paper, then peel off the parchment paper that used to be on the bottom of the layer.
- Briefly heat the raspberry jam (in a bowl in the microwave is fine). Spread half of the jam evenly over the blue layer to the edges, then invert the uncolored, white layer on top.
- Peel parchment paper from the top side of the white layer and evenly spread the second half of the raspberry jam over it. Invert the red layer on top and peel off its parchment paper.
- Place a new layer of parchment paper over top of red layer, and wrap cookie layers with plastic wrap. Place a baking sheet flat on top of the cookie layers to weigh it down with canned goods or whatever you have in the fridge, then refrigerate the whole thing for at least eight hours, ideally overnight.
- Once the cookie layers have chilled and compressed, remove from the refrigerator. Melt chocolate using a double boiler or in twenty-second intervals on half-power in the microwave, stirring after each interval until smooth.
- Spread the chocolate in a thin, even layer on top of the cookie slab. If you like, wait two minutes for the chocolate to start to set up then use the tines of a fork to imprint a wavy pattern. Sprinkle nonpareils on top of the chocolate at this time, if using. Wait another 7-10 minutes for the chocolate to mostly set before using a sharp chef's knife to slice the slab into strips, and then bars. Carefully wipe the knife between slices for the cleanest cuts. Let chocolate set completely before serving or storing.
Notes
Would you like to save this?
Plus receive periodic recipe newsletter emails.
Nutrition
Nutritional information is provided as an estimate. As it can vary due to many factors (brands used, quantities, etc.), we cannot guarantee its accuracy.
Food Safety and Nutrition DisclaimerRecipe adapted from Smitten Kitchen's Seven-Layer Cookies
Matt and Dawn says
I’ve made these three times for July 4th and they come out great. Two little tricks that help us that we almost always keep forgetting.
1. Do the egg white/sugar after you do the almond paste/sugar. The almond/paste sugar combo needs more time to mix than the egg/white sugar, and if you do that first it loses some of its fluffiness while waiting for the almond paste/sugar to mix.
2. Bake blue layer first since that’s the first layer you want cooled down.
Great recipe and thank you!
Alyssa says
You're very welcome! Thank you for sharing those tips. I'm so happy to hear these cookies have made their way into your holiday plans. 🙂
Nellie says
Perfect for any patriotic holiday! Love it!
Alyssa says
Thanks Nellie! I love switching up the colors of these rainbow cookies to be festive for holidays. 🙂
Monica says
Love this!! If my family sees this, I will surely get not so subtle requests! : )
Izzy says
I've never eaten rainbow cookies before! How fun though! I love how colorful they are! I'm not great at making 4th of July desserts, so you will just have to send me a big pan of these 🙂
Kelly - Life Made Sweeter says
You make the prettiest rainbow cookies! I am still too scared to try making them because I have a feeling they won't turn out. Yours always look perfect 🙂 Love these beautiful red, white and blue ones! So fun and patriotic!
Christin@SpicySouthernKitchen says
Of wow! All those layers look so pretty! What a festive treat. 🙂
Alyssa says
Thanks Christin!
Catherine says
Dear Alyssa, these cookies look so pretty and festive. I love your twist on the classic rainbow cookie. xo, Catherine
Alyssa says
Catherine, that's sweet - thank you! Dressing rainbow cookies up for holidays is just a delicious excuse to get to eat them more often. 🙂
Jess @ Flying on Jess Fuel says
Oooh I've never had this type of cookie before, but I LOVE the raspberry and almond combo! And these are so cute all dressed up for the holiday. 🙂
Alyssa says
They're amazing Jess! I definitely took for granted how popular and all over the place they are in the NYC-area where I grew up. A batch of these isn't safe around me. 🙂
Natalie @ Tastes Lovely says
These are just too fun! Perfect for 4th of July : )
Alyssa says
Thanks girl!
Sues says
Whoa these are seriously gorgeous!! I feel like I HAVE to make these for the 4th of July...
Alyssa says
Thanks Sues! I have to admit just about all of this batch is long gone...guess I have to make them again for the actual 4th!
Danielle says
Alyssa, these cookies are soooooo awesome! They look so perfect and who doesn't love colorful themed desserts? Love these!
Alyssa says
Thanks Danielle! Really I'm just looking for ANY and all excuses to make rainbow cookies - they're my favorite! They make a ton of cookies though so they're a great one to make for a crowd.
Shelby @ Go Eat and Repeat says
These cookies are gorgeous! I love how fun and festive they are for the summer holidays!
Alyssa says
Thanks so much Shelby! I'm all about a festive theme. 🙂
Kristine @ Kristine's Kitchen says
These cookies are so fun and patriotic! I've never tried a rainbow cookie, but you make them sound delicious! I love that they are flavored with almond!
Alyssa says
They're amazing Kristine! We had them all the time when I was growing up. Moving away from the NYC area now I realize they're not super popular everywhere! Thank goodness for recipes. 🙂
Gayle @ Pumpkin 'N Spice says
Wow these cookies are gorgeous, Alyssa! I've never made a rainbow cookie before, but you are totally inspiring me to do so. I love the red white and blue cookies! And they look so delish, too!
Alyssa says
Thanks Gayle! Ugh they are my faaaaavorite. I definitely took for granted how prevalent they were up in NJ where I'm from! Soooo good.
Rachelle Belloit says
I just finished the final stage of these cookies (put the white chocolate and red sprinkle sugar on top) and the cookies are back in the frig. My last step is to cut them. I am very nervous to invert the entire cake (white chocolate face down??) and then cut them that way? Won't it mess up the white chocolate topping???
Alyssa says
Hi Rachelle, I'm sorry if this is too late! I've cut the cake in two pieces (with the white chocolate side up), and then inverted a smaller section at a time if all at once seems a little daunting. Once the chocolate has hardened completely, inverting the sections wasn't an issue (the chocolate didn't get smushed). You can also cut everything with the white chocolate side up, though the chocolate edges most likely won't be exactly even - the chocolate edges won't be perfectly straight. Still delicious though! 🙂